One question - Should I use the effective focal length on a DSLR or the reading from the lens? I use a Canon EFS 18-55 currently (new camera). It has a 1.6 multiplier for its sensor size.
Ron
| Camera Reviews | More Reviews | Mobile Reviews Photography Reviews |
My own interest in panoramic photography actually started several years ago, before digital was a real option for photographers. Once I discovered medium and large format photography, my interest in panoramic photography grew. At that point I was using the special-purpose Fuji GX617 and the Noblex 175 for panoramas, and I was happy with the results. But even so, I had grown weary of packing and carrying both 35mm equipment and a panoramic camera on photography trips--especially because the panoramic cameras are large-body and heavy. In an effort to reduce the weight, I bought yet another panoramic camera--the excellent, lightweight 35mm Hasselblad Xpan. Nonetheless, the pairing of the Hasselblad Xpan with the 35mm Canon equipment I always carried wasn't the best solution, because I lost the efficiency of being able to swap lenses between cameras.
 |
|
|
Today photographers are quickly discovering a new way to create panoramas by stitching together digital photographs. Even though I had read articles about this process, I wasn't ready to take the plunge. I was skeptical that a stitching technique could produce panoramas of the quality of any of my panoramic cameras, and--as long as I had my panoramic cameras with me--there was no motivation to try.
My First Digital Panorama
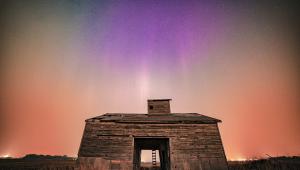
It was only when I was faced with a shot that cried out to be a panorama with
only my digital Canon to capture it that necessity proved to be the mother of
experimentation. I had no choice; I could lose the shot or I could set up a
tripod and give it a try. I reasoned that even if the photos were not usable
in a stitching program, at least I would have a good mosaic of the scene.
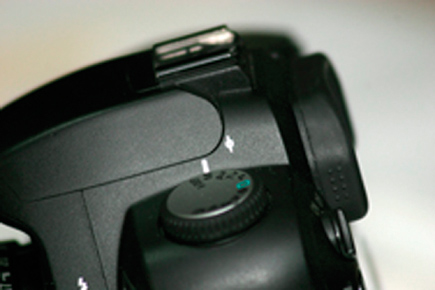
Using a tripod with the leveling bubble, I also placed a double-bubble level
on the camera hot shoe and watched as I rotated it. It seemed to be level at
every position. So I began to shoot by overlapping each photo roughly 25 percent
with the previous one, and it took eight photos to capture the scene. I then
realized that I had the autoexposure on, which was not likely to work on the
partly cloudy but largely sunny scene that contained a broad range of highlights
and shadows. After taking a reading at a location that I thought was probably
the median of the extremes of the exposure range, I re-shot the scene. I set
the camera on Manual mode and placed that exposure setting in the aperture and
shutter speed. Now I was confident that I had captured the scene.
I had shot the images in a raw format, and eight photos required a lot of memory
when I combined them. You have to be prepared for using larger files. Not having
any software designed specifically to merge the photos, my choice was to use
Photoshop and a Photoshop tutorial I had seen about layer merging or "stitching."
It was a lot of work, but fun, and the results were reasonably good for a first-time
effort.
 |
|
|
Tips For Taking Digital Panoramas
Since my first experience, however, I've learned several lessons that
might help you get started with digital panoramas. With a little planning, a
little research, a little practice, and a little attention to detail, you can
create exciting scenes that perhaps exceed what you might have done before.
Some modest equipment should be added to your digital camera--but certainly
no more equipment than is needed by the macro photographer and a lot less than
your big game wildlife colleagues.
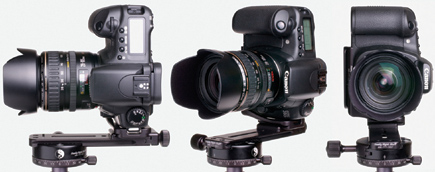
The absolute necessary piece of equipment for this process is a tripod with
a sliding plate camera mount. Depending on the manufacturer, this can be called
many things: an adjustable plate, a slide mounting plate, or a sliding rail.
Although you can do a workaround on some tripods, I also strongly recommend
adding to your gear a rotating head mount (a panning head mount)
for seating and rotating the camera on the tripod.
The process for doing panoramas described later assumes you have this piece
of equipment. An "L" mount is nice because it gives you the ability
to handle vertical shots. Some subjects are absolutely perfect for stitching
together vertical shots to create a horizontal panorama: buildings, waterfalls,
and bridges are among the most frequently shot, and the vertical exposures can
be stitched just as well as horizontal exposures.
What brand of equipment should you purchase? I've used equipment from
several different manufacturers and I find most of it intuitive and easy to
use. Several companies are catering to what they see as a growing market for
panoramic photography, and the equipment is now much better and much more readily
available. I happen to like the Really Right Stuff line of panoramic products,
and their website (www.reallyrightstuff.com)
is very helpful. Manfrotto (www.manfrotto.com),
distributed by Bogen Imaging Inc. (www.bogenimaging.us),
has a good selection and Kaidan (www.kaidan.com)
has also distinguished itself in panoramic equipment. There are many good product
choices, and many of the product manufacturers offer online tutorials. (While
many manufacturers have fine websites, don't hesitate to search the web
beyond that offered by the manufacturers.) Although some of the new equipment
can sometimes be expensive, I have a word of encouragement for the photographer
on a budget: I have not yet found a shot that required me to buy high-end equipment.
 |
|
|
|
| |||||||||

One question - Should I use the effective focal length on a DSLR or the reading from the lens? I use a Canon EFS 18-55 currently (new camera). It has a 1.6 multiplier for its sensor size.
Ron

![]()
| Camera Reviews Other Reviews | Mobile Reviews Photography Reviews Columns | News | Features | How-To | Resources |
 © 2025 Shutterbug