- REVIEWS
Camera Reviews 
More Reviews Mobile Reviews Photography Reviews - GALLERIES
- VIDEOS
- BUYER'S GUIDES
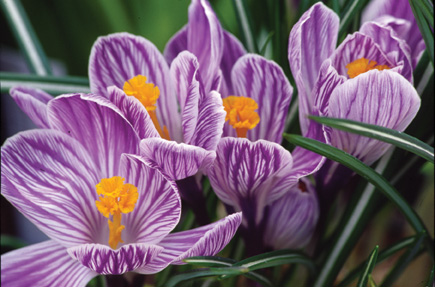
Konica Minolta’s DiMAGE Scan Dual IV; Make Superb High-Resolution Scans From 35mm Slides And Negatives
Flat-bed scanners are remarkably popular and they outsell dedicated film scanners by a wide margin. That's understandable because flat-beds are affordable, simple to operate, and can produce excellent scans of photographic prints, art work, and even small objects. Many of the latest models are even more versatile, capable of scanning frames of film as well, using a transparency adapter unit (TPU). While film scanners can produce even higher image quality from "tiny" 35mm slides and negatives, such models have been substantially more expensive and more complicated. That's changing rapidly. Today you can buy a high-resolution film scanner for under $250 and it will produce excellent scans with great ease of use.

A perfect example of this trend, the Konica Minolta DiMAGE Scan Dual IV ($239,
street price) boasts a full 3200dpi resolution and other impressive specifications.
Take advantage of its advanced capabilities and you'll get several benefits
over flat-bed scans of 35mm film: more detail in bright highlight and dark shadow
areas, fewer optical aberrations such as Newton's rings (a rainbow-hued
circular pattern), less digital noise (colored specks) in shadow areas, and
superior definition of fine detail.
Convenience And Ease Of Use
Although this is a pro-caliber scanner in some respects, the 15-minute setup
and installation process is quite easy, guided by the instruction manual and
on-screen recommendations. The kit includes holders for four slides and for
a six-frame strip of negatives; these are sturdy and well-designed. After reading
the step by step instructions, I loaded some negatives and launched the Easy
Scan Utility software that allows for virtually decision-free scanning. In a
couple of minutes, I made my first high-resolution scan, with 12.5-megapixel
resolution in a 35MB TIFF file.
 |
|
|
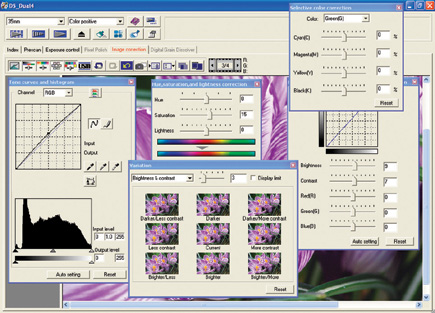
Although Konica Minolta also provides the DS Dual 4 Utility software, with
numerous user-selectable features, the Easy Scan Utility is a fine starting
point. It's simple and intuitive to use, perfect for anyone without much
experience with complicated image-enhancing tools. Easy Scan Utility is also
great when you need to work quickly and do not have time for making many pre-scan
adjustments. Start with a slide or negative that does not exhibit any serious
technical problems, and you can make good scans quickly, using the automated
features.
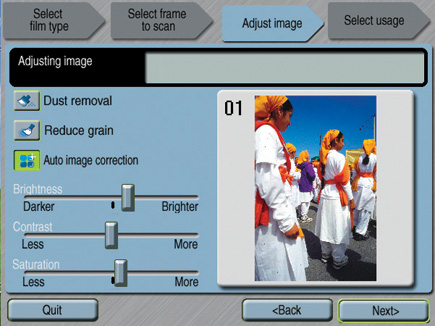
After a brief warm-up period, insert the film holder and identify the film type,
as prompted. Click on the [Next] button and the software will generate a thumbnail
preview. Select the "Auto Image Correction" feature and decide whether
you want to apply the fully automated "Dust Removal" tool (recommended)
and the "Reduce Grain" tool (necessary only for ISO 800 or 1600
film). Autofocus and cropping will be completed automatically.
 A |
|
 B |
|
 C |
|
|
Click on the [Next] button, and select one of the options for the scan: for
a specific print size that you plan to make, for a 3- or 5-megapixel image file,
or the "highest resolution" scan that's ideal if you want
to make large prints. Click the [Scan] button, provide a file name and a "Save
To" location in your computer, and specify TIFF as the file format. If
you selected the "Save at Highest Resolution" (3200dpi) option,
the DiMAGE Scan Dual IV will generate a 4300x2900 pixel image in about one minute
with a fast PC with USB 2.0 connection for high-speed data transfer. In the
lower resolution settings, the scanning speed is much faster.
Open the TIFF image in Photoshop Elements 2.0 software (included) and you should
find that it's quite pleasing. Be sure to sharpen it with Unsharp Mask
or another filter, because the Easy Scan Utility offers no option for adjusting
sharpness. If you want greater control over your subsequent scans, try this:
Check the "Adjust Image" box in the Easy Scan Utility and the software
will provide convenient slider controls for correcting brightness, contrast,
and color saturation (richness). Make adjustments until the small preview image
appears to be just right and you should be even happier with the resulting scans.
|
| |||||||||


![]()
Get the Latest Photo Tips, News & Reviews from Shutterbug!
| Camera Reviews Other Reviews | Mobile Reviews Photography Reviews Columns | News | Features | How-To | Resources |
 © 2026 Shutterbug
AVTech Media Americas Inc., USA
All rights reserved