- REVIEWS
Camera Reviews 
More Reviews Mobile Reviews Photography Reviews - GALLERIES
- VIDEOS
- BUYER'S GUIDES
How to Recover "Impossible" Blown-Out Highlights in Photoshop (VIDEO)

This tutorial from the internationally popular PiXimperfect YouTube channel begins with a provocative question: "How do you recover blown-out highlights when you have no data to recover from?" It turns out that what was once impossible is now easily within reach, thanks to the latest mind-blowing features in Photoshop.
Instructor Unmesh Dinda is an image-editing impresario who teaches workshops across the globe and has almost five million subscribers to his instructional channel. As you'll see, recovering highlights is now super easy, even when details are totally missing, thanks to the remarkable capabilities of Photoshop's Generative Fill.
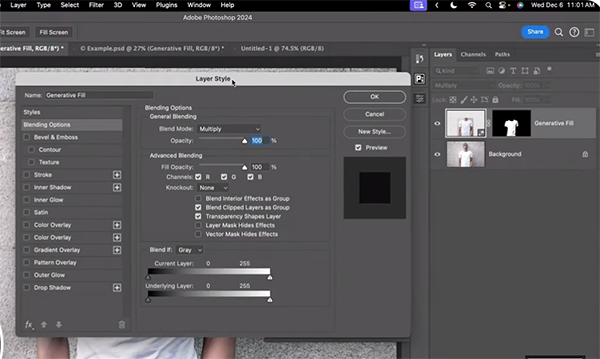
In less than seven minutes Dinda demonstrates how easy it is to target and precisely select severely clipped highlights and then employ Generative Fill to fill in the blanks. He also explores techniques like Blend modes and Masking to get the job done to perfection. Dinda's method is so impressive that even AI naysayers will be intrigued.
Dinda begins with a casual portrait of a subject whose white t-shirt is devoid of detail because the shot was intentionally overexposed. He demonstrates how the conventional methods of dropping exposure or decreasing highlights simply doesn't work for this extreme example—even when working with a Raw file that provides the best chance of success.
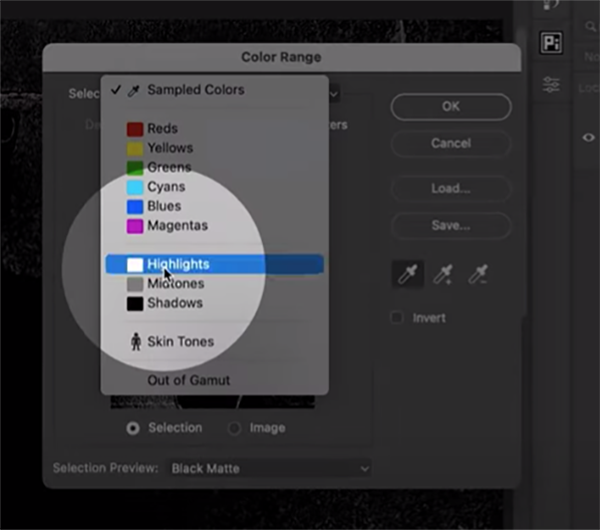
Thus, it's time to go to Plan B and let Generative Fill work its magic. The first step is targeting the specific areas where you want lost details to appear. To do this Dinda clicks on the Select tab atop the screen and chooses Color Range from the dropdown menu. Another window then appears, and in this case Highlights is the option you want.
The next step is choosing Black Matt in the Selection Preview dropdown. By doing this everything selected will be shown (namely the blown-out areas of the shirt), while all other areas will appear black. Dinda explains how to fine tune this result to suit your needs.
The preliminary selection is still very harsh, but you'll see how to significantly smooth the transitions by dragging the Fuzziness slider. As the video proceeds you'll notice other imperfections and Dinda makes short work of those too. Along the way he provides helpful keyboard shortcuts to speed up the process.
At this point there's still four minutes to go for perfecting the transformation, and Dinda carefully walks you through the steps that are necessary for getting the job done. Even a cursory glance at the before/after images reveals the power of this technique. Once the video concludes be sure to take a look at Dinda's robust YouTube channel where there's much more to learn.
And don't miss the tutorial we posted from another image-editing expert who demonstrates how to use Photoshop's Gradient Map tools for landscape photos with stunning color.


![]()
Get the Latest Photo Tips, News & Reviews from Shutterbug!
| Camera Reviews Other Reviews | Mobile Reviews Photography Reviews Columns | News | Features | How-To | Resources |
 © 2026 Shutterbug
AVTech Media Americas Inc., USA
All rights reserved