- REVIEWS
Camera Reviews 
More Reviews Mobile Reviews Photography Reviews - GALLERIES
- VIDEOS
- BUYER'S GUIDES
Here’s How to Create Stunning Golden-Hour Portraits with a Simple Edit in Lightroom (VIDEO)
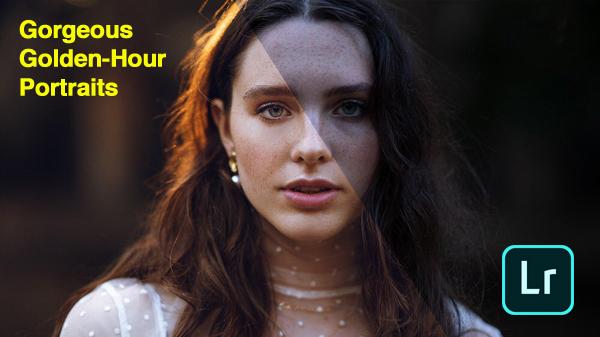
Most photographers know that “Golden Hour”—the time right after sunrise or just before sunset—can be the best time to shoot. And that often holds true when photographing landscapes, portraits, and just about anything else. Despite the beautiful soft reddish light at prime time, a quick edit in Lightroom can often turn a good image into a great one.
In the behind-the-scene tutorial below, Australian fashion photographer Julia Trotti demonstrates how to shoot and edit golden hour portraits made with a fast 85mm f/1.4 lens. Along the way you’ll pick up valuable tips on framing, posing, exposure settings and gear.
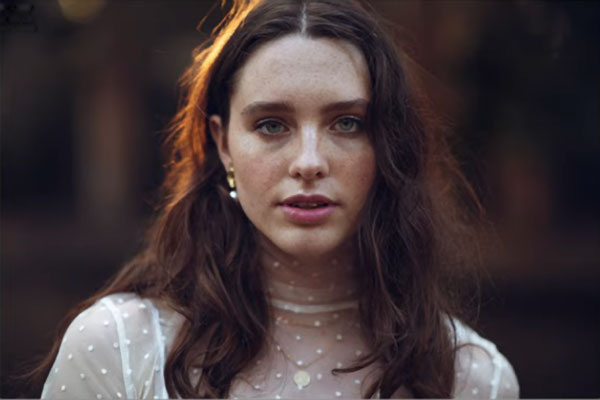
Trotti made her portrait instants before sunset, with the result that there’s just a hint of golden light on her model’s hair. It’s a rather nice photograph, but a bit too dull, dark, and cold. As you’ll see, a few quick adjustments in Photoshop provides a cleaner, warmer image with beautiful tones.
Trotti also provides helpful advice on cropping, and how to employ the Rule of Thirds for maximum impact. If all this sounds pretty simple, it really is. But the results are dramatic.
There are more shooting and editing tips on Trotti’s YouTube channel. And for a tutorial on a unique form of portraiture, check on our recent video with five easy boudoir poses.


![]()
Get the Latest Photo Tips, News & Reviews from Shutterbug!
| Camera Reviews Other Reviews | Mobile Reviews Photography Reviews Columns | News | Features | How-To | Resources |
 © 2025 Shutterbug
AVTech Media Americas Inc., USA
All rights reserved