- REVIEWS
Camera Reviews 
More Reviews Mobile Reviews Photography Reviews - GALLERIES
- VIDEOS
- BUYER'S GUIDES
Digital Photographer’s New Guide To Photoshop Plug-Ins; Flood (By Flaming Pear)
Editor’s Note: This is an excerpt from “Digital Photographer’s New Guide to Photoshop Plug-Ins,” a new book by Jim Zuckerman and Scott Stulberg. Zuckerman and Stulberg have created a comprehensive look, along with easy to follow step-by-step instructions, that illustrates the power of modern plug-ins for your work. In this excerpt they share the fun of working with Flaming Pear’s “Flood.”
 |
|
 |
|
|
Need To Know
Website: flamingpear.com
Notes: A free trial version of the software can be downloaded from the company’s website. Flood can be purchased individually, or it can be bought in various bundled software packages for a variety
of prices.
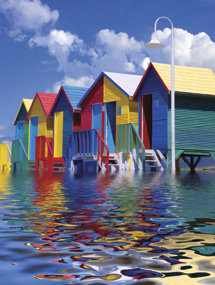
One of my favorite filters in the pantheon of Photoshop plug-ins is Flood, which creates watery surfaces and reflections that are very realistic. In fact, the reflections that are generated are much more believable than the Wave filter native to Photoshop. Initially, it’s easy to think about ponds and lakes reflecting a distant shoreline of trees, a mountain range, or a city skyline, but this fantastic plug-in can be used for a surprisingly diverse number of subjects.
Establishing The Horizon
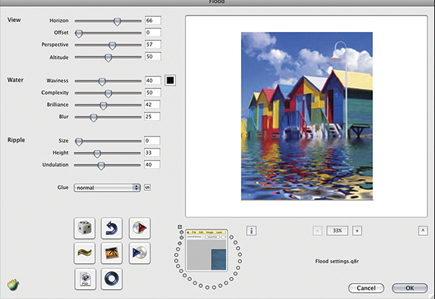
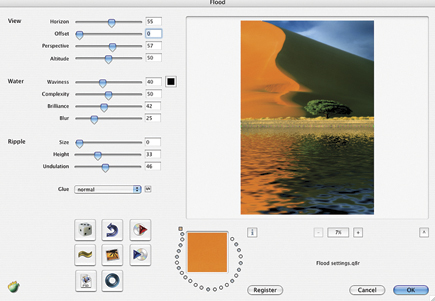
Before you can begin manipulating the digital body of water, you must first establish a horizon line in the image. To get started, open Photoshop and choose a picture into which you’d like to add a waterscape. Then open the Flood plug-in and use the first slider bar (labeled Horizon) in the dialog box to create a horizon line anywhere in the photo.
 |
|
|
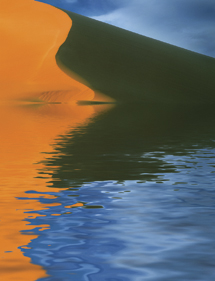
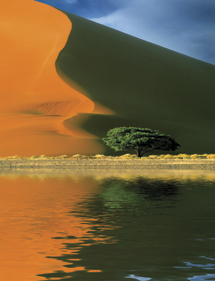
Using the original photo of a sand dune I shot in Namibia as an example (Photo A), I created two very different reflections. Compare photos B and C and notice where I placed the horizon line. In Photo B, I completely eliminated the tree, while in Photo C I chose to include not only the tree, but some of the desert scrub as well. Figures 1 and 2 show the position of the sliders to illustrate how I set the Horizon for photos B and C. The large preview in the dialog box displays how the image will be affected as you move the horizon up or down.
 |
|
|
|
 |
|
|
Making Space
Notice that in both photos B and C, I began with an original horizontal image and ended up with a vertical one. Though it’s not always necessary, you may often find that you want to extend the canvas to allow more image area for the water. This can be thought of as adding real estate to the image. To add space, go to Image>Canvas size; a dialog box will appear.
 |
|
|
|
 |
|
|
|
| |||||||||


![]()
Get the Latest Photo Tips, News & Reviews from Shutterbug!
| Camera Reviews Other Reviews | Mobile Reviews Photography Reviews Columns | News | Features | How-To | Resources |
 © 2025 Shutterbug
AVTech Media Americas Inc., USA
All rights reserved