- REVIEWS
Camera Reviews 
More Reviews Mobile Reviews Photography Reviews - GALLERIES
- VIDEOS
- BUYER'S GUIDES
How to Shoot Digital Infrared Photography
Back in 2010 I sent a brand new Nikon D5000 to Llewellyn Data Processing (LDP LLC) in Carlstadt, NJ, and paid them to modify it so that it records the IR (infrared) spectrum only. They’ve been in this business for 20 years, since 1997, and in my experience they do terrific work.
They replaced the factory installed anti-alias filter (also known as a Low Pass filter) with one that cuts off at 720nM (nanometers). With this conversion, the Nikon captures IR directly and does not need a special filter in front of the lens. On the downside, it shoots only IR, and the Nikon warranty was voided. However, since I had never had a defective Nikon, I wasn’t overly concerned about the warranty.
Today, almost exactly seven years later, the camera is still going strong.
LDP also sells new cameras that have already been converted (visit maxmax.com for more details) including cameras for drones.
My friend Steve Rosenbaum turned me on to digital IR photography. The man is a master. I think of him as the Ansel Adams of Infrared. I’ll never forget wandering around Cologne, Germany, with Steve after a Photokina trade show a few years back. He used a Minolta DiMAGE 7 which produced incredible IR pics because that model was manufactured without an AA filter. But it was painfully slow, required a tripod and ate batteries like a starving billy goat.
A converted DSLR with interchangeable lenses is the best way to go.
There are two major challenges to successful digital infrared photography, even for those who use IR-modified cameras. Setting the correct White Balance is a huge hurdle. The second is the Channel Mixing that must happen during post processing.
Here is what works for me. There are other methods and some of them produce better—or at least different—results.
I shoot Raw + JPEG and process the Raw file. This gives me some leverage over White Balance, but not as much as you probably suspect. I use Preset Manual White Balance (page 99 in the Nikon D5000 Owner’s Manual) using an 18% gray card as the target. Sometimes it takes three or four attempts to register the setting, but once set the results are consistent. I have tried other methods but all yielded less success.
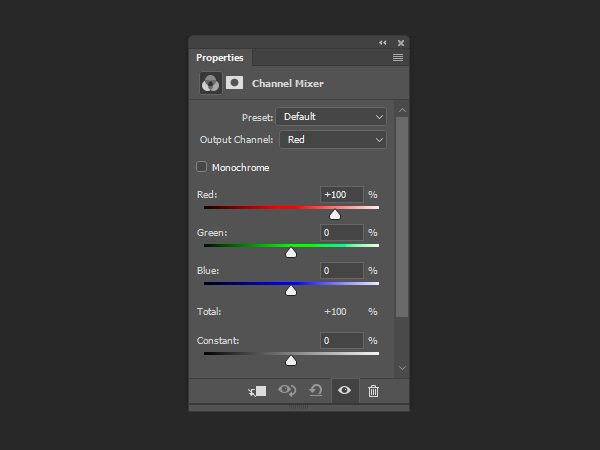
I perform the post processing using Adobe Creative Cloud. I created a Photoshop Action to perform the basic procedure; I fine tune the colors manually after that. To follow the same steps as the Action, open a new adjustment layer from the dropdown Layer menu and select Channel Mixer. In the Red Output Channel, adjust the Red slider from 100% to 0 (zero) and the Blue slider from 0 to 100%. Then switch to the Blue Output Channel and adjust the Blue slider from 100% to 0 and the Red slider from 0 to 100%. Easy, no? And you can see why creating an Action is a real timesaver.
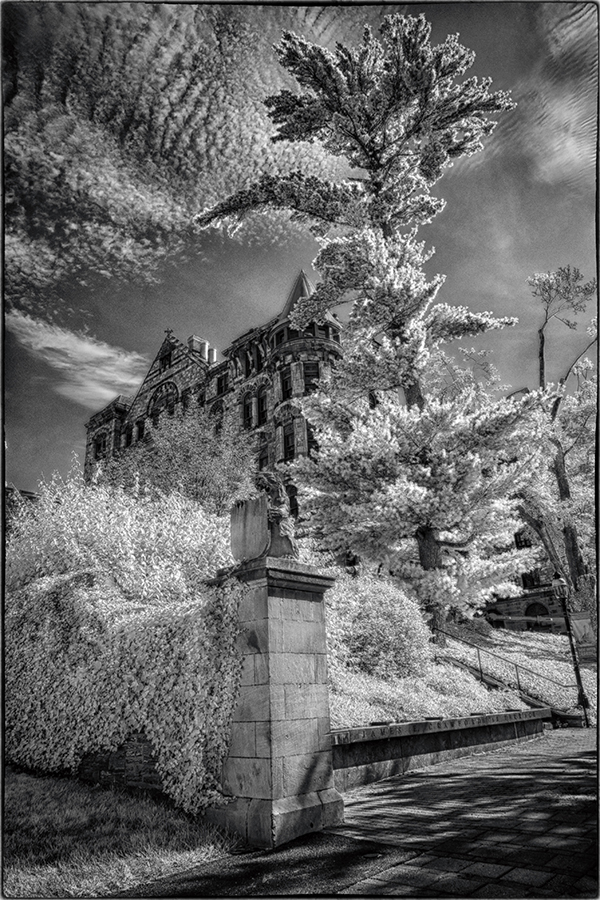
After the channels have been successfully swapped, adjust the colors using the same tools and techniques you do for any normal-color image. Or convert the image to monochrome in your usual way. The easy way in Photoshop (/Image /Adjustments /Black & White) gives you a surprising amount of control over the final output.
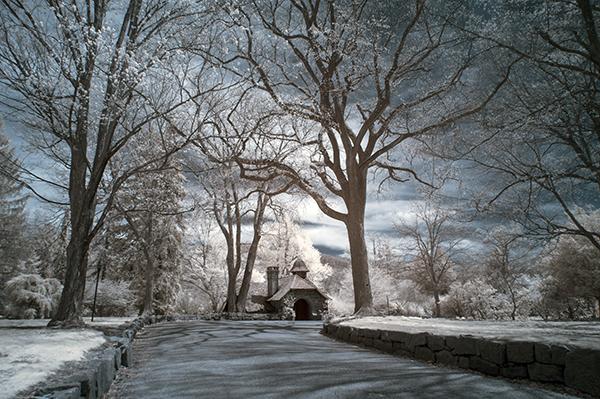
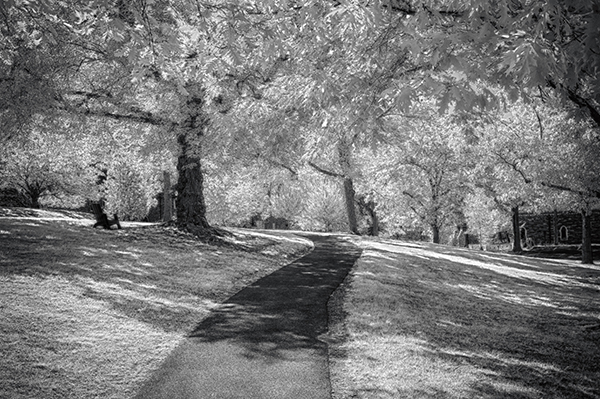
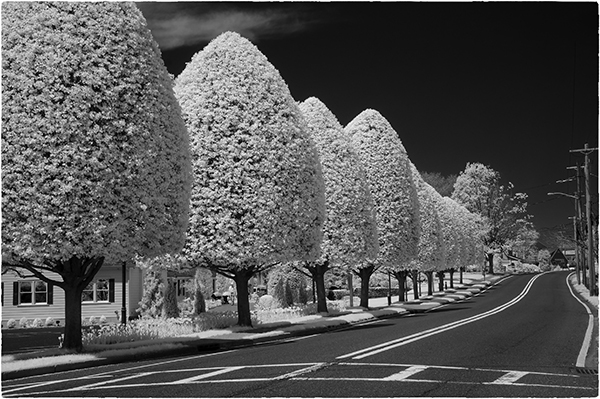
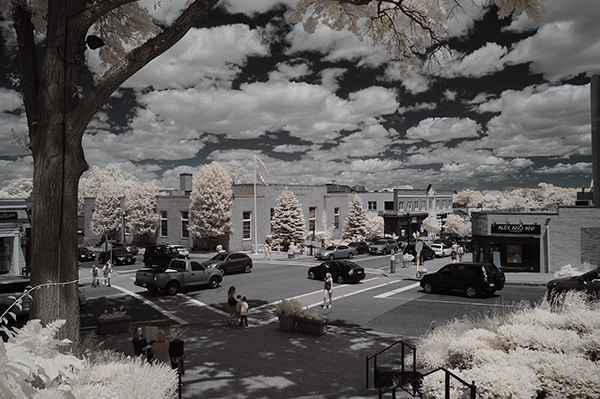
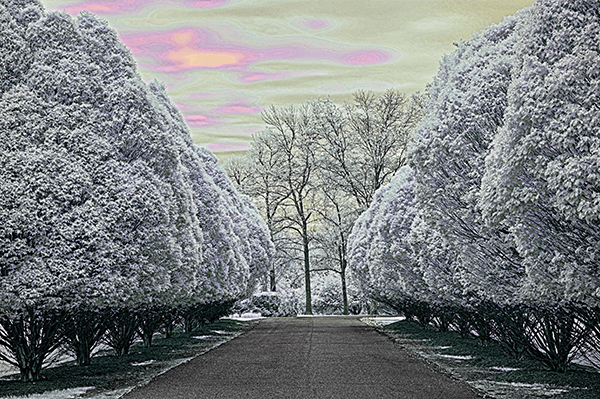
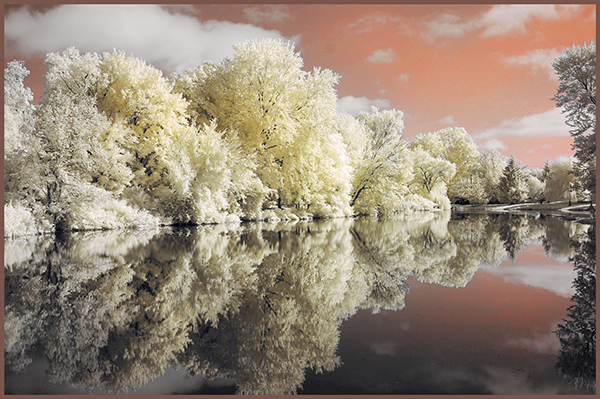
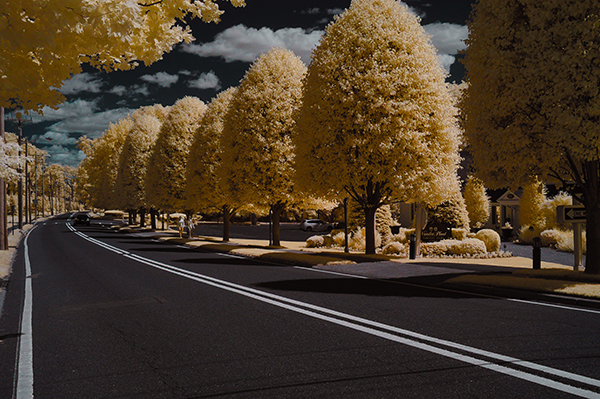
What follows is a selection of recent IR images; all were captured with my modified Nikon D5000 and an assortment of lenses. —Jon Sienkiewicz


![]()
Get the Latest Photo Tips, News & Reviews from Shutterbug!
| Camera Reviews Other Reviews | Mobile Reviews Photography Reviews Columns | News | Features | How-To | Resources |
 © 2026 Shutterbug
AVTech Media Americas Inc., USA
All rights reserved