- REVIEWS
Camera Reviews 
More Reviews Mobile Reviews Photography Reviews - GALLERIES
- VIDEOS
- BUYER'S GUIDES
Dell UltraSharp U2410 LCD Display; They Call It Premier Color…And It Is
A Shutterbug reader, Tracy Valleau, e-mailed me, suggesting that I take a look at the 24” widescreen Dell UltraSharp U2410 LCD display with 1920x1200 pixel resolution. What makes it suitable for digital photography and professional graphics is its wide color gamut of 96 percent of Adobe RGB and the fact that its white luminance is adjustable from 80.0 to 90.0 CD/m2, both of which provide a high reproduction screen image quality. Its 12-bit internal processing assures a smooth rendition of tones on screen. The screen is in a bezel and stand that is sturdy but light, with an excellent design that’s carefully manufactured. In all respects, this Dell U2410 is quite affordable at a list price of $599, while entirely competitive with more expensive brands favored for a color-managed digital photography workflow.
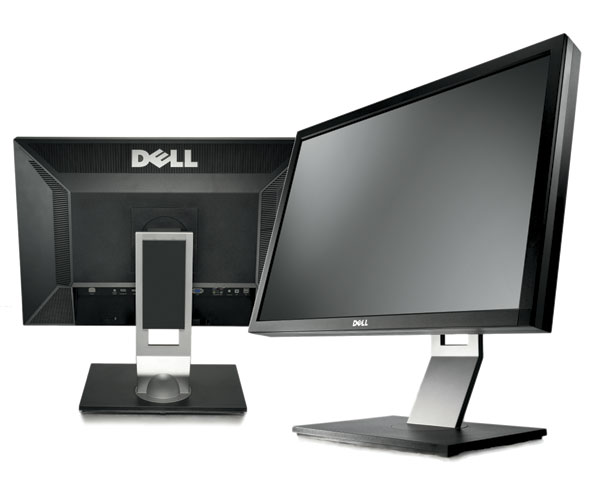
The connectivity support includes a full range of connectors from traditional D-sub, two DVI, an HDMI and Display Port, and also includes a powered USB hub and media card reader. Equally significant, the Dell U2410 can be adjusted, calibrated, and profiled using all the popular systems, including ColorEyes Display Pro (www.integrated-color.com), Datacolor Spyder3Elite (www.datacolor.com), or X-Rite i1Display 2 (www.xrite.com). However, if a user has a profiling colorimeter and software over a year old they may need to upgrade the hardware to a colorimeter that has a wide bandwidth that will read the 96 percent Adobe RGB color reproduced by the U2410 LCD display. As part of the fine design, Dell has positioned the adjustment control button on the vertical bezel at the lower-right corner, plus there’s an on-screen control dialog that is adjacent to the control buttons. This setup makes the entire adjustment procedure with a color management application on screen accessible at all times and very easy to read and manipulate for digital photography work.

All Photos © David B. Brooks
Some of my readers have complained that at a brightness with the white luminance set at 90.0 CD/m2 their screen is darker than they would like when used for other than photographic computing. With the handy access to the controls and on-screen read-out adjacent to it, a user should set the top control to Adobe RGB for photographic work, and then could switch to another mode for a brighter setup for home/office computing very easily.

Working With The Dell UltraSharp U2410
From the moment after the Dell box with the U2410 arrived, the installation and setup was a gentle breeze and should be easy even for the inexperienced. I already had a DVI cable connected to the Display Port adapter Apple supplied with my computer, so it was quick connecting the power, the video to a year-old Mac mini, and USB as well. I booted up, and found the display worked fine, reproducing the desktop I had been using with my mini, so I left it running to warm up while having lunch. After that respite, I quickly rebooted and was set to use the ColorEyes Display Pro with a new Spyder3 colorimeter I had gotten a few months ago.

After using the top control button and setting the Dell to run in Adobe RGB mode, adjusting to obtain a 90.0 CD/m2 white luminance read-out with ColorEyes was really simple. I moved the Contrast percentage lower until the ColorEyes read-out went a bit below 90.0 CD/m2 (Brightness adjustment was at 50 percent and not adjusted). Then I clicked on the ColorEyes Profile button with my aim points set at a gamma of 2.2 and a color temperature of 6500K, and the U2410 was calibrated and profiled in just a few minutes. The resulting screen appearance looked even and clean and not as dark as some might expect—it was now at less than half the white luminance many who leave the settings at default would find. In fact, my environment lighting for the desk the U2410 lives on is a FOBSUN 90 LED Downlight I wrote about in my blog (http://blog.shutterbug.com/davidbrooks/) not long ago. It is mounted on an old Century stand with an arm that holds the FOBSUN LED about a foot above and 6” behind the U2410, and the lamp is turned to shine down and back on a wall 3 feet behind the display. The result is plenty of illumination for the desktop, ideally balanced in brightness and color with the display.

|
| |||||||||


![]()
Get the Latest Photo Tips, News & Reviews from Shutterbug!
| Camera Reviews Other Reviews | Mobile Reviews Photography Reviews Columns | News | Features | How-To | Resources |
 © 2026 Shutterbug
AVTech Media Americas Inc., USA
All rights reserved