- REVIEWS
Camera Reviews 
More Reviews Mobile Reviews Photography Reviews - GALLERIES
- VIDEOS
- BUYER'S GUIDES
7 Cool Long Exposure Photography Tricks (VIDEO)
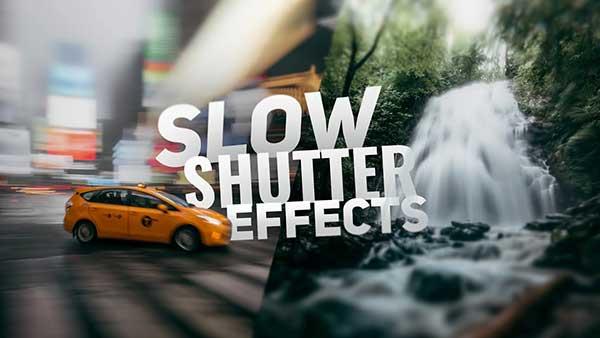
Long exposure photography is when you blend motion together with shooting your camera at a slow shutter speed. By shooting long exposures you can create surreal or dreamy images that portray the world in motion.
The beauty is in the blur, so to speak.
In the below video, photographer Aidin Robbins shows you seven head-turning long exposure photography tricks you can easily replicate with your own camera. Watch the clip at the bottom of this post to see how you can achieve each one.
“Usually for photography you’re going to use a really fast shutter speed like 1/400th or even 1/1000th of a second to freeze one moment in time and have as little motion blur as possible,” Robbins explains. “But if we slow that shutter speed down and try maybe a quarter of a second, five seconds, or maybe even something crazy like sixty seconds, you can create some really interesting effects by using that motion blur to your advantage.”
#1 Speeding Subject
“The first one is the simplest and that’s just to shoot something that moves quickly, like a moving car or someone on a bicycle. Using this with a slow shutter speed will just blend that motion out a little bit more and it helps to portray the motion of that subject.”
#2 Panning
“Next let’s take that exact same photo but add an additional element where we’re going to move the camera to follow that subject as we’re taking the photo. This creates this really interesting effect where the background completely blurs out, but the subject is in focus.”
#3 On a Moving Subject
“Instead of standing back and taking a photo of a moving subject, let’s take a photo while we’re on that subject, like a car or in this case an escalator. Because the camera is locked onto a moving subject, you’re going to really blur out the background and imply its motion.”
#4 Flowing Water
“For this, just set your camera up on a tripod and shoot something with moving water like a waterfall or a river. Then use an exposure around the range of between three and 20 seconds, depending on how much you want to smooth that water out.”
#5 Light Trails
“You can take that exact same technique of setting up your tripod and shooting a moving subject for several seconds to create this light trail effect. You can take a flashlight and paint designs in your photos, which is kind of quirky and fun but what I prefer to do is shoot headlights and get these really cool light streak effects from traffic.”
#6 Disappearing People
“If you’re in a busy area where there’s a lot of crowds of people what you can try doing is setting up your tripod and exposing for as long as possible, like literally 60 seconds. And all of those people, assuming they’re moving, are going to blur out and practically disappear.”
#7 Night Skies
“And finally, let’s keep that 60-second shutter and instead of using it to cut down a crowd, let’s use it to photograph the night sky. This technique doesn’t show motion but it’s still going to require a tripod. To get the best result, make sure you’re pointing your camera at the brightest part of the sky.”


![]()
Get the Latest Photo Tips, News & Reviews from Shutterbug!
| Camera Reviews Other Reviews | Mobile Reviews Photography Reviews Columns | News | Features | How-To | Resources |
 © 2026 Shutterbug
AVTech Media Americas Inc., USA
All rights reserved