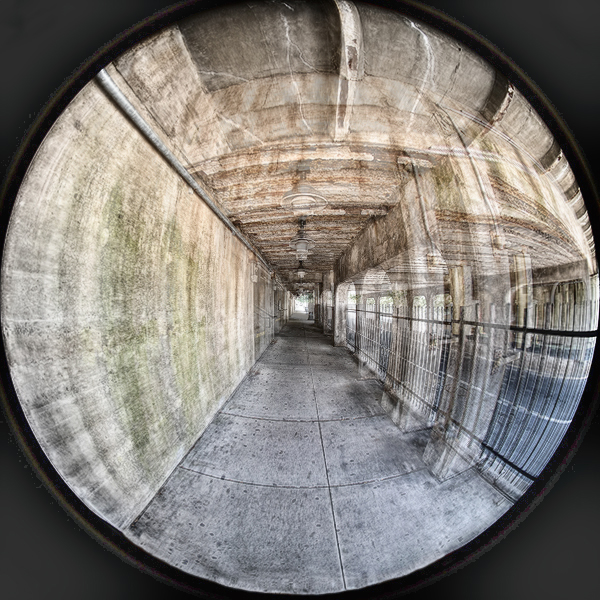
10 Tips for Shooting with a Circular Fisheye Lens

Fisheye lenses abound, and many are priced under $199. Products like the Meike 6.5mm f/2 ($129) and 7artisans Photoelectric 7.5mm f/2.8 ($139) plus offerings from Bauer, Rokinon, Opteka, Samyang, Venus and some camera manufacturers are very affordable, exciting and—by and large—pretty damn sharp. But using one effectively can be tricky. Here’s what extensive hands-on practice has taught me so far.

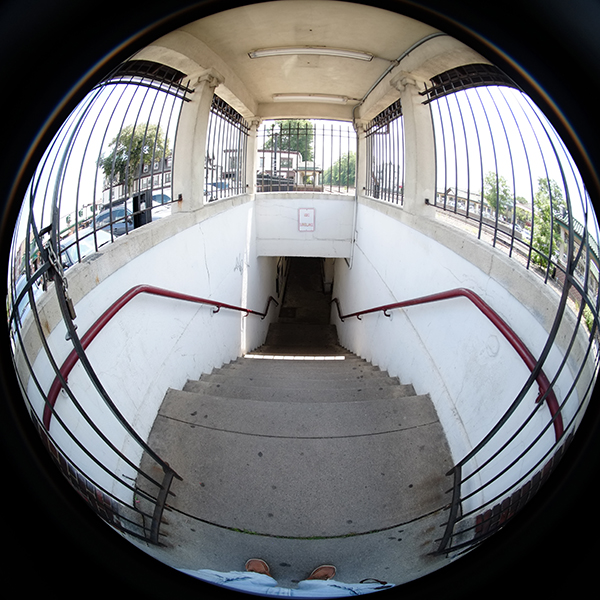
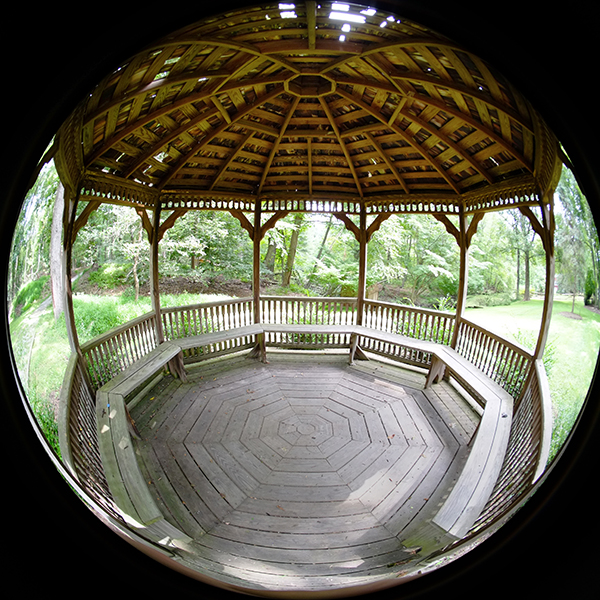
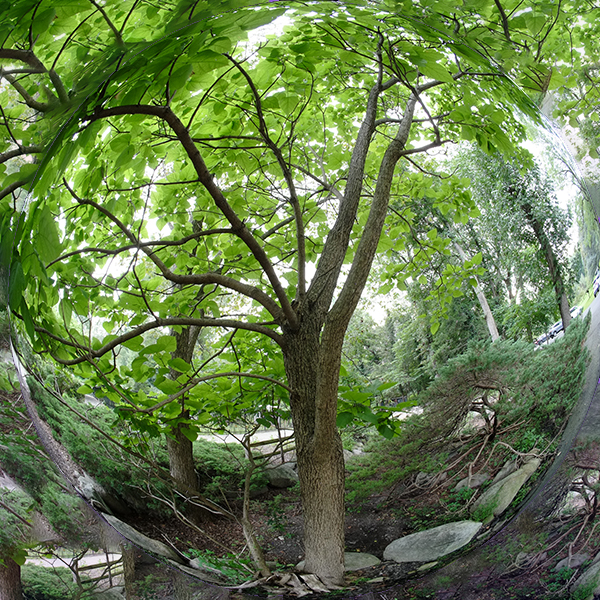
There are two types of fisheyes, not including those found on actual fish. The full-frame type, as the label suggests, fills the entire frame with wonderfully warped, perspective-bending wideangleness. The circular fisheye, which we’re covering here, instead turns 180 degrees of reality into an amazing circle, leaving a black border and negative space in the unexposed area of the frame. Both are cool, but the circular is more fun, in my book, and the images are instantly recognizable as being fishy.

Every image in this piece was shot with a Fujifilm X-E1 and a Meike 6.5mm f/2 Circular Fisheye. In the next few weeks I’ll be posting a full review of this lens. Spoiler Alert: save yourself some time and just order the lens now. And if anyone knows how to contact Meike’s Marketing, PR or Sales Dept in the US, please let me know. I’m trying to get their input for the review but so far they’ve resisted my efforts to communicate with them.

Beyond that, all of the predictable caveats apply. Inexpensive circular fisheye lenses are manual focus and Aperture Priority (or Manual) exposure only. Focus is easy, however, because the depth of field stretches from here well into next month. Many fisheyes work on mirrorless cameras only. Those that fit on DSLRs render different results on full-frame DSLRs as compared to crop-frame APS-C format models. Do yourself a favor and visit an actual camera shop to make your purchase so that you can preview the effects before summoning MasterCard. And don’t waste your money on one of those mutated fisheye adapter gadgets that screw into the front of another lens—they are sheer disappointment.

1. Watch your toes and fingers. Circular fisheye lenses see 180 degrees, sometimes even a bit more, so unless you’re watchful there’s a good chance that your toes or belly (or both) might appear at the bottom of the frame. Same caution regarding hand placement—don’t crowd the lens with your fingers or they could spoil the shot. I know this well but I still muffed a few shots because old habits are hard to break. ©Jon Sienkiewicz


2. Shoot at 1:1 Aspect Ratio. If your camera offers 1:1 format like my Fujifilm camera does, use it and minimize the unexposed, wasted space. The image resolution is the same because you are using only the middle part, anyway. Shoot a couple test shots to make sure that the entire circle fits inside the square image. As you can see, the circle is slightly clipped on one edge in my example, but it’s so close that I can live with it. ©Jon Sienkiewicz


3. Manual Exposure. Because fisheyes have such an extreme field of view, the camera’s TTL meter might be confused sometimes. I found it more accurate to shoot on Manual and adjust exposure by watching the LCD monitor, as was the case with this shot taken on the urban campus of Boston University. ©Jon Sienkiewicz


4. Find round things. To each his own, but I find that round things become dramatic when captured with a fisheye. Swing the camera up and down (not too much or you’ll become seasick) until you achieve the perspective you want. There’s a hackneyed but still fun cliché pic that you’ve probably seen. Set the self-timer on the camera and set the camera on the ground. Gather your friends in a circle above the camera, arms intertwined as if in a football huddle, everyone staring into the lens. You can imagine the results. Don’t try this if you only have two friends or if the ground is wet. ©Jon Sienkiewicz


5. Crop to “normal” wideangle perspective. Simplified explanation: crop the circular image from all sides until it looks like a “regular wideangle” shot. We all have different tolerance levels for warped perspective, so crop it in the way that suits you. As in this image, begin with a level shot that has relatively straight lines. ©Jon Sienkiewicz


6. Try the camera’s Panorama feature if available. If your camera has a sweep panorama feature that automatically composites a series of exposures while you pan the landscape, try it with your circular fisheye. This shot was taken with my X-E1 and cropped slightly at either end because I couldn’t avoid overlapping. ©Jon Sienkiewicz


7. Use Content Aware Fill. This feature of Adobe Photoshop is heaven-sent for many reasons, but did you know that it’s also a creativity engine? Use your favorite selection tools to Select all of the black, unexposed area outside the image circle and initiate a Fill with Content Aware active. Photoshop will try to match the data near the selected areas, and the results will be remarkable. Random, but remarkable. You can try this on other images too, but it works particularly well on CFI (circular fisheye images). ©Jon Sienkiewicz


8. Pinch filter. The Pinch filter in Photoshop progressively shifts all pixels from the center toward the edges, or from the edges toward the center, in varying degrees as set by the slider. This is the only practical use for the Pinch filter that I know of. Above, the shot on the left was shot normally with the Meike 6.5mm f/2 and processed without editing. On the right is the same image showing the effects of the Pinch filter set at +100. Experiment with other filters, too. Pile on. ©Jon Sienkiewicz


9. Fill unexposed areas with the opposite hue. In Photoshop, select Invert from the Image/Adjustments menu, then use the eyedropper tool to click on the dominant color. Now Undo the inversion and you’re left with a normal-color image plus a foreground color that is the opposite hue of the dominate image color. (Opposite of red is cyan, for example. These are opposite hues, not complementary colors.) Select the unexposed areas of the image using your favorite selection method and then use the Paint Bucket Tool to fill. Yeah, you might get away with skipping the selection step, but sometimes the color floods nearby areas. So it’s better to go through all of the steps so you can edit the selection. Obviously, you could fill the void areas with any color you want, but the opposite hue approach works well and yields a consistent result from image to image. ©Jon Sienkiewicz


10. Copy, Filter, Paste and Blend. Looks like a multiple exposure; simple and easy to do. Choose an image. Copy it (Ctrl-A, Ctrl-C). Apply the filter of your choice; in this example I used the Pinch Filter which works exceedingly well. Next, Paste (Ctrl-V) the copy onto the modified image, creating a new layer, and use the Opacity slider to adjust the ratio between the edited Background image and the unedited Copy. Try different filters. ©Jon Sienkiewicz

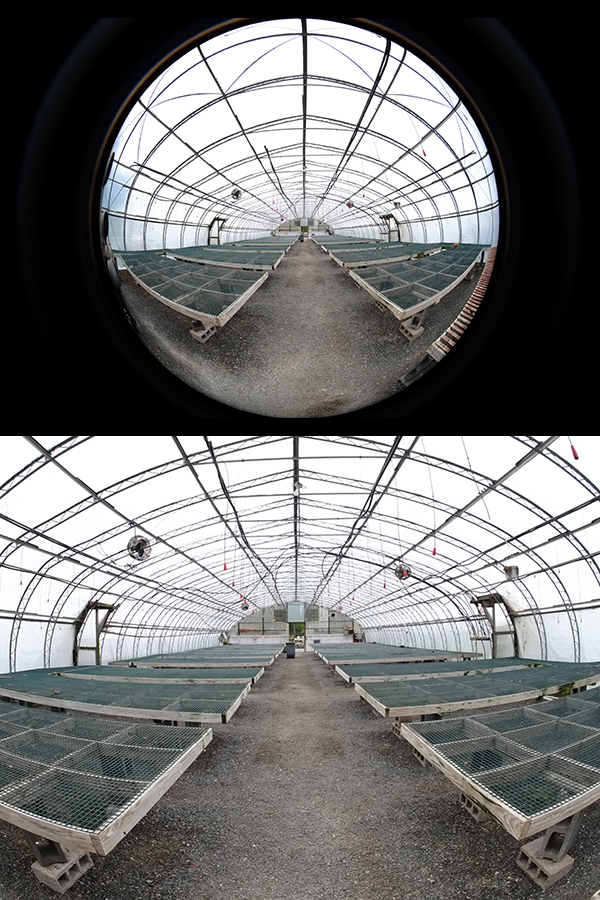
This list barely scratches the surface of what can be done with a fisheye. You may have noticed that all of these shots were taken outdoors. (Even Tip 5 was shot in an outdoor greenhouse.) There’s a whole world of creative things you can do indoors, too. Maybe we’ll cover some of those in a future installment.

—Jon Sienkiewicz

X