- REVIEWS
Camera Reviews 
More Reviews Mobile Reviews Photography Reviews - GALLERIES
- VIDEOS
- BUYER'S GUIDES
Image Management; Finding Images with Keywords
To add a keyword in the Keyword HUD (which comes up with the keyboard shortcut Shift-H) click on the plus/minus button on the far left and type in the keyword required. This creates a main keyword. Here the keywording process gets started by typing in "kids."
 |
When you click on the second button from the left you are adding in a subordinate keyword, which usually means it is linked to the main keyword (though it may not fit every image under that main keyword.) Here, clicking on the button yields an "untitled" that awaits filling in.
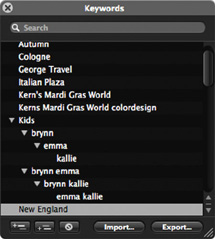 |
All the possible combinations of the three sisters in one shot have been added. When you start the keywording process it's a good idea to look at all the pictures in a Project and make some notes as to how keyword can be most effectively used.
 |
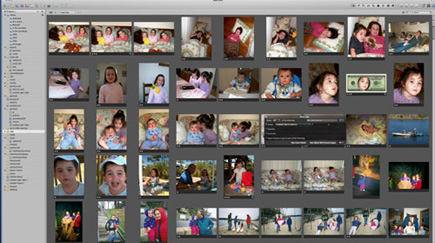
Once you have all the keywords in the Keywords HUD it is easy to attach the keywords to images. This screen is in the Grid View of the Browser, with the Keyword HUD in the workspace (Shift-H). It's an easy matter to simply click on a keyword, or set of keywords (Command-click) and drag them onto select images.
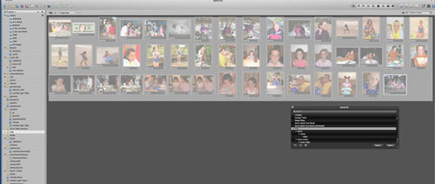 |
Another way to add keywords from the Keyword HUD is to select a group of images (here by dragging over a group) and then simply click on a keyword and drag it onto any of the selected images. The keyword will then be applied to all the images in the selection.
 |
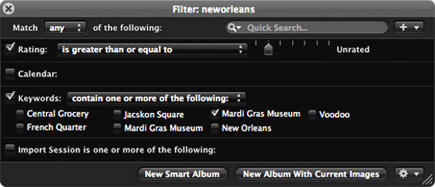
If you want to pick select images out of a Project after keywording all you need do is bring up the Query HUD (Command-F) and click on Keyword and then select the identifying word or words, and the images will be instantly sorted and brought into view.
Keyword Workflow
In order to see how to work with these boxes in the control area we'll
start a download and keyword process from scratch.
 |
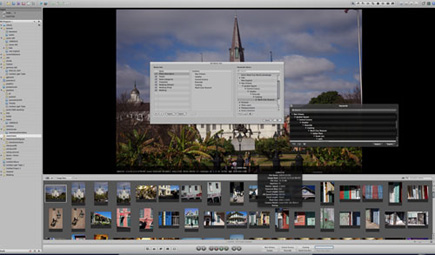
This large group of images has been imported from a CD onto which a New Orleans shoot had been burned. The task is to create keywords for the disparate images. All were shot in the same city but require different categories to be most useful.
 |
There are a number of ways to add keywords for sourcing later. Here the keywords were added using the Keyword HUD, already described. Keywords start with New Orleans but continue with French Quarter, etc. These keywords were jotted down on paper while browsing through the imported images.
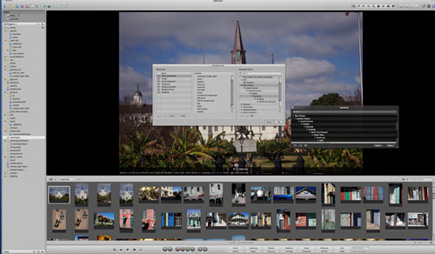 |
The dialog box for creating Presets is opened via the drop-down menu from the button entitled "photo descriptors." This is where the keywords can be found in the Keyword Library and where you begin the process of changing the button assignments in the Keyword control panel.
 |
Here the New Orleans descriptors have been moved into the Contents panel of the Edit Button Sets dialog box. Note that the other descriptors have been eliminated. This is not necessary, as you can simply move the keywords you need for the Project at hand up in rank and the first 8 will show up assigned to the numbers in the Keyword control panel.
To assign a keyword to an image after the control panel number buttons have been assigned simply select an image or images and press the number on the keyboard. You can do this with images in a Viewer or the Browser Grid view, and it's a very fast way to add keywords to images.
Lift & Stamp
One of the easiest ways to add keywords to a large group of images is with the Lift & Stamp HUD. This can be accessed from all the viewing modes. The process is two-fold. You first lift the keyword or keywords from one image and then stamp it onto another or a group of selected images.
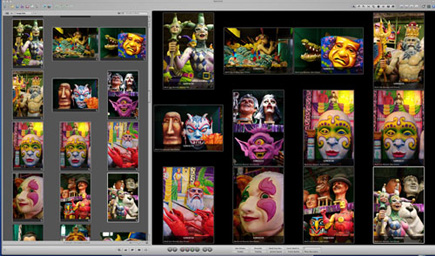 |
This group of images contains lots of similars, a good candidate for the Lift & Stamp process. The Browser in this screen sits to the left.
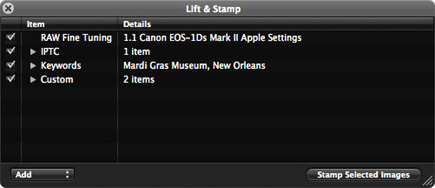 |
The Lift & Stamp tool allows you to select among all the information associated with the image. Uncheck the information you don't want to travel onto the image or images you select.
 |
Here's the information unchecked. Now simply select an image that contains a Keyword (look for the tiny scroll in the lower right hand corner) and open the Lift & Stamp tool. Your cursor then becomes a downward pointing arrow--this is the "stamp" that you just click on top of an image or selected images to transfer the information.
 |
The keywords show up in the lower left hand quarter. The larger, central information is the picture number, which can be changed to show other information as well.
 |
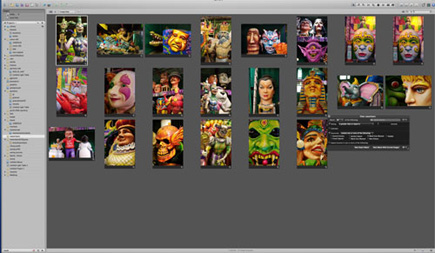
To finish our task here are the selected pictures with keywords from the New Orleans shoot, all found quickly from using a single subordinate keyword.)
 |
Keywords are an excellent way to sort and edit images. They are associations that help you group your images much as you'd place individual images in folders in a filing cabinet. Because keywords travel with the image in the form of IPTC data, they can also be used by clients, such as stock agencies, for labeling and sorting in their image library. They help save duplication of effort by you and your client, and can be a great aid in sales, plus make you a better supplier of images to any agency or buyer.
 |
When choosing keywords work as generically as possible, and begin with the general down to the specific. The tools for applying keywords in Aperture and similar advanced programs make the process as painless as this sometimes tedious process can be.


![]()
Get the Latest Photo Tips, News & Reviews from Shutterbug!
| Camera Reviews Other Reviews | Mobile Reviews Photography Reviews Columns | News | Features | How-To | Resources |
 © 2026 Shutterbug
AVTech Media Americas Inc., USA
All rights reserved