- REVIEWS
Camera Reviews 
More Reviews Mobile Reviews Photography Reviews - GALLERIES
- VIDEOS
- BUYER'S GUIDES
Faux Infrared
Faux Infrared
Plug-Ins And Actions That Do The Job
by Joe Farace
Capturing digital infrared images using the appropriate filter or a camera that’s been converted for IR capture can be lots of fun, but what about that huge library of film and digital shots you already have? With just a little bit of digital darkroom magic many of them would make great IR shots. Here are a few tips, tricks, and techniques for converting conventional— non-infrared—images using plug-ins and actions into what might be called faux IR.
Alien Skin Exposure 2
If you’re wondering how good a digital emulation of this process can be I made a few shots of a tree in my front yard, with the leaves slowing changing color from summer to fall, in both conventional and IR capture.
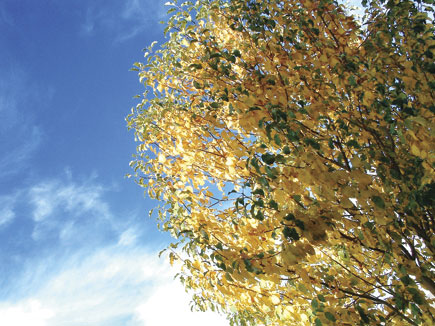
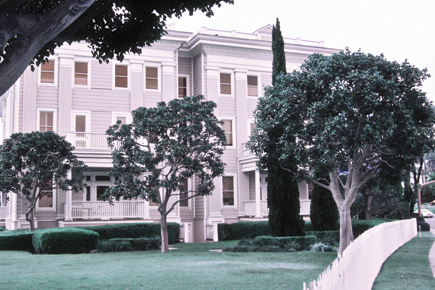
(#1) This color reference image of an apple tree was made with a Fuji FinePix 3800 in Program mode at 1⁄100 sec at f/8.2 at ISO 100.
 |
|
|
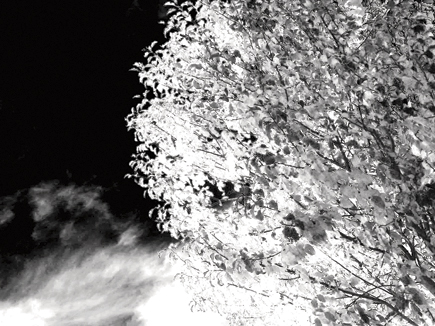
(#2) With a Hoya R72 infrared filter attached to the front of the Fuji 3800’s lens it produced an exposure of 1⁄2 sec at f/2.8 and ISO 100. The captured RGB image file typically has an overall magenta color but you can convert it into black and white using any of the tips from my February 2009 Shutterbug story “From Color To Black & White In A Few Steps” that’s also available on-line at www.shutterbug.com.
 |
|
|
(#3) The interface to Exposure offers four other tabs with controls that let you tweak to suite your taste but here the defaults were used. Notice that the leaves that were green in the original image remain dark in this image.
 |
|
|
(#4) Alien Skin Software’s Exposure 2 (www.alienskin.com) consists of two film emulation plug-ins, one for color and another for black and white that offers 20 infrared variations on three different IR films including Kodak’s HIE that I used here.
 |
|
|
(#5) I know what some of you are thinking. What about Adobe Photoshop’s own black and white (Image> Adjustments> Black & White) function that includes an infrared preset? While results shown here are acceptable it’s not quite as good as what Exposure 2 produced, but the final decision is, as always, up to you.
 |
|
|
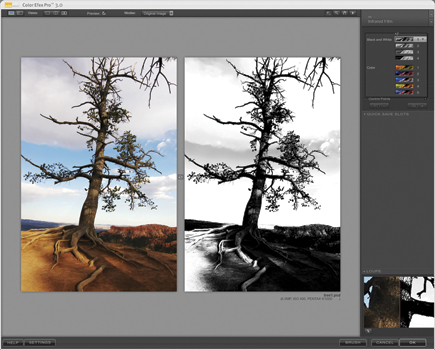
Nik Color Efex Pro
The infrared film filters that are found in Nik Color Efex Pro (www.niksoftware.com) emulate several different methods of capturing the infrared portion of the spectrum and the black and white and color filter sets are designed to mimic the effect produced by their respective films. The black and white filters emulate conventional infrared black and white film and can be used to create stunning landscapes, with dark skies, bright white clouds, and glowing white vegetation. The color filter imitates infrared color film producing colorful images, with interesting color shifts. The Infrared Thermal Camera filter will produce the effect of night vision scopes and goggles or scientific heat-to-color cameras. The green, night vision method reproduces the effect used by Hollywood and the colorful scientific method is similar to the effect of translating heat values to color. Both are fun. Nik’s Silver Efex Pro offers two infrared film presets—Normal and Soft—each can be tweaked using the sliders and digital filters on the right hand side of the interface.
 |
 |
|
|
||
 |
|
|
 |
 |
||
|
|
Nik Silver Efex Pro
(A) Nik’s Silver Efex Pro offers two infrared film presets including Normal and Soft and I selected the Normal option for the test image and used the sliders on the right hand side of the interface to minimize the film grain effect.
 |
|
|
(B) At its default settings, the Infrared Film Normal preset creates a slightly different and less contrasty version of my test image.
 |
|
|
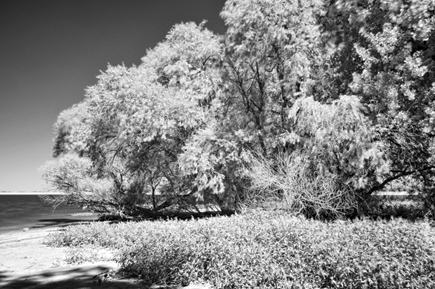
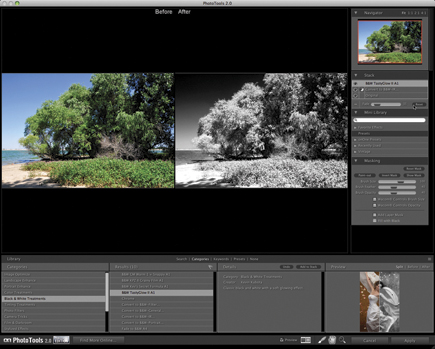
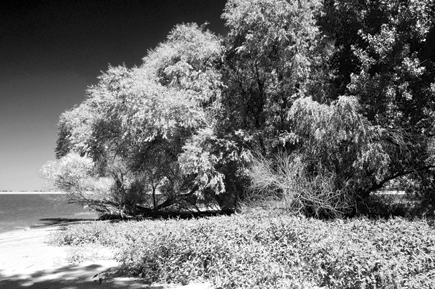
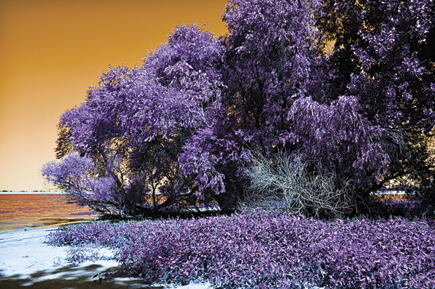
PhotoTools2
PhotoTools 2 (www.ononesoftware.com) bundles hundreds of photographic effects that were designed by Jack Davis and Kevin Kubota along with all the photo gurus at onOne Software, all wrapped up in one easy-to-use Photoshop compatible plug-in. One of this program’s advantages is that it lets you preview, stack, and combine effects to produce pro-grade results with just a few mouse clicks. The plug-in reproduces camera filters like neutral density, color correction, alternative processes, as well as various kinds of film, including infrared.
 |
|
|
 |
|
|
 |
|
|
 |
 |
|
|
 |
|
|
Infrared Film Actions
Since most actions take less than 10K, you won’t have to be worried about download time or hard disk space. You can find actions on the Web in sites such as Adobe Photoshop Marketplace (www.adobe.com/cfusion/exchange/index.cfm). This well-produced site has a section that lists all of its actions that are available for download along with a sample image showing what the effect looks like. Another great source is Actions Central (www.atncentral.com) so check them both out.
I found the Film & Grain Fx Simulator on Adobe Photoshop Marketplace. It’s a set of Photoshop actions created by Das Bosun that emulates film and printing. It simulates contemporary as well as historic film processing and printing techniques including Cross Processing, Infrared (color and black and white), Cyanotypes, and Litho prints. These actions are not recommended for image files embedded with wide gamut color spaces such as ProPhoto RGB, but worked great with all the sRGB & Adobe 1998 files I tried.
 |
|||
|
|||
 |
 |
||
|
|
||
Craig’s Actions (www.craigsactions.com) is a suite of commercially available actions that includes a set called InfraRedders. Craig told me “The art of infrared is tricky at the best of times, that’s why there are nine actions to get you started.” With presets and variations for portraits, strong and even extra strong effects, you have control of the final look and the ability to modify it.
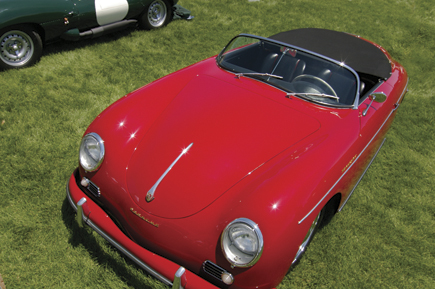 |
|
|
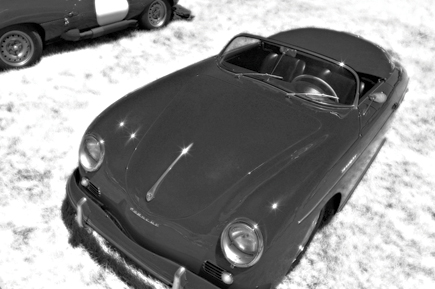 |
|
|
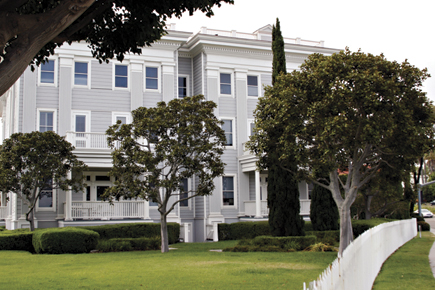
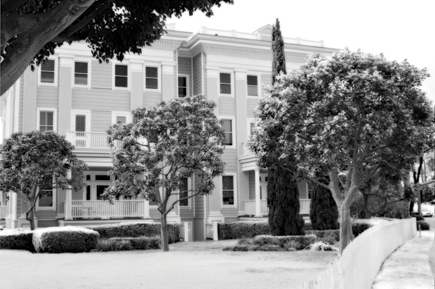
I found Dave’s IR Actions at Action Central and it’s an updated version of one of first actions contributed to the site and was produced by Dave Jaseck. According to Dave, it “fakes an IR look and optional color by reducing layer opacity.” He also mentions that your original image must be in 8-Bit mode.
 |
|
|
 |
|
|
 |
|
|
Tool Tips
There are a few things to keep in mind when using any of these tools: In most cases, all of the examples were made at the default settings. Plug-ins typically have lots of sliders and controls that let you tweak the image even more and Photoshop actions offer intermediary steps where dialog boxes are called so you can provide input to fine tune an image. My advice is to use any and all of these controls at their extreme ends to see what happens and if you have to start all over again there’s nothing lost because you should be working on a copy of your original file. Any effect, whether through a plug-in or action, is highly subject dependent and the results achieved with your image can be different and maybe even better than what you see here. The main thing to keep in mind is that you should experiment and have fun in the digital darkroom.


![]()
Get the Latest Photo Tips, News & Reviews from Shutterbug!
| Camera Reviews Other Reviews | Mobile Reviews Photography Reviews Columns | News | Features | How-To | Resources |
 © 2026 Shutterbug
AVTech Media Americas Inc., USA
All rights reserved