- REVIEWS
Camera Reviews 
More Reviews Mobile Reviews Photography Reviews - GALLERIES
- VIDEOS
- BUYER'S GUIDES
Epson P-7000 Multimedia Viewer
Pictures displayed are bright and readable from a fairly wide angle from center, and having a 4 inch LCD means editing and perusing is easy on planes, trains and, when not driving, automobiles in all sorts of lighting conditions. |
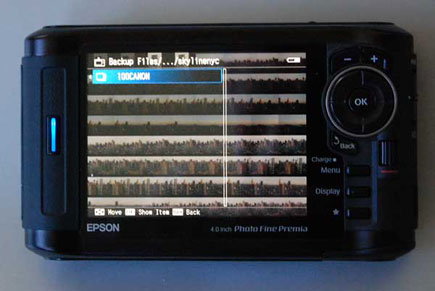
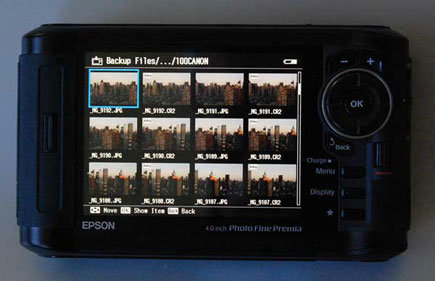
There are numerous ways to view images. They can be viewed as screen filling images, as thumbnails (12 per screen) or as what Epson dubs “mini thumbnails”, which I found fairly useless except for realizing I had taken too many shots of the same scene. You can also zoom in on any image and toggle up and down to check focus. You can use the built-in histogram to make exposure judgments, but in my case that’s usually so after the fact that it is rare I can avail myself of a reshoot, although it does allow you to compare bracketed images with ease.
When you first get the device you must set up the date/time stamp for download, as that is how folders are displayed. There is no way to rename the folders. When you toggle back through to find an image the folder menu stays put and the images display faintly in the background. I would have preferred it the other way around. The device read all sorts of cards for me, ranging from a simple digicam to a Canon 5D and even the new Sony A900, from which it showed the Raw files (though would not process them—more on that later) even before Sony had released their Raw software or the converter was available from Adobe in Camera Raw. Very impressive. The unit even has a very good EXIF detective, and reads out all pertinent information as you toggle through the Display button, which brings you through the thumbnail and full frame views.
 |
|
|
 |
|
|
If you want to do something with the image at the point you have it highlighted, either as full frame or thumbnail, you hit the Menu button, and a screen comes up over the image with options for something called Photo Enhance (which seems to be an auto Levels of sorts), Process (again, in a bit), print from the device, create wallpaper with the image, have a slide show of all, or delete the image. Again, this menu covers up the image. Better, I think, would be a design where the options run as a side Nav bar so the image would be viewable throughout the process (which it is when you Retouch, however, a plus there.)
One of my main tasks after downloading is to dump the images that don’t make the grade, which can range from a low to high percentage of shots depending on how I did that day and my disposition later. The delete process here is as cumbersome as it is on many digital cameras, always acting as a failsafe even if you don’t want it to do so. I did find a workaround, which was to use the Star rating system that’s akin to Elements and other programs, where images are rated rather than deleted on the first go round, and then saving the 3 star and up images later. The Star button is one of the options on the body, and you press it (or don’t) for a 1-5 rating. I would have liked a delete button added to that same back control rather than have to scroll down to it in the menu. The good thing is that images can be scrolled through quickly using a thumb scroll device on the camera back.
 |
|
|
Processing, or Retouch as Epson dubs it, adds the option to do the usual basic global image adjusts in the device, including choosing among presets such as People, Landscape (plus going Monochrome), and Manual Settings for Brightness, Contrast, Saturation, Color Balance, Sharpness and Noise Reduction. Given that Epson does not reveal the source of the noise reduction and sharpness algorithms I am loathe to recommend them, though they seemed harmless enough. Frankly, the idea that you can adjust an image to your liking, even on this nice bright screen, in a device like this, is not something I would advise, especially on JPEG shots that might get wrangled a bit more than you might anticipate. And once you OK the adjustments the processing time is quite slow. Save all that for later. I would rather Epson have spent the money on direct upload, BlueTooth, or done something to make the device more functional for this day and age.
 |
|
|
The Retouch menu allows you to work on an image right in the unit, and after you are done you can rename the file with a sort of touch screen keyboard. While an interesting feature, I frankly would recommend doing most of this later after you download to a full-featured program, but it can be handy if you want to print on the road, and it does make a copy so the original is still unchanged.
And that brings up the issue of relevance and how this viewer might or might not do the trick. I have to say that it was very handy to have along and not have to lug a computer to backup images. Lack of worry about the bumps and grinds and hassle with check-in at the airport is a big plus for the Epson side.
What about viewing images on the big Epson screen? That was a big draw back when we had 2 inch LCD screens on cameras, by my camera now has a 3 inch LCD, so giving up a bit of real estate compared to the 4 inch screen on the Epson is not much of a sacrifice. And superimposing the menus over the images is not the optimum design structure.
In short, the Epson Multimedia Storage Viewer (the P-7000 in this test) is a very handy device to take on the road, if you don’t need your laptop for other tasks, and certainly does the job of storing images and making for fast and easy downloading later. It can also play videos, with an earphone attachment for fidelity, and music too, though it’s hardly a shirt pocket or lapel device. It has the capacity to handle lots of images, and can be used as a backup drive to store same while you travel. And it both downloads and uploads with as good as or faster speeds of any device I have worked with in the past. While file deletion is cumbersome, I guess the thinking is to protect us from ourselves; better to make it a bit of an obstacle course than regret the loss of images later.
At $799 for the 160GB and $599 for the 80GB capacity viewers, Epson is starting to bump up against some lower-priced laptops, sans software, of course. It strikes me that while obviously practical, it could use some updating regarding uploading to the web and perhaps even wireless downloading at home or in the studio, or even some email capability like we have seen in some recent digicams. The concept of a portable viewer and storage device is strong; the updating of features to fit in with how many folks are now using and sharing their images would make it even more compelling.


![]()
Get the Latest Photo Tips, News & Reviews from Shutterbug!
| Camera Reviews Other Reviews | Mobile Reviews Photography Reviews Columns | News | Features | How-To | Resources |
 © 2026 Shutterbug
AVTech Media Americas Inc., USA
All rights reserved