- REVIEWS
Camera Reviews 
More Reviews Mobile Reviews Photography Reviews - GALLERIES
- VIDEOS
- BUYER'S GUIDES
Self-Publish Your Photo Book
Self-Publish Your Photo Book
A Great Way To Show And Share Your Images
by Joe Farace
Most photographers dream of accomplishing two things in the publishing world: The first is having their work featured in a national publication such as Shutterbug, National Geographic, or maybe Playboy and the second is showcasing their photography in a coffee table book. I can’t help you with that first goal but I sure can with the second. Even though I am author or co-author of 30 books produced by several different book publishers, some of my recent books has been self-published and the reasons for doing so are the same reasons that I’m going to suggest you try self-publishing.
Except for photographs made on the moon, everybody has been almost everywhere and photographed just about everything. To book publishers this means who’s making the photographs is more important than where. The chance of any publisher seriously looking at a unknown photographer’s book on landscape photography featuring classic locations such as Arches National Park or Yosemite—no matter how good they may be—are slim and none. The first shots at books like this may be given to “name” photographers but you can happily self-publish your own book of landscape images or any other subject, and maybe even sell several hundred copies, making a few bucks in the process. That’s why after every photo book publisher I spoke with rejected my book “How I Photograph Cars,” I decided to do it myself.
 |
POD
POD is short for “print on demand” and Blurb.com (www.blurb.com) is only one of several different websites (see “Self Publishing Options”) that let you produce books in quantities as few as one. You can use Blurb or any of many other services to publish the Great American Novel but I’ve always wanted to publish a coffee table book. Blurb lets you do that without suffering the indignities of receiving enough publishers’ rejection slips to wallpaper your bathroom. Don’t laugh, the number of famous authors who have gone through this is legion.
Blurb lets you create books in four sizes, including photography books that can be produced in hard cover with a dust jacket or softbound versions. A new option called “Hard Cover, ImageWrap” wraps photos around the hard covers, kind of like a built-in dust jacket. All these choices means there are lots of different permutations and combinations, so you’re sure to find one that fits your goals, aspirations, and budget.
As I wrote this, Blurb raised their prices, so I recommend checking the Book Pricing section of the website for the current rates. The Book Pricing section currently shows the cost for four different styles of books including Square (7x7”) starting at $12.95, Standard Portrait (8x10”) beginning at $19.95, Standard Landscape (10x8”) starting at $19.95, and Large Format Landscape (13x11”) beginning at $54.95. The most important thing to know about pricing is that books are priced by page count but not by the page. All of the previous prices are for a 40-page book and you can publish up to a 440-page book, moving up in 40-page increments. A 41 to 80-page book is the next bracket so it pays to stay on the high end of the page count before moving into the next, more expensive category. Since a 68-page book costs the same as an 80-page book, you can create a bigger book with more photos for the same price.
Where Blurb differs from similar “print on demand” sites is that they provide free layout software, called BookSmart, that lets you produce the entire book off-line using professionally designed page templates that let you blend multiple images and even text to produce a professional-looking book without requiring any book design experience.
Design Your Photo Book
Step 1: Begin the process by collecting all the images you want to appear in the book. I started working on “How I Photograph Cars” using Adobe Photoshop’s Bridge to locate and assemble all of the images I wanted to include but you can use any image browser software.
Step 2: What resolution should the files be? BookSmart works with JPEG files and the books are printed at 300dpi. The biggest photos you can use, a full-page picture in a 13x11” book, should be no larger than 3900x3300 pixels. Put all of the image files in a clearly labeled folder so you can easily find them later in the layout process.
Tip: Placing larger images will not improve the final product but can make uploading slower and may cause scaling artifacts. On the other hand, Blurb accepts images down to 150dpi but depending on how large they’re used these lower resolution images may not print as well as you’d like. You can find detailed specifications on image size and resolution in Blurb’s FAQ section. To remind yourself of these requirements, write them on a sticky note and attach it to the bottom of your monitor when working with BookSmart.
 |
|
|
Step 3: Start the process. BookSmart includes a number of standard page templates including Title, Introduction, Copyright, and Introduction so be sure to use them in order to make your book look like a “real” book.
Tip: At the beginning of the process you have a choice of using “Starter Layouts” that includes many of these standard pages and that may be better way to work on your first book rather than using the “Wing It” option that lets you work totally from scratch.
Step 4: Read the fine print. Some of these templates, especially the Copyright page, include boilerplate and generic text so be sure to read and customize it for your book. Other pages, such as Title, have placeholders for text, such as your book’s title and subtitle.
 |
Tip: Choose title and subtitle carefully because they will be automatically added to the spine of the book as well as the top and bottom of the inner pages. You can change them later but it’s more work than getting it right at the start. Prepare any new text using your favorite word processor and save it in the same folder as your image files.
 |
Step 5: Lay out the book. If your monitor’s size permits, use the side-by-side page layout option that lets you see adjacent pages at one time. This is just one of the three views possible in BookSmart and will help you decide which images look best next to another over the book’s gutter (the inside fold where the pages meet) and how different layouts visually interact. The software includes many different page templates that let you use multiple images and mix text blocks with your photographs. You can add, change, or delete any of this material at any step in the process because BookSmart is so flexible.
Tip: This software is not as versatile as Quark XPress or Adobe InDesign but it’s much, much easier to learn and use.
Step 6: Drag and drop. With your folder of JPEG images prepared, it’s just a matter of selecting what page template you want to use and dragging your file onto the space on the template. This is where you’ll need to exercise taste and judgment to achieve a pleasing blend not only of the images selected but in how many photos are used on a specific page.
 |
Tip: On the left-hand side of the working window, BookSmart has a scrolling window showing thumbnails of all the images dragged from your folder. Once a photograph is placed in this dock it can be moved onto a page. After an image is placed a green check mark appears on it in the scrolling window; if you delete the image from a page, the check mark disappears.
 |
Step 7: Proof read all text. Caption information or text is placed by cutting and pasting from your word processing document into the place on the page (maybe all of it) reserved for words.
Tip: You can type text directly into a page template but unless there is very little of it that’s the hard way and mistakes are easier to make. When you think you’re finished adding photographs and writing text ask a friend to review the book, checking for errors (BookSmart has a spell checker but it’s basic), duplicate images, or boneheaded mistakes. You can print a proof copy but not owning stock in an ink company I’ve never used this option.
 |
Step 8: Upload and Order. When you’re ready for printing, BookSmart lets you upload the book and depending on your Internet connection, the size of the book, and number of images it might it take a half-hour or more. Then you pay for the book plus shipping using a credit card. Eight days later, the nicely packed finished book(s) will arrive via UPS.
After you’ve ordered even one book, you can make it available to the public (or not) and add whatever mark-up you like to make some money on sales. You can create a description page that lets you describe what the book is all about as well as include a brief biography, which is more than Amazon will do for you. Checking the Preview option allows potential buyers to preview the first dozen pages in the book to help them make a purchase decision. When I added it to my book “How I Photograph Women” it increased sales. More importantly BookSmart and Blurb lets you publish a book that most publishers would ignore because the potential market is too small. Since Blurb lets you publish as few as one book, no niche is too small.
 |
Self-Publishing Options
While I used Blurb.com to publish some of my recent books, there are many other self-publishing websites available. What I liked about Blurb was their software and how well it interfaced with the way I like to work. Your work style or publishing requirements may be different, so take the time to surf the Internet and check out some other options, including:
Lulu (www.lulu.com) is free to use and has no set-up fees.
 |
SelfPublishing (www.selfpublishing.com) whose FAQs will help you understand the difference between print-on-demand and vanity press, subsidy press, or a packager.
iUniverse (www.iuniverse.com) offers the range of professional editorial, marketing and publishing services you might expect from a traditional publisher.
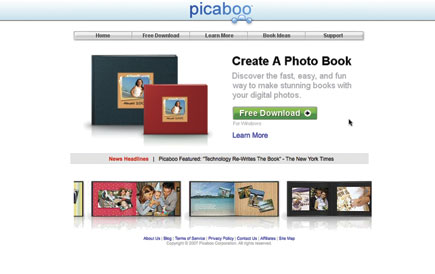
There are also websites, such as picaboo (www.picaboo.com) and software, including Apple’s iPhoto, that will let you make bound photo books that are somewhat different from the kind of publishing effort any of the previously mentioned on-line services offer.


![]()
Get the Latest Photo Tips, News & Reviews from Shutterbug!
| Camera Reviews Other Reviews | Mobile Reviews Photography Reviews Columns | News | Features | How-To | Resources |
 © 2026 Shutterbug
AVTech Media Americas Inc., USA
All rights reserved