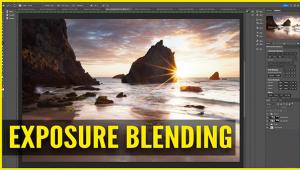
How to Handle Challenging Colors in Landscape Photos (VIDEO)

Experienced landscape photographers know that some intense colors are difficult to deal with during the editing process, especially when processing images captured just as the sun drops below the horizon. In this tutorial from the PHLOG Photography YouTube channel you'll learn how to render these vibrant tones in Lightroom while achieving a realistic effect.
Instructor Christian Mohrle is an accomplished German nature photographer who we frequently turn to for solutions to challenging tasks like this. Feel free to use the link beneath the video to download the demonstration image so you can make the changes yourself while watching Mohrle work his magic.
Mohrle describes the task like this: "Every now and then I can capture an insanely vibrant sunset like this. The problem is that once I fix the exposure and play around with the colors a bit they start to look strange." He then walks you through his method for handling these intense tones to create a natural looking image.

As always Mohrle begins with a few global adjustments to prepare the overall photo as much as possible for the selective enhancements that follow. In this case the first step is changing the profile from Adobe Color to Adobe Landscape. This may sound counterintuitive because this profile significantly boosts base Saturation, but Mohrle has a good reason for doing so.
Other preliminary enhancements include modifying exposure to accentuate detail in the sky and dark foreground. Mohrle also raises the blacks, increases color temperature, brings down the tint to reduce a magenta color cast, and adjusts Texture, Clarity, Dehaze, and Vibrance. At this point many of us would be pleased with the image just as it is.
But watch what happens when Mohrle employs a bit of masking to selectively adjust various areas within the frame. He adds a Linear Gradient over the top right of the sky, another Linear Gradient over the same side of the foreground, and a hard-edged selection over everything below the horizon. The adjustments to each of these areas are very simple, but they have a huge impact on the photo.

Once again you may think the image is ready for prime time, but Mohrle has a few other tricks up his sleeve that deliver the eye-popping effect he desires. These include further refining the colors, fixing chromatic aberration, and carefully adding a bit of subtle sharpening.
All that's left to complete the remarkable transformation is cleaning up the image in Photoshop. Voilà! It's well worth paying a visit to Mohrle's instructional YouTube channel where you'll find a wealth of information for improving your landscape photographs.
And don't miss the tutorial we posted recently from another post-processing expert with several "game-changing" hacks that will streamline your image-editing workflow.
- Log in or register to post comments


