- REVIEWS
Camera Reviews 
More Reviews Mobile Reviews Photography Reviews - GALLERIES
- VIDEOS
- BUYER'S GUIDES
Get Your Head Into The Clouds: Tips For Capturing Brilliant Skies

All Photos © Moose Peterson
Clouds are magical elements that when added to our photographs can make all the difference between a good photograph and a great one. No matter the subject, the right clouds can turn the most boring scene into the most spectacular. But just including clouds doesn’t guarantee a great image. In fact, clouds can cause you as many problems as they solve. Bringing the romance of clouds into your photographs so they reach out and grab the heartstrings of your viewer is a little bit of an art. Let’s look at how the lens, exposure, texture and finishing with clouds can improve your photography.

The Lens
Puffies (as I like to affectionately call big, cumulus clouds) that are really photogenic are an important element in your photographs. But the majority of the time they are just that, an element. So, like any element you need to include those that work and exclude those that don’t. And that’s where your lens comes into play.
The mind’s eye goes first to those elements that are light and bright, especially when they are in the top of the frame. What is light and bright and at the top of your frame when you include clouds? Clouds. With that in mind, here are some of the guidelines I follow.
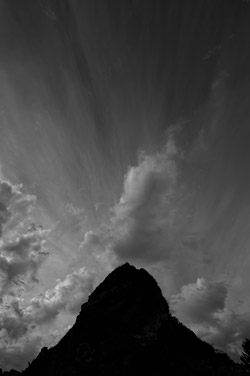
If there are only 1-3 dominant clouds in the sky I go long. If there is a flotilla of clouds with no real distinct, dominant, single cloud, I go long. When I have one dominant cloud or a sky of clouds with one dominant cloud amongst them, I go wide. When a cloud mirrors a shape in the landscape, no matter anything else, I go wide.


When I get on site I first grab the lens that matches those guidelines. Do I stick with the initial lens choice? I tend to only 50 percent of the time. Since clouds are so fluid, constantly changing as the wind whips them about, you are racing the clock. The great clouds that make you stomp on the brakes are often gone by the time you change lenses. And often when you turn around after getting your camera out will you find that you need to change the lens again. So have an open mind and imagination, focusing in on making the most of the cloud, then choosing a lens.
The Exposure
The moment you decide to include clouds in your photographs you just complicated your photographic life. Let’s start by understanding that complication. In digital you work in a five-stop world. A majority of the time when you include clouds, you have increased the range of your exposure beyond these five stops because your foreground might be in shadow caused by those overhead clouds. Using your Highlight Warning (what I affectionately call Blinkies) you can see where you have lost information; gone paper white and have clipped highlights in parts of the clouds. With this information, you have a couple of options.
The first and most obvious option is often ignored, and that is to do nothing! If you want dark clouds to look dark, including white gives the mind a reference point to say, “Those are black clouds.” Since the mind zeros in on white and bright, a Blinkie, if placed in the right spot in the photograph, can be a powerful tool to pull the eye through the frame. And finally, what color do most people think clouds are? White, so delivering what the viewer expects can often be a plus.
And if that loss of information, that Blinkie, is a bad thing. What can you do? You have a couple of options, depending on your tastes. The first option, which I use all the time, is dialing in underexposure compensation (-EV). I’m always shooting at -.5 just to pull in those highlights on the edge of burning out. But I don’t hesitate to dial in up to -2. The sacrifice here is the shadow detail will start to disappear and turn black. However, if this is used correctly it can bring strength to your landscape image. What if that’s not enough? You dialed in -EV and you still have Blinkies?
What if you want all the detail in the clouds or the shadows or both?


One of your best tools for cloud photography is the split grad filter. It is a marvelous tool to pull down highlights that are lost. I simply hold it in my fingers, making a U shape and pinching the filter between them, then holding it up against the lens. I then move the filter up or down, clicking and looking at my Blinkies to make the call on its effectiveness. The key to using the split grad is not placing the split line plumb with the horizon. Angling the split grad to enhance the angle the light is falling blends in the filter so no one can tell you’re using it.
If someone looks at your photo and can see the effect of the filter, you lose the power of the clouds. If the split is not enough by itself, add in exposure comp and in certain applications, adding a polarizer as well. Combining all three might be the perfect solution. Don’t know which might work for you? Just go out on a cloudy day and shoot a test. You’d be surprised what you’d learn about your own photography!
The Texture
Clouds have texture? Oh yeah baby, they are laced with it. Including that texture even if you don’t readily recognize it is the hidden secret to making the “Wow” of clouds come out in your photography.
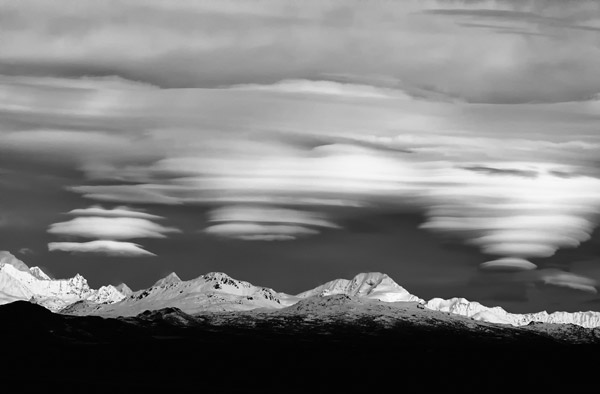
Look at clouds really carefully. These balls of moisture warp light into shades of black to gray to white, which give them their gorgeous shape. That’s the texture we need to tap into. You start by being picky about which lens you use to incorporate the clouds. You then continue on by your exposure choice. For example, you could use a wide lens on a rather overall gray sky. But then add a split grad to underexpose the top of the frame, expose to bring out the foreground and you have brought out not only texture in the clouds but also brought visual depth to the overall photograph.
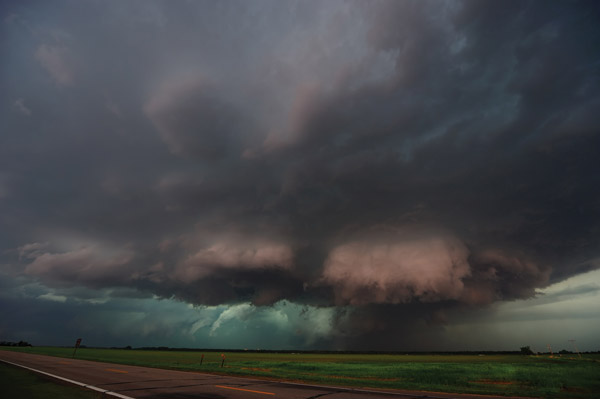
To really let the clouds fly in your photographs, you’ve got to become a cloud connoisseur. There are clouds and then there are clouds! To put it in visual terms, you can have the clouds floating over the plains on a warm summer day or you could have a super cell over the same plains. You can manipulate either scenario to tell the story you want, so work that texture to tell your story. Overexpose a storm and you’re saying it’s over and the rainbow is soon coming. Underexpose and the texture of the clouds tell of a big storm coming. It’s totally up to you, being it’s your photograph, your story.


![]()
Get the Latest Photo Tips, News & Reviews from Shutterbug!
| Camera Reviews Other Reviews | Mobile Reviews Photography Reviews Columns | News | Features | How-To | Resources |
 © 2026 Shutterbug
AVTech Media Americas Inc., USA
All rights reserved