- REVIEWS
Camera Reviews 
More Reviews Mobile Reviews Photography Reviews - GALLERIES
- VIDEOS
- BUYER'S GUIDES
Brighten & Sharpen Eyes for Portrait Photos That Jump off the Screen (VIDEO)

Ask several accomplished portrait photographers to name the key component of an image, and you'll likely receive the same response: "It's the eyes." Making the most of these beacons of personality often requires a bit of straightforward post processing, and that's what you'll learn how to do today.
The following tutorial comes to us from the Lou Imag'in YouTube channel and demonstrates a simple Photoshop technique for getting the job done to perfection—even if you're inexperienced at portraiture or editing images in Photoshop. Maybe you're photographing a models indoors, making environmental portraits with available light, or shooting causal images of family or friends. Whatever the task, this easy approach will boost the quality of your results.
The instructor named Lou is a professional photo retoucher and experienced travel photographer who also shoots the occasional people picture. In barely three minutes she walks you through a simple Photoshop technique for deepening the gaze and making a model's eyes POP—all in a very natural looking way.
In fact, Lou's method is so simple that only one adjustment layer is required to accomplish this essential task. The process begins by zooming in on the image and navigating to Photoshop's Curves panel. Then you find the brightest area of the eyes (other than a reflection) and drag that spot on the Curve upwards.

Next Lou locates the darkest portion of the eyes and does the opposite; namely dragging that point down. Now it's time for a Mask, and you'll why and how to make it invisible. Lou then chooses a Brush with 20% Opacity and paints inside the eye—taking care to avoid any lashes or skin surrounding the eye.
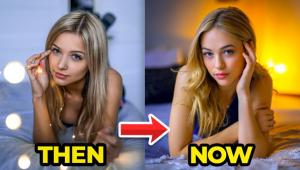
This enables you to boost contrast, color, sharpness, and other parameters of the eye—all without affecting other portions of the shot. Lou advocates taking a very subtle approach, to maintain a realistic look, so you may have to zoom in on the before/after images to appreciate the effectiveness of the final result.
Remember, with portraiture "the eyes have it," and despite the subtlety of this approach it can make a big difference in the impact of your portrait photos. After watching this lesson head over to Lou's instructional YouTube channel where there's much more to learn.
And on a related note, be sure to check out another tutorial we posted, explaining how to use Photoshop's High Pass Sharpen and White Balance tools to edit portrait photos for a flattering effect.
- Log in or register to post comments


![]()
Get the Latest Photo Tips, News & Reviews from Shutterbug!
| Camera Reviews Other Reviews | Mobile Reviews Photography Reviews Columns | News | Features | How-To | Resources |
 © 2024 Shutterbug
AVTech Media Americas Inc., USA
All rights reserved