- REVIEWS
Camera Reviews 
More Reviews Mobile Reviews Photography Reviews - GALLERIES
- VIDEOS
- BUYER'S GUIDES
Making Digital Contact Sheets From Negatives; A Hybrid Solution For The Film/Digital Photographer
With labs charging from $8-$12 or more per color contact sheet, you can save
the cash by doing them in your own computer darkroom studio. Moreover, this
process gives you working digital images of entire rolls that you can inspect
close-up on your monitor. As digital image files you can mark them up on screen,
adjust orientation (horizontal/vertical), excerpt selections to send as JPEGs,
and of course, adjust the image quality. You can also print them out and treat
them like normal
contact sheets.
Step 1 |
|
 |
|
|
For those of us still processing our black and white at home, but who have abandoned the chemical print darkroom in favor of digital scanning, this is the answer for making contact sheets. And it's also a great way to archive all your old color negatives that might have become separated from the prints.
What You'll Need
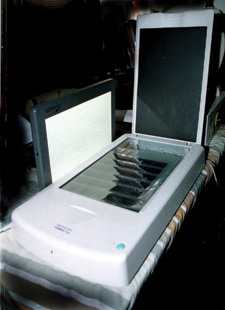
You'll need a flat-bed scanner and a light box. Both should be at least
8x10.5". Most flat-bed scanners are this size or larger. The choice of
light box is a bit more tricky. The mini light boxes are too much trouble, since
their small size requires two (or more) passes. The big bulky ones are useable
but impractical. The best ones for this purpose are thin and have the required
lighted surface size. I use a Promaster LP-400 Light Panel. It is 3/4"
thick with an 8x12" illumination surface. My scanner is the Microtek ScanMaker
V6UPL, which has more than enough scanning surface. Most other flat-beds will,
too, since they're used for at least letter-size documents.
Step 2 |
|
 |
|
|
Setup Procedure
Cut your negatives and sleeve them in letter-size clear storage pages. PrintFile
stock number 35-7B or its wider cousin, 35-7BXW (extra wide) will both work
fine for 35mm; also Clear File's 11B (holds 20 frames), 12B (35 frames),
or 12D (35 frames with data panel). Just remember that a five-frame strip is
a little less than 7.5" long, and a six-frame strip is nearly 9"
long, wider than most scanners. The extra wide page will accommodate six-frame
strips, but you may not be able to use its full width. For 120 negatives PrintFile's
120-4UB works fine. It will not work for sleeved negatives or transparencies,
however. For that you'll have to go to products by ResFile or Clear File's
16B or 17B. If you're working in 4x5, Clear File's 18B or PrintFile's
45-4B will work.
This will make life much easier than if you lay them out on the scanner individually,
since you'll waste time aligning and realigning them. Don't worry
about dust at this point. If you get your negatives back in long continuous
sleeves from your lab, keep the sleeves on when you cut the negatives, if they'll
fit into the pages. This will reduce dust. If you're using 120 film you
can buy pages that will accommodate sleeved film.
Step 3 |
|
 |
|
|
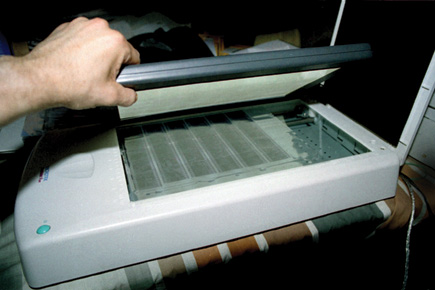
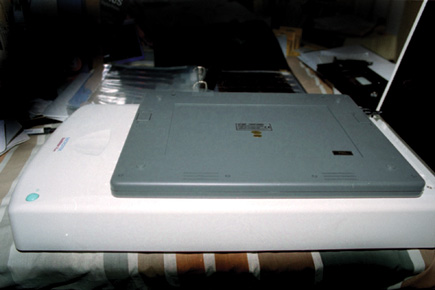
Lay the negative page out carefully on the scanner. Place the turned-on light
box on top, light side down. Adjust the scanner controls on your computer to
handle negatives, transparencies, color or black and white, whatever you're
using. I usually increase the contrast to halfway between default and maximum.
I leave the color balance at default, though I often find that the color comes
out much truer after the individual scan. If color is critical at the contact
sheet stage, you may have to experiment to find the most accurate color for
your combination of film and scanner. The light source of most light boxes and
scanners is supposed to be close to daylight, but you still may have to make
adjustments. Use the preview function to get the positioning just right, since
you may not have a lot of tolerance on one side or the other, and you don't
want to lose any part of your image.
|
| |||||||||


![]()
Get the Latest Photo Tips, News & Reviews from Shutterbug!
| Camera Reviews Other Reviews | Mobile Reviews Photography Reviews Columns | News | Features | How-To | Resources |
 © 2026 Shutterbug
AVTech Media Americas Inc., USA
All rights reserved