- REVIEWS
Camera Reviews 
More Reviews Mobile Reviews Photography Reviews - GALLERIES
- VIDEOS
- BUYER'S GUIDES
Adobe Photoshop Elements
Affordable Image Editing For The Photo Ethusiast
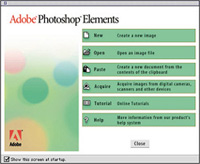
It was just a matter of time before Adobe would fill the gap between PhotoDeluxe and the full version of Photoshop. The increasing rate of sales of digital cameras was the signal to Adobe that it was time for Adobe Photoshop Elements. The only surprise to me was the estimated street price of $99, and the name Elements. The name, on second thought, is not that surprising when you realize that the brand that has sold the most digital cameras is Sony and that the majority of their sales have been to business and institutional use. So Elements is directed to not just the photo enthusiast market, but also to businesses, institutions, and people doing web creation. So, does Adobe's "Digital Darkroom," have all of the things a serious photo enthusiast needs and wants? Well, just prior to Adobe's first showing of Elements at the Photo Marketing Association convention in Orlando I received and began working with the new application. Here are my impressions. A Familiar Face |
|
As soon as Photoshop Elements is fully open, the interface will be quite familiar to anyone who has worked with Photoshop 6.0, although a couple of the menu names are different and the selection of each menu drop-down item varies considerably from 6.0. Below that are mostly familiar action icons to perform things like Save, Copy, etc., in addition to a Well with tabs providing drop-down, tear-off dialog windows. Several of these are new, while others like Navigator, Layers and History are familiar to Photoshop users. There are two new ones, Recipes and Hints, that are interactive information and instructional resources. The new user will find that these additions make the fabled steep learning curve of Photoshop a gentle incline. Hints And Recipes |
|
Recipes, on the other hand, provide a fuller description as well as instructions on the application of the selected process. These are chosen from the menu options. Other functions are also accessible from the tabs in the Well. The Recipes table of contents is available from a drop-down list at the top of the Recipes window. The dialog explains the process in numbered steps. There's also an occasional interactive arrow icon that opens the dialog window for the process. To a very large extent, the basic operations of Photoshop Elements can be learned without ever cracking a book. This ease comes from having Hints and Recipes open on screen and following the descriptions and instructions. This allows you to learn each capability of Elements as you practice them. Preference & Options |
|
Working With Adobe Photoshop
Elements Some of the features that are included in Elements and not Photo-shop 6.0 are a definite advantage, including the Browser. This is a thumbnail generation and storage facility that makes finding and selecting an image stored on your hard drive, CD, or other storage device connected to your computer, much easier. Elements stores and remembers the location of each folder of files, so when you return to it all of the stored thumbnails pop up in a couple of seconds. This saves having to have a separate thumbnail/database utility, and it is a convenience provided from within Elements. Photoshop Elements shares the same basic application structure as Photoshop 6.0, including the Plug-In architecture. So any plug-ins you may have in PhotoDeluxe or Photoshop 5.0 LE may be transferred and will function in Elements. The only exception to this is some scanner driver plug-ins designed for Macintosh Photoshop 5.5 or earlier. I found this out when I directed Elements Preferences to my Plug-Ins folder in Photoshop 5.5, and found the scanner drivers did not function properly until I installed the Photoshop 6.0 version of the driver directly in Elements. I then could use both my Microtek ArtixScan 4000t and the Epson Perfection SU 1640 with the TWAIN 5 driver to do some scanning. |
|
Although Photoshop Elements does not have specific access to scanner input color management, Plug-In drivers like LaserSoft SilverFast 5 include this in their options. Once set up, and pointed at all of the correct profiles, it provides an exact match between the driver's preview window and Photoshop Elements. Working in Windows, with a TWAIN driver like that of the Epson Perfection 1640 SU will also provide similarly matched results. Levels Check |
|
Automation functions on an analysis of the numeric value content of the image file. If the image file has a typical distribution of values the adjustment it makes will usually be quite good. But, if the image is atypical, the image adjustment can be way off. A natural coloration due to the light conditions of a photograph, for instance, can be mistaken for a color cast that is then removed by the automatic processing, resulting in a falsely skewed result. The Levels dialog is quite straightforward. The histogram chart indicates where the distribution of image information is, so it is easy to identify whether the image utilizes the entire gamut. The method for using Levels is described in instructions in the Recipes drop-down window. There are three eyedroppers to help locate and identify the black, gray, and white points in the image. If the image does not have a pure black, or white, and there is no area in the image which should be a neutral mid-tone gray, you can use the triangular sliders under the histogram graph to set the white and black cutoff points as well as adjust mid-tone position to lighten or darken the image. The only thing you miss by this latter method is that by setting the points relative to particular tone levels in the image, the use of the eyedroppers also removes any color cast. Once you are done, you can then check the result by opening the Histogram from the Image menu selection to see a more precise display of the distribution of image values within the gamut. When first opening an acquired image and optimizing it with Levels, it is not unusual to have the color a little off from how it should appear. Elements contains the Photoshop tool called Hue and Saturation that's ideal for making specific color adjustments. Hue and Saturation is also accompanied by a Recipe set of instructions. Very often, once an image has been optimized with Levels, some colors are what you would like and others are a little off, or either too weak or strong. For instance, the blue of a sky may be too blue. By selecting the Blue channel in the Edit window, and then using the first (left) eyedropper and clicking on the sky, that segment of the color gamut is bracketed in gray between the two color "rainbow" bars. If you make adjustments with the sliders to change Hue, Saturation, or Lightness, the changes only apply to the bracketed segment of the spectrum. A blue sky can be shifted a little toward cyan, and the saturation can be reduced a little, and possibly it will then look more natural to you. |
|
Global Color Adjustments Once an image file has been adjusted, I usually zoom in to about 150 percent and use the Rubber Stamp tool to touch up dust spots and scratches. This job is also covered with instructions in the Recipes drop-down window. Next, I usually will make a print on letter-size paper to proof my work. In Photoshop Elements you get the same advantages available in Photoshop 6.0--a print preview dialog that can be selected from the main File menu. Regardless of the size/resolution setting of the image file you have open, there is a Scale Print Size section in the dialog with a button to scale the image to the maximum printable area of the paper size you have chosen in Page Setup. Once this button is checked a large thumbnail on the left side of the dialog window shows how the image will appear on a print. Fun Stuff |
|
The traditional feature creative digital photographers probably use most in Photoshop is Layers. This feature's functional control is via a window opened from the Well in addition to access from the main Menu bar. Its use is also supported with instructions in Recipes. One way you can use Layers is to extend the capabilities of all of the fine creative and natural paint filters provided with Elements. With an image open, you can go to the Layer menu item and select to open two or three Copy Layers. Then, with the Layers dialog window torn off from the Well and in your workspace, you can select each layer copy of the image and apply a different filter. Then, one at a time, you can adjust the transparency or the Mode, or both, and blend two or three different filter affects to the same image. This blending of filtered image layers produces a more subtle and unique image effect. Say you have a portrait open in Elements and want to change the background to an image you have as a file on your hard drive. Just use the Select menu and click on All, then go to the Icon bar and select the copy command. Close the portrait image and open the background image. Go to the Paste icon and click it. Now you have two layers when you open the Layers dialog window from the Well. Next, with the portrait layer on top and active, go to the toolbox and select the lower left corner of the Eraser tool so the options pop out. Choose the Background Eraser option. With this tool you can remove the background from the original portrait image and the new background will show through. Once you have removed all of the old background, go to Layers and select Merge Visible, and then SaveAs a new file name, and your portrait has a new background. Layers is also the support and means to apply type and type effects, as well as buttons and other objects over a photograph that you might want to use as a web page. This is done quite simply by going to the Layers menu and selecting a New Layer. Then go to the toolbox and select the text tool and choose either vertical or horizontal type. Once you have selected the font and font size, just type in the letters and words placed where you want on screen. Detailed instructions on using type is yet another function covered in Recipes, so you can have that window open as you work and follow the step by step procedures. If you want to apply affects to the type, use the Layer Styles window from the Well to access and select Text Effects. You can apply any effect simply by clicking on its icon, and the effect will be applied to the type in the layer on screen. Impressions And Recommendations But what I have covered, and a few things I didn't get to work with, are a lot for the expected street price of $99. Most important, the foundation under Photoshop Elements is the same Adobe engine that provides a level of image processing quality that keeps Photoshop the most highly respected photo image editor for PCs and Macs. If you have or are about to start a digital darkroom, Adobe Photoshop Elements cannot be beat as your foundation software in performance, ease of learning, and ease of use. If you have Adobe PhotoDeluxe or Photoshop LE, the price of an upgrade is $30 less than the $99 street price, so there is no excuse not to have Adobe Photoshop Elements. The application will be widely distributed in retail stores that sell software. For more information call (800) 833-6687, or visit Adobe's web site at: www.adobe.com. |
|


![]()
Get the Latest Photo Tips, News & Reviews from Shutterbug!
| Camera Reviews Other Reviews | Mobile Reviews Photography Reviews Columns | News | Features | How-To | Resources |
 © 2026 Shutterbug
AVTech Media Americas Inc., USA
All rights reserved