| |
Here
are the three really critical lenses to own if you want
to achieve really crisp images wide-open. Zooms won't
cut it, so fast primes are the way to go. Clockwise from
top left: Canon's 135mm f/2 L, Canon's 85mm
f/1.2 L, and Canon's 90mm f/2.8 TS-E Tilt-Shift
lens.
|
|
Recently I've begun
to look at things differently. As a working commercial photographer,
much of my work consists of really tack-sharp images. While I've
always worked with foreground and background areas that may be out of
focus, the "look" has always been "sharp."
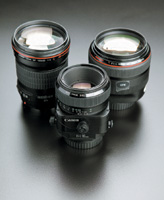
Changes in the style of editorial and commercial images over the past
seven or eight years have changed the way I approach many assignments
today. We've all seen the narrow depth of field product photography
popularized by lifestyle magazines like Martha Stewart's Living,
where the photographer holds just enough depth to get the front of the
object in focus, then everything else falls out of focus quite rapidly.
In the mid-1990s the shifted focus plane was all the rage. Using either
a view camera or a funky lens mount like the wild Zorkendorfer, creative
photographers found that by swinging their film planes in the "wrong"
direction, they could get some deliciously soft and creamy out of focus
areas. I find that I'm getting more and more calls from clients
looking for the really short depth of field look, so it was time for
me to really figure out how to create this effect reliably.
|
| |
These
shots of pro model Lauren Michelle show just how dynamic
this look can be. A close look at these images show that
only one eyelash is really sharp--everything else gets
soft and dreamy without the flat "out of focus"
look that slower lenses produce.
Photos © 2004, Jay Abend, All Rights Reserved
|
|
The Wide-Open Dilemma
It should be obvious to any seasoned photographer that most lenses perform
their worst when they are wide-open. In general, the really sharp "sweet
spot" for most lenses, even the most expensive prime lenses, is
in the middle of the aperture range, around f/5.6-f/11 for most of us.
It is also true that as you stop down toward the lens' smallest
aperture, your depth of field increases dramatically but the lens will
also soften up a bit. Sure, sometimes these rules don't hold fast,
since some very inexpensive zoom lenses perform fairly well wide-open,
but in general you'll find that wide-open can be a dangerous place.
Famous Fast Optics
In the world of shallow depth of field photography there are a handful
of lenses that are legendary. For example, Leica-M owners speak reverently
of the 50mm f/1.0 Noctilux. Additionally, I've created some amazing
images with a Nikkor 55mm f/1.2 on a Nikon F2, and made some nice available
light portraits with a Canon 85mm f/1.5 on a Canon rangefinder body back
in the '80s. In modern glass few lenses can match the Canon 85mm
f/1.2 for sheer "buzz." Wherever you go, fashion and portrait
photographers are talking about this lens, or Nikon's equally desirable
85mm f/1.4 Nikkor. Other hot glass for the wide-open look? Several manufacturers
make a 135mm f/2 lens, and the classic sports lens, the 300mm f/2.8 is
also a champ for headshots with blown-out backgrounds.
|
| |
I like this look
for portraits. Here Lauren Michelle sat on some stairs and
I got at least 10 ft above her. Tightly cropped with a 135mm
f/2 wide-open, only her face is sharp--from the neck
down it blows out quite nicely.
|
|
Besides shallow depth of field,
artificially throwing parts of the focal plane out of focus can also make
for some dramatic images. The two leaders for this kind of photography
are Nikon's 85mm f/2.8 Micro-Nikkor and Canon's 90mm f/2.8
TS-E. Both lenses are engineering marvels, allowing full automatic operation
(though manual focus only) with provisions for lens shift and lens tilt.
By rocking the lens fully to one side and shooting wide-open, you can
get a full-length body shot with only about a 12" slice of critical
focus. Everything else is soft and blown out, but with the dreamy, creamy
"soft lens" look that no Photoshop filter can recreate.
Unfortunately, when it comes to the hottest looks with the hottest lenses
there is no cheap way out, though I have found that a simple 50mm f/1.4
lens can do a fabulous job as well. I own a 50mm f/1.4 EF lens for my
EOS-1Ds digital camera, but probably break it out about once every two
years. That's a big mistake, since I've noticed that this
lens produces some of the nicest images of any lens I own. Even brand-new
50mm f/1.4 lenses for any camera system are hardly bank-breakers, so if
you only shoot with a medium aperture zoom now, do yourself a favor and
get one good normal lens.
|
| |
Wow,
I love the tilt-shift lenses! Nothing compares to this look.
I swung the lens way out to only get a small slice of focus,
but as you can see both her face and the building (approximately
100 yards away) are sharp--cool!
|
|
The Manual/Autofocus
Difference
When shooting wide-open you remove the typical safety net favored by many
autofocus shooters. Unlike focusing by eye, your autofocus camera racks
the lens until the contrast in the critical points of the image are at
a peak level, then it stops. According to where your lens was focused
before the shot, you'll either have focus at the front or back of
your subject--rarely in the center. When you focus by hand you tend
to rack through the focus points, using your brain to average out the
focus points and give yourself a bit of depth. Even wide-open the difference
between manual and autofocus can be startling. No lens exacerbates this
problem more than Canon's 85mm f/1.2. This big, heavy lens has a
fairly slow autofocus system, since those big heavy elements take a while
to get moving. This lens should definitely be focused manually.
I also like to bracket all of my wide-open shots. Not bracketing for exposure,
as is the custom, but bracketing for depth. In other words, I manually
focus right at the front of the subject, then fire off a half dozen shots,
slowly rotating the focus ring through the zone from front to back. This
works great on product shots, but for people there are those times when
the right expression doesn't match the correct focus point.
|
| |
Here's
a look that I've been getting with a 4x5 view camera
for years, with the back swung out to really limit the depth
of field. While this high-end Canon 90mm f/2.8 TS-E is a
wonder, I've also received decent results with a cheap
Russian tilt-shift on a Nikon body.
|
|
Exposure Considerations
One of the problems with shooting this style is exposure. While most of
us fight for light, trying to get a fast shutter speed and decent aperture
combination, shooting with your lens at f/1.2 creates an entirely new
set of problems. With a typical SLR camera at ISO 100 an f/stop of 1.2
in broad daylight results in a shutter speed of 1/4000-1/8000 sec. Unless
you own a high-end SLR you're likely limited to 1/1000, 1/2000,
or 1/4000 sec. Did you ever think that 1/4000 sec would be too slow? Of
course slower film or forcing your digital SLR into a custom function,
low ISO mode are solutions to this problem, but keep in mind that sometimes
too much light will be an issue.
A Digital Alternative?
There's a lot of talk about using electronic means to create this
effect. Sure, I've used the Gaussian Blur filter in Photoshop over
the years, as well as Andromeda's excellent "VariFocus"
plug-in. Photoshop CS now has a very effective "Lens Blur"
tool, which does a good job of recreating this effect. None of them, however,
really touch the look of a real wide-open or swung lens. Even if you could
do a terrific job of carefully silhouetting your foreground subject, in
my opinion you'll never really duplicate the look that you can simply
create optically with the right lens.
|
| |
You
don't need expensive glass to get similar effects.
For this publicity shot of psychologist and author Edward
Klein, I used a plain-old 50mm f/1.4 lens on a Canon EOS-1D
set to ISO 400. Even though we were in a busy and cluttered
restaurant, a simple window and a white card for bounce
reflection took care of the lighting. Handheld at f/1.4
at 1/60 sec, I got a lot of very crisp, usable images.
|
|
The Fuzzy Part
The really cool part of this kind of photography is the fuzzy stuff. Landscape
photographers refer to the out of focus background as "bokeh."
Outdoor shooters argue about the lenses with the nicest bokeh. How can
one lens be prettier out of focus than in focus? Well, a lot of it has
to do with the optical design, and a lot has to do with the iris of the
lens. Some cheapo lenses use a crude eight-blade iris, which creates coarse,
octagonal-shaped highlights and very low contrast out of focus areas.
The expensive lenses often use 22-blade curved leaf iris units--for
nearly perfect circles at all apertures. Add that to the precision coatings
and asphercial lens elements in the better lenses, and you can see how
they outperform cheaper lenses. Who's got the prettiest bokeh in
the world? In my opinion it's a tie between Canon's 85mm f/1.2
L and their gorgeous 200mm f/1.8 L. Neither is cheap but both are great.
Dealing with this narrow depth of field can make for some very exciting
photographs, and some very disappointing photo shoots. Even experienced
pros can come back with hundreds of unusable images (take it from me).
You can always play "safety" and shoot a bunch at f/4 just
to ensure that you have something worthwhile, but I find the methodical
manual focusing, painstaking focus bracketing, and patience can really
do the trick.
Try it out. If you have the right kind of camera and lenses, I think you'll
be impressed at how different your images look when shot to intentionally
limit the depth of field.
|