- REVIEWS
Camera Reviews 
More Reviews Mobile Reviews Photography Reviews - GALLERIES
- VIDEOS
- BUYER'S GUIDES
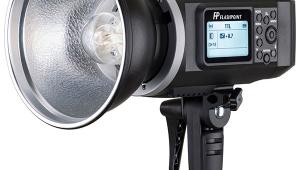
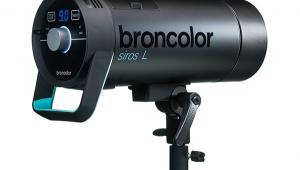
Lighting Review: Profoto B1 500 AirTTL Battery-Powered Portable Studio Light

Profoto B1 lights are the first studio lights to feature built-in TTL. They also have their own battery and controller so you can go on location and just pop up a light and start shooting. As of this writing they are available only for Canon, but by the time you read this the Nikon version should be available as well. To me, this is tailor-made for location shooting, so that’s where I did my tests.
First, let’s look at some basic info; if you want to delve deeper just follow the links at the end of this report. Essentially, the B1 is a 500 watt second light that you can plant on a light stand, turn on, mount the controller, and start shooting. It will fire off approximately 220 full-power flashes on a full charge. Full-power pops require about two seconds to recycle. There is no AC. A battery level indicator is both on the battery and on the back of the unit. You control output, full or manual power, groups, ratio, modeling lights, and more from the Air Remote TTL-C controller mounted on your hot shoe. You can use the modeling lights since they are LEDs and won’t drain the battery in five minutes, unlike most battery-powered lights.
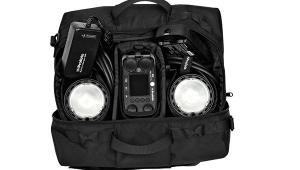
You have access to the entire extensive catalog of Profoto light-shaping accessories; I was supplied with a few of their latest umbrellas. The lights are beautifully made, the controls are mostly intuitive, and you can fit two lights, two battery chargers, and the Air Remote TTL-C in the cool Profoto backpack I was supplied.

Test Shoots
My first shoot was at Atlantic Gymnastics in Dover, New Hampshire. I used two lights. For the action shots I used a 51-inch Umbrella Deep White L as the main light on my model from the front right and the second B1, with no light modifier, to light her from the left side. I used the Air Remote TTL-C to power on the lights and initially set both lights at the same power.
This locale proved why speed in setting up really comes in handy. We only had one hour before we’d be bombarded with kids swinging and bouncing from everywhere, so we had to work fast. The first location I thought would work didn’t, so we had to move the lights to another spot. Instead of setting the lights up where I wanted and then metering and adjusting them, I just popped them into place in the new area, took a quick shot, saw it looked OK on the back of my camera, and fired away.

All Photos © Steve Bedell


I put my main light on the right under Group A and my accent light from the left in Group B using the controller. I did notice Group B seemed a little “hot” so I used the Air Remote TTL-C to knock it down a stop and then, after a test shot, a bit more. My Group A light on her face and front was perfectly exposed.
After doing the action shots we took our model to another area of the gym and took the second shot of her with her teammates in the background. I kept my main light in the umbrella under Group A and placed the B light behind her. I used the Air Remote TTL-C to set the main light on +/-0 and set the B light the same. Since the B light was hidden I had more control over it by switching over to Manual and adjusting from camera position. Note that in TTL, you can vary the output by two full stops in either direction, but in Manual you have the entire nine-stop range to work with.
My next test shoot was at the beautiful Silver Fountain Inn in Dover, New Hampshire. We took photos in a formal room and one of the guest rooms with our model. I wanted the light to be softer this time so I used the 51-inch Umbrella Deep White L with a supplied white diffuser sock. Although the diffuser sock softens the light further and eats up 1.5 stops, with TTL you don’t need to do any manual calculations.
Setting up was a snap. I did not want the flash to overpower the surroundings, so I shot at a moderate aperture of f/5 at ISO 400 and adjusted the shutter speed to get the background and incandescent lights the intensity I desired. I took a few test shots using the one light in Group A and found I did not need to make any adjustments in flash output; it was dead on in TTL mode. I landed on 1/60 sec to get the look I was after and took all the shots using the Group A setting at +/-0.


We then moved to a guest room. I moved into position and fired off a couple of test shots still using the one light in Group A from slightly left of camera since I wanted a flatter light for this image. The flash exposure was once again right on the money and required no adjustment, so we began shooting immediately.
After the standing poses we did some others using the bed and pillows and shooting right under the big umbrella for a very soft “butterfly” light. The TTL not only nailed the exposure but I continued using it in that mode and when I looked at the images later I was able to see how remarkably consistent the exposures were. During the testing I never once used my flash meter, but was able to make all adjustments and test shots from camera position using the Air Remote TTL-C controller.
Conclusions And Recommendations
Like all Profoto gear, the B1 lights and accessories are built to take years of hard use. I particularly like the lamp head design where you just throw a cap on it and you don’t worry about breaking anything. The battery design and capacity are exemplary.
The Air Remote TTL-C controller is so simple to use that you’ll be off and running in five minutes. Once you get used to using it, the integration of radio control plus TTL makes everything else seem like old tech.
I found the TTL to be very accurate. If you have a moving target, like my gymnast, shoot away in TTL. However, if your subject is more stationary, you may choose to take a test shot in TTL and then switch to Manual so exposures are identical.
The price of the Profoto B1 is around $2000, clearly aimed at the pro market, so let’s look at who would use it. I see wedding shooters taking full advantage of this light. I also see many portrait photographers like me using them for family and individual portraits. They set up quickly and can get you accurate exposures with little effort on your part. With the cost of top-of-the-line speedlights going for $550 to $600 with only a fraction of the power, the B1 lights make economic sense for many applications. If you have the need and the budget, these lights should be high on your shopping list.


Prices
Profoto B1 500 AirTTL: $1995
Profoto Air Remote TTL-C: $395
For more information and full specs, visit Profoto at http://profoto.com/us/home.


![]()
Get the Latest Photo Tips, News & Reviews from Shutterbug!
| Camera Reviews Other Reviews | Mobile Reviews Photography Reviews Columns | News | Features | How-To | Resources |
 © 2025 Shutterbug
AVTech Media Americas Inc., USA
All rights reserved