- REVIEWS
Camera Reviews 
More Reviews Mobile Reviews Photography Reviews - GALLERIES
- VIDEOS
- BUYER'S GUIDES
The Opus Pro OPL-L300-Series AC/DC Location Kit; This Strobe System Goes Where You Go
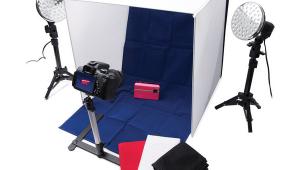
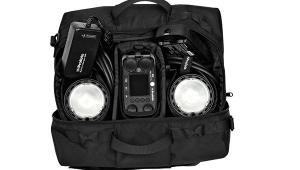
I've had many opportunities to work with battery-operated studio strobe systems. My problem with them was that they were heavy and bulky, not powerful enough, or simply too costly. Then I came upon the Opus Pro OPL-L300 location kit. I immediately noted that the 300 ws monolights were compact. Then I hefted the battery pack. Hmm, not bad, I thought. I could actually carry this stuff around on the subway here in New York City if I had to, not to mention schlep it up and down two flights of stairs. With this kit in hand, I was well on my way to a portrait session of a family with an expectant mother.
 |
|
 |
|
 |
|
|
Ahead Of The Game
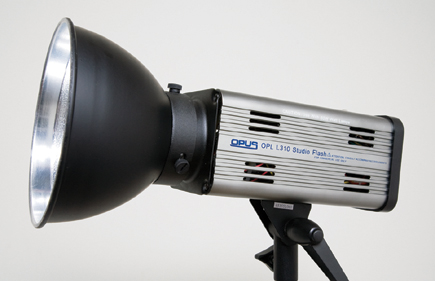
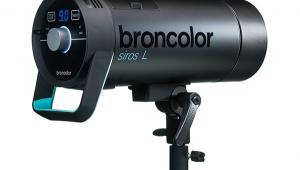
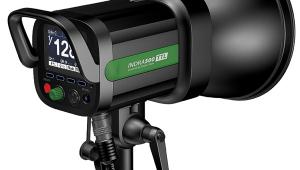
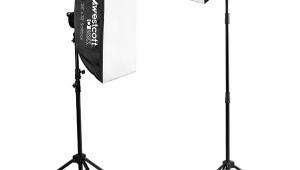
The beauty of these heads (designated OPL-L310) is their simple design and compact size, not to mention 300 ws output. You can easily heft each with one hand. In fact, this squarish head (as seen from the back) practically fits in the palm of your hand. And there was enough power so you didn't feel you'd be sacrificing anything when using something like a photographic umbrella.
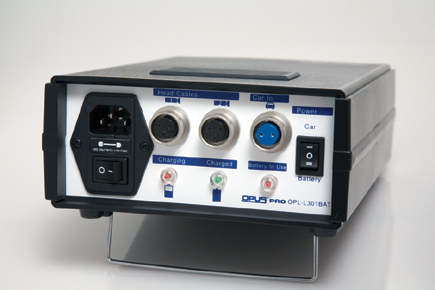
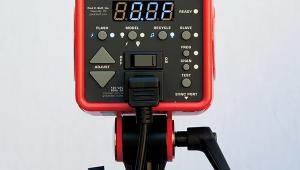
All the controls reside on the back panel, consisting primarily of four rocker switches in a row. Normally there's no need to mention the on/off switch, except that here it only comes into play when running the unit off mains current (AC). When the battery is used, this switch has no effect and shouldn't be engaged. That brings us to the second and even more important switch: the AC/DC (battery) selector. I'd prefer this to be the first switch on the panel, so it's not easily overlooked--and maybe color-coded for emphasis. Make sure to make the proper selection before proceeding.
The two controls that follow are different in that these are three-way switches. A bit cryptic in that you're not sure which is which, the first of these two (the third rocker switch on the panel) controls the 60w quartz-halogen modeling light. This can be set to full/off/1/2, in that order (top to bottom); it is not proportional, so it really is only a rough guide at best. And when using the external battery pack, the modeling light is not even an option--internal circuitry bypasses it. Since the protective cap fits over the flash tube, which comes attached out of the box (but is user-replaceable), I didn't even bother screwing in the modeling lamp when using the battery pack--it would just be more work with no payoff. (IMPORTANT: Handle the modeling lamp and flash tube carefully and avoid contact with fingers; preferably use a darkroom glove--available at photo retailers--and don't screw the modeling lamp in too tightly.)
The final rocker switch controls flash output. This one is even more confusing. The upper position (single dash indicator) gives you full power, while the bottom position (two dashes) cuts power in half. The middle position--the "o" normally used to indicate "off"--marks 1/4 power. Certainly not a natural progression or a conventional way of doing things, at least not to someone who is used to incremental or continuous output control, which is something I missed here. Fine-tuning output may require you to move a light nearer to or farther away from the subject to get the effect you're after (remember, set shutter speed at your camera's X-sync speed or slower, and primarily adjust f/stops to control exposure). But to be fair, the continuous power variator found on other Opus units had to be sacrificed to make room for the battery switch and DC socket. You'll also notice that this flash requires a mini-sync cable, which is less robust and seemingly more prone to damage when mishandled. (IMPORTANT: When reducing output by way of the power switch, manually pop the flash, either remotely or via the test flash button on the back panel, to dissipate the stored energy and thereby avoid overexposure at the wrong flash output.)
 |
 |
|
|
||
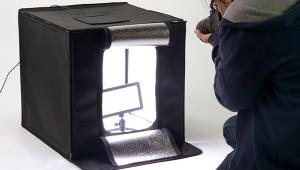
The photocell sits atop the housing, and can be switched on or off via a back-panel button. I tend to keep this in the "on" position, but switch it off when triggering/testing lights individually. I slaved the second strobe to the first one, when necessary, firing the flash via a radio remote triggering system I own or using the supplied sync cable.
|
| |||||||||


![]()
Get the Latest Photo Tips, News & Reviews from Shutterbug!
| Camera Reviews Other Reviews | Mobile Reviews Photography Reviews Columns | News | Features | How-To | Resources |
 © 2025 Shutterbug
AVTech Media Americas Inc., USA
All rights reserved