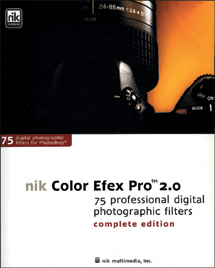
nik Color Efex Pro 2
nik Color Efex Pro 2 Quick Look
· 75 filters
· $299.95 (Street price)
· True Light processing
Further Information
nik Color Efex Pro 2
http://www.nikmultimedia.com
 Last
year I reviewed the extensive range of effects available with the original version
of nik Color Efex Pro (CEP) here. Now, the makers of this versatile plug-in
collection have added 32 new filters, an improved interface, support for 16-bit
images, the ability to apply effects to selected portions of a photo, and powerful
controls to preserve highlight and shadow detail. Whether you want to inject
spectacular special effects or enhance your images while maintaining realism,
nik CEP 2 offers impressive and wide ranging choices.
These 75 digital photographic filters work inside any program that accepts Adobe
Photoshop specification plug-ins, including Photoshop Versions 5.5 through CS,
Elements 1 and 2, Adobe PhotoDeluxe, Photoshop LE, Jasc Paint Shop Pro, Corel
Painter and PhotoPaint, Ulead PhotoImpact and Microsoft Digital Image Pro. Through
easy to use preset style choices and slider controls, each filter can be carefully
tweaked for a wide range of effects, variations and combinations.
New Features
In addition to the striking new filters described, the first thing you'll
notice about Version 2 is an improved user interface with a large, zoomable
preview. You can choose to show a pair of before and after images, or one larger
image, which shows the applied effect filling the preview window. To check how
the effect compares with the original, simply click the On/Off button at the
top of the window to toggle between large views of the effect and the original
instantly.
 |
|
|
Furthermore, nik has added valuable features to control the tonal range of your images. At the top left of each dialog box, below the filter's name, click on "Advanced" to bring up the Advanced panel. At the top you'll see a histogram of your images (just like Levels in Photoshop) which shows the distribution of tonal values in your photograph, highlights on the right, shadows on the left, midtones--where else--in the middle. Below this are two sliders to fine-tune and preserve the detail in your photo. Increase the value of the Protect Highlight slider to preserve detail in the brightest portion of the image. Conversely, to protect detail in the darkest parts of the image, increase the Protect Shadows value. As you move these sliders you can monitor their effect in the histogram.
 |
|
|
To a similar end, Version 2 includes what nik calls True Light processing "designed to preserve the relationship between colors, contrast, and details in the image to provide more natural film-like results." Integral to each Version 2 filter, this approach is said to prevent banding and preserve fine detail.
 |
|
|
Rather than applying an effect to an entire image, one way to distinguish your work is to apply effects or filters to only portions of it. The new Selective module enables this, and you don't even have to draw selections. Simply activate the feature, select any filter from the Selective palette and "brush" on the effect by dragging with your mouse. You can both paint and erase the effect digitally. If you have a Wacom graphics tablet, you have the added control of pressure sensitivity. Note, though, that the Selective feature is available only for Photoshop and Elements.
 |
|
|
If your digital camera can shoot in Raw mode, I recommend that you use this capability, especially for contrasty scenes and difficult lighting situations. When using the Canon 10D and Digital Rebel, for example, I can open and save the Raw files from these cameras in Photoshop CS as 16-bit files. These contain tons more information than conventional 8-bit files, which means you have a lot more exposure latitude, and can perform multiple corrections and effects with virtually no damage to the file. Nik CEP 2 now supports 16-bit files, so you can enjoy this benefit when applying the nik filters.
 4 |
 6 |
|
 5 |
||
|
||
- Log in or register to post comments


