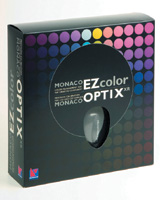
Monaco's EZcolor/OPTIXXR
Take Control Of Color Management

Say the words "color management" and some digital photographers and printers break into a sweat. Others swear that what they don't know can't hurt them. But most believe that taking control of color management is essential to a professional workflow that ensures that what you shoot and scan resembles closely what you see on your monitor and print or present on the web.

For both Windows and Mac, Monaco Systems has greatly simplified the once daunting process of building color profiles for your monitors, scanners, digital cameras, and printers to deliver accurate and consistent color across devices and paper and ink types. These profiles characterize how each device represents color. Then, image-editing and printing software such as Photoshop Versions 5 through CS and your printer drivers can apply this information to maintain consistent, accurate color from one device to another.

#1

#2

#3

Calibrate And Profile Your Monitor
To give you a sense of how all this works we'll go through just one of the processes--profiling your monitor. With the Monaco software installed, let the monitor warm up for 30 minutes to an hour (15 minutes for an LCD) in order to stabilize. Also, don't use the colorimeter suction cup on an LCD screen as it can cause damage to that surface. Set the lights in your workroom to the level that you use when working with the monitor. For the best results, avoid bright lights or strongly colored objects near your workstation. Disable the Adobe Gamma Control Panel as described in the Monaco User Guide.

1. Launch the MonacoEZcolor software. From the screen (#1), choose "Create Monitor Profile."

2. Now, select Calibrate and Profile, then choose your monitor type, CRT or LCD. The User Guide includes separate chapters for each type. Next, the software checks your colorimeter.

3. Now, move to the Select Profile Parameters window where you choose the white point settings, and choose a gamma setting, usually 1.8 for Mac and 2.2 for Windows. Depending on your system, you may set a hardware white point and maximize the monitor's dynamic range. The most common white point for professionals is the industry standard color temperature for viewing of either 5000K or 6500K. Further, the Monaco User Guide describes various white point settings in detail.

4. Measure the Lightest Black by first setting your contrast and brightness controls to their maximum. Then, following the on-screen guide, place the colorimeter over the image displayed and fix it in place (#2). Click "Measure" and the software sets to work.

5. Measure the Darkest Black.

6. Set Brightness. With the colorimeter still in position, click "Measure" again. Once you have completed this step, do not change the brightness or contrast controls, or the profile will no longer be accurate. With analog dials or knobs, it is often best to tape them in position. With push button digital controls, be sure not to accidentally change them.

7. Measure Color Patches. With the sensor still in position on your screen, click "Measure." The software sends a rainbow of 35 color patches sequentially to the monitor, evaluates them with info read by the colorimeter, and determines the monitor's range of reproducible color.

8. Save the Profile. Click "Create Profile" to name, build, and save the profile (#3).
Now you're ready to profile your scanners, digital cameras, and printers. If you have a reflective scanner, you can profile both an RGB scanner and a printer together.

#4

4. To profile a printer and scanner, you print this target file from the EZcolor software, using the paper, ink, and printer settings for which you want to create a profile. 5. Be sure to write down the paper, ink, and printer settings for which you are creating a profile. In this example, I profiled Epson's Matte Paper-Heavyweight at a printer resolution of 1440dpi on the Epson Stylus Photo 1280 printer. 6. Further, be sure that all color correction and management options in the printer driver are turned off, as shown in this screen shot of the Epson printer driver. 7. Attach the Monaco IT8 print to your print of the target file (after it has dried completely), then scan them together on your flat-bed scanner.

#5

#6

#7

Why do you need color management? Because each device in your workflow reproduces color quite differently. Scanners, monitors, and printers use different color spaces, reproduce different gamuts of color, and have different dynamic ranges. Especially if you are using papers or inks other than those from your printer manufacturer, profiling them for a color managed workflow can make a tremendous difference. If you're printing black and white images with all your inks in order to achieve the smoothest tonal gradations, profiling can help make the prints neutral, without an unwanted color cast.

The Color Management Team
The bundle reviewed here includes both the EZcolor software Version 2.6 and the MonacoOPTIX XR colorimeter--a mouse sized hardware sensor to calibrate both CRT and LCD monitors. With this combination, you can profile your entire workflow by following step by step on-screen instructions from the EZcolor software.

Here's a brief overview: For each of your devices, MonacoEZcolor 2.6 software can create an ICC profile (after the International Color Consortium comprised of Adobe, Kodak, Apple, and Microsoft). After launching EZcolor, you select one of four choices and wizard-style instructions guide you through each process. First, follow the steps to "Create a Monitor Profile"--you'll be setting the optimum brightness, contrast, and white point or color temperature. Then, "Create an Input Profile" for a reflective scanner, transparency scanner, or digital camera. A print called an IT8 target with color swatches and a gray scale is included with the bundle to aid in calibration. If you're profiling a film scanner, contact Monaco to purchase a transparency target. Because of the tremendous variation in film and processing, targets for color negative films are not offered. You can profile a digital camera for repeatable controlled lighting in the studio, but not for constantly changing natural light outdoors. Once you complete the steps, the software automatically generates the appropriate profile and saves it on your hard drive.

If you output to an in-house printer and you also use a reflective scanner, the "Create Printer Profile" option shows you how to create both a printer and scanner profile at the same time (#4-#7). With your printer, you print a target contained in the Monaco software (#4), then place both the supplied IT8 target print and the print from your printer together (#7) on your scanner and scan them simultaneously. The software then compares and evaluates them, and generates profiles for both the scanner and the printer. Ideally, you should make a profile for every printer resolution setting and every combination of paper and ink that you use. Using the same ink set, for example, the profile for a matte paper will be different than one for a glossy stock.

Profile To Taste
Once you've generated your profiles and worked with them a bit, Monaco provides the ability to edit them to your exact taste. Color balance can be adjusted overall, or specifically for highlight, mid tone, and/or shadow areas. Furthermore, lightness, saturation, and contrast can be individually fine-tuned. Of course, to use the profiles, you must implement a color managed workflow using ColorSync on the Mac and the ICM system on Windows.

Real-World Results
So how do the profiles perform? With the generic profiles that ship with ink jet printers, print results can sometimes go awry. Colors can really stray when you use third-party inks and papers. In the color portrait examples shown on page 84, #8 was printed with the profiles supplied by the manufacturer, using the manufacturer's ink and papers. Although the differences in the prints are subtle and may not show well in magazine reproduction, they are significant to the eye. First, there is a yellow/green cast in the shadow on the wall to the left. The mid tones of the hair are also too yellow. Most of the wall color and the skin tones are fairly good, except the pink/magenta in the neck, cheek, and forehead has been slightly saturated. When I shot the photo, there was a significant blush of pink in the model's skin, but not so much as seen here.

#8

8. This portrait of Vivian Balaam was printed with profiles supplied by the manufacturer, using the manufacturer's ink and papers. Note the yellow/green cast in the shadow on the wall to the left. The mid tones of the hair are too yellow, and the pink/magenta in the skin tones has been oversaturated. Differences in the prints are subtle and may not show well in magazine reproduction.
Photos © 2004, Howard Millard, All Rights Reserved

#9

In the Monaco profiled version, #9, the shadow is much more accurate, and there is no yellow tinge in the mid-tone areas of the hair. Further, the saturation of pink in the flesh tones is not exaggerated, and is much closer to the original. Finally, the wall color is more neutral, and the overall contrast of the image is lower, showing more detail in the shadow areas of the hair. In additional black and white tests, not shown, when printing in RGB to use all inks, the Monaco profiles created neutral blacks, while prints made with the manufacturer's profiles had yellow, brown, and green casts.

For professional work or anyone who demands critical color and tonal reproduction, and for printing black and white, the EZcolor/OPTIX bundle produces neutral profiles with good saturation and contrast. Skin tones and large flat areas like even skies are smooth. With generic profiles, you may see banding or posterization in such broad areas. If you generate a profile and still see some banding, use the Edit Profile function of EZcolor to reduce contrast and it should disappear.

Further, unlike some other color management systems, EZcolor uses your own scanner as a color patch reading device. You can keep it accurate by profiling it periodically to compensate for any changes in the scanner lamp.

For anyone seeking to take professional-level control of their color, Monaco's EZcolor with OPTIX XR bundle is a strong value. While MSRP for the bundle is $548, I have seen it priced below $400. Go to the Monaco Systems website, www.monacosys.com, for more information, a Flash demo, and a free trial download of the software. Note: The system requirements are Windows 98SE, Me, 2000, and XP; Mac OS X 10.2 or later (Version 2.5 is available for earlier Mac systems).

X