- REVIEWS
Camera Reviews 
More Reviews Mobile Reviews Photography Reviews - GALLERIES
- VIDEOS
- BUYER'S GUIDES
How to Take Stellar Night Shots of Stars: Better Astrophotography Through Settings And Science
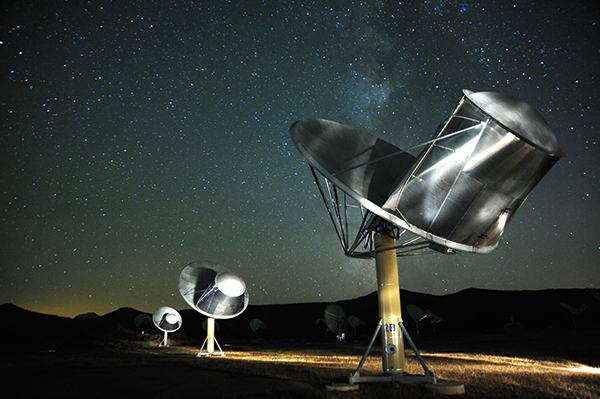
© Seth Shostak
We’ve all seen them: night shots of some wind-weathered rock formation in the American Southwest, backed by a dramatic, star-spangled sky. Earth, the universe, and everything.
Your first thought: “What sort of unaffordable equipment does it take to make a photo like that?” Your second thought: “You know, a 16x20 nighttime pic would sure look good above the pool table.”
So how do you make that shot? Well, you already have the equipment, even if you don’t have the pool table. And thanks to digital photography, just about every hominid with a camera can produce stunning photos sporting a sky full of stars.
The technical problems are two: (1) Stars are dim. Your fancy monolight won’t boost their brightness, not at a distance of a few hundred trillion miles. (2) They move. Well, actually, it’s not so much that the stars move, but that Earth rotates—a fact that, despite its present inconvenience, has some advantages that many appreciate. Such as sunsets.
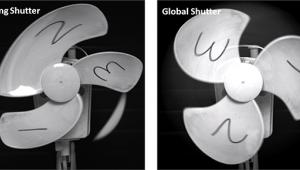
The first problem can be solved by opening up your lens, cranking up the ISO on your camera to at least a few thousand, breaking out the tripod, and making a time exposure. However, keeping the shutter open for more than several seconds is likely to result in stars that look like tadpoles, the consequence of Earth’s rotation trailing them across your camera’s sensor. In most cases, unless you’re a one-eared, Dutch impressionist, you’ll prefer a sky dotted by stars, not laced with stellar streaks.
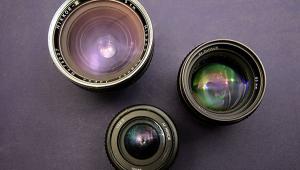
So how long an exposure can you make before trailing sets in? After all, a longer exposure is a good idea, as it will show more stars. Well, maximum exposure depends on a couple of things, beginning with the focal length of your lens. The longer the lens, the greater the magnification and consequently the quicker streaking will become apparent. But it’s also important in which direction you point the camera. If the sky behind your natural-wonder foreground is in the north, where the stars all pivot in small circles around Polaris (aka the North Star), exposures can be longer because the apparent motion is less. If you’re aimed elsewhere, stars parade across the sky more rapidly and streaking will be a bigger problem.
OK, that’s the situation, but what’s the practical implication? I’ll save you the optics and the math…they’re not hard, but make for tedious reading. Instead, I offer you the bottom line rule of thumb: Your maximum exposure should be approximately 600 divided by the focal length of your lens.
So if you’re using a 50mm lens, then the maximum exposure should be 600/50 = 12 seconds. Obviously, wide-angle lenses allow longer exposures, and I frequently call on my 14mm. With the shorter optic, I get more stars, both because the longer exposures make fainter stars visible and because the wide-angle optic includes more sky. Easy, peasy.
Here’s the fine print: The rule above is a good guide to the maximum shutter time for most parts of the sky, but as noted if your camera is aimed northward you can get away with longer exposures. Note, however, that the heavens—and especially the Milky Way—are more interesting and sport more bright stars toward the south.
A few other considerations: Dial in a daylight white balance; that way most stars will be white. But don’t be surprised to find that some will be red or blue. Stars are not all the same temperature, a fact that you won’t be the first to discover.
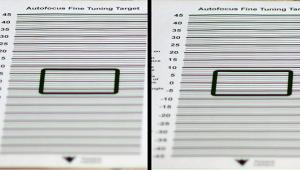
Manually set the focus to infinity, as your camera’s autofocus system will have a nervous breakdown if asked to gauge whether stars are sharp. And of course you’ll also need to balance exposure so that the natural arch or other foreground object is actually visible and not just a black silhouette blocking the stellar firmament. I’ve used portable flashes (manually tripped) as well as flashlights and cell phones to “paint” foreground subject matter, although admittedly this may not be practical if you’re facing off against the Grand Tetons.
Should your camera have a noise reduction option, you may want to turn it on and see if it actually helps. And finally, star shots shouldn’t be on your agenda if the moon is visible in the sky or if you’re in a brightly lit urban area. There’s a reason those nifty night shots are so often made in wilderness areas—it actually gets dark!
It’s all simpler than it sounds, and after all, you can easily make tests. Oh, and one last thing: Don’t gnash your teeth when stars in the corners of your picture are not perfect dots. Camera optics are designed to photograph people not point sources—unless of course you’re talking about the Hubble Telescope. Deal with it.

Seth Shostak is an astronomer at the SETI Institute who thinks photography is one of humanity’s greatest inventions. His photos have been used in countless magazines and newspapers, and he occasionally tries to impress folks by noting that he built his first darkroom at age 11. You can find him on both Facebook and Twitter.
(Editor’s Note: Technically Speaking is a new column by astronomer Seth Shostak that explores and explains the science of photography.)


![]()
Get the Latest Photo Tips, News & Reviews from Shutterbug!
| Camera Reviews Other Reviews | Mobile Reviews Photography Reviews Columns | News | Features | How-To | Resources |
 © 2026 Shutterbug
AVTech Media Americas Inc., USA
All rights reserved