- REVIEWS
Camera Reviews 
More Reviews Mobile Reviews Photography Reviews - GALLERIES
- VIDEOS
- BUYER'S GUIDES
Creating DEPTH: The Pro Trick for Epic Landscape & Travel Photos (VIDEO)

It's often easy to capture a good photograph of a beautiful landscape scene, but what if you your goal is something great? This can usually be accomplished during the editing process, as you'll see in the tutorial below from the popular PHLOG Photography YouTube channel.
Instructor Christian Mohrle is an accomplished German landscape photographer whose straightforward lessons we post frequently. This episode is all about using Lightroom to add depth and dimension to make outdoor photos the best they can be.
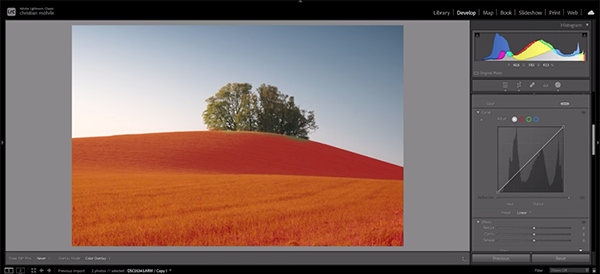
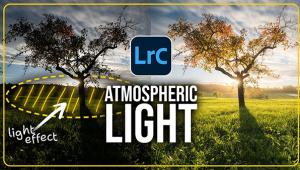
There's a link beneath the video for downloading Mohrle's demonstration image and we highly recommend doing that so you can follow along and make the adjustments as they're explained. The photo in question is a nice minimalist scene of a singular tree atop a grassy hill with a plain blue sky in the background.

Mohrle's standard practice is to make a few basic global adjustment to the original shot before moving on to the transformational tricks that follow. There are three main potions of this shot deserving of attention: the flat pale sky, the hill in the center with highlights on the left and shadows on the right, and the very bright foreground that separates it from the hill.
The first preliminary step is changing the profile in the Basic panel to Adobe Standard which temporarily lessens Contrast—giving Mohrle more control over this attribute as the edit proceeds. He also adjusts White Balance and modifies Tint to eliminate a slight green color cast. Other preliminary adjustments include dropping the blacks, increasing the whites, and adding a bit of Texture while decreasing Clarity.
With the image much improved Mohrle moves on to selective adjustments, beginning with a simple mask over the sky. As you'll see, he carefully darkens most of the sky without affecting light entering the scene on the upper left. He does that by dropping exposure to introduce more contrast, modifying color temper to accentuate blue tones, and bringing down Tint to get the exact color he wants.
Mohrle then creates a mask over the foreground, using a brush to eliminate the tree from his selection so that this primary element is unaffected by the enhancements that follow. After a couple more quick masks that get his image really close, is time to finish the job with color grading and careful sharpening.
Color adjustments for this particular image are quite simple, as Mohrle increases blue saturation, uses Luminance sliders to enhance the foreground, and brightens green tones throughout the lower portion of the shot. We think you'll be impressed when you compare the before/after images.
There's much more to learn about editing landscape photos on Mohrle's instructional YouTube channel, so head over there and see what he has to offer.
And be sure to check out the earlier tutorial we posted, explaining the best ISO settings to use for capturing eye-catching landscape, travel, and nature photographs under varying conditions.


![]()
Get the Latest Photo Tips, News & Reviews from Shutterbug!
| Camera Reviews Other Reviews | Mobile Reviews Photography Reviews Columns | News | Features | How-To | Resources |
 © 2026 Shutterbug
AVTech Media Americas Inc., USA
All rights reserved