- REVIEWS
Camera Reviews 
More Reviews Mobile Reviews Photography Reviews - GALLERIES
- VIDEOS
- BUYER'S GUIDES
Add Impact to Nature & Travel Photos with Realistic Sunbeams in Photoshop (VIDEO)
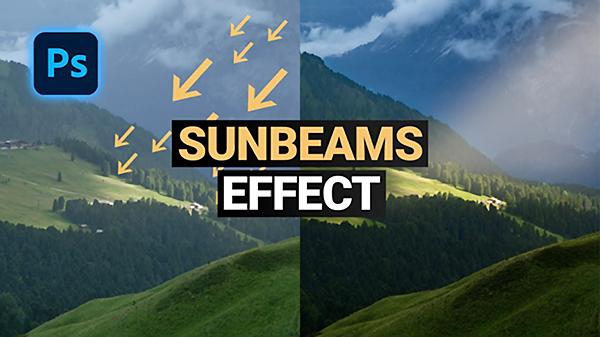
We all strive to pull a money shot straight out the camera. But every so often it’s possible to turn a good photograph into a great one with a little post processing. This could be because you captured the image in flat light, the exposure wasn’t quite right, or the image simply needs something extra for maximum impact.
The quick video below involves the later situation, in which a nice photo becomes far more compelling by adding natural looking sunbeams in Photoshop. Best yet, the technique is really simple and only takes six six minutes to demonstrate.

Based in Southern Germany, photographer Christian Möhrle has been making stunning landscape photos for the past 20 years. He’s also a great instructor committed to helping others improve their work.
In this episode Möhrle demonstrates how easy it is to give Mother Nature a helping hand, by adding sunbeams or light rays with a few quick clicks in Photoshop. The trick delivers natural-looking results, and Möhrle begins by creating a rough shape for a sunbeam using the Lasso tool. Then the creative process begins.

Once a crude sunbeam selection is made, it’s time fill the area with bright, warm color tones—much like Golden Hour. Because sunbeams typically have soft edges, the next step is to blur the filled selection. At this point things begin to look a lot more realistic.
The final touch is making the shot appear even more natural by creating a layer mask and using the Gradient Tool (with colors set to B&W). Möhrle walks you through the entire process so you’ll feel confident replicating the effect yourself.
After watching the video head over to Möhrle’s YouTube channel for more helpful tips. And check out another tutorial we posted, with a simple trick for making striking photos of boring landscape scenes.


![]()
Get the Latest Photo Tips, News & Reviews from Shutterbug!
| Camera Reviews Other Reviews | Mobile Reviews Photography Reviews Columns | News | Features | How-To | Resources |
 © 2026 Shutterbug
AVTech Media Americas Inc., USA
All rights reserved