- REVIEWS
Camera Reviews 
More Reviews Mobile Reviews Photography Reviews - GALLERIES
- VIDEOS
- BUYER'S GUIDES
20 Easy Tips for Taking Breathtaking Landscape & Nature Photos

(Editor's Note: This story originally appeared on Wit and Folly as 51 Tips to Help You Take Breathtaking Landscape Photography Photos.)
Landscape photography is one of the most rewarding types of photography. There is nothing better than working hard, dragging yourself out of bed when everyone is sleeping, staying at a location after everyone has left, to create the image you have dreamt about making.
At the same time, it can be so difficult and disappointing too. I’ve lost count of the number of times that I’ve woken up at an insanely early hour, driven or hiked hours to THAT spot I had planned to shoot, only for the weather to not cooperate.
But, like anything rewarding in life, those great moments are the ones you remember and are what keeps me coming back over and over again to landscape photography.
Here are my 20 favorite tips to give you the best chance to create breathtaking landscape photos wherever you are in the world. Enjoy!
1. Sense of Depth is Your Friend

There are two ways you can use a sense of depth in your landscape photography. First, you can create a deeper depth of field by keeping everything in the image in focus from the foreground to infinity. This is the most common way to create depth and you can do this by using a smaller aperture such as f/11 to f/16. It keeps the image visually interesting as it allows your viewer to clearly see everything in the image.

The second way to use sense of depth as a creative tool is by using a shallow depth of field. One of my favorite ways to use this technique is to blur the foreground elements as a way to help frame the subject of the image. You can do this by using a larger aperture such as f/2.8 to f/4 and focusing on the focal point of the image. A shallow depth of field keeps the image visually interesting as it leads the viewer’s eye to the subject in the image.
2. Use Layers in an Image to your Advantage

Similar to tip #1 another way to make your image more interesting is by using layers. One of the easiest ways to create layers is to have a foreground element in your photo which helps accentuate the subject of your image.
This could be flowers, rocks, leaves on a tree, or really anything else which is interesting in the environment you are in.
Another way to capture layers in the image is to accentuate what nature and the scene already give you. For example, in this image which I took at Sun Moon Lake in Taiwan, the boat dock and the mountains behind it already created natural layers.
All I had to do was compose it the way I liked and use a smaller aperture to keep most of the image in focus.
3. Going off of Tip #2, Find and Use Foreground Elements
![]()
Using a foreground element is such an incredibly easy way to make your image more interesting that I wanted to give it its own section to make sure you see it! So, next time you’re out shooting, instead of just taking the photo as you normally would, try to find a foreground element and include it in the image.
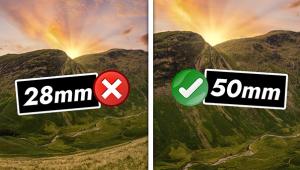
4. Use a Wide-Angle Lens

A wide-angle lens can give you a very unique look and perspective. Obviously, it allows you to capture a wider view and fit more into your image.
However, the best way to use a wide-angle lens effectively is to get super close to your foreground element which will allow you to create that depth of field we have been talking about. In this image, I had the camera as close to the ground as I possibly could with the tripod.
I put together this article about my favorite travel lenses for the Sony a6000. Even if you don’t have a Sony E Mount camera, it contains a lot of good information on what to look for in a new lens if you’re in the market for one.
5. Don’t Underestimate the Power of a Good Zoom Lens

Using a zoom lens in landscape photography is a great way to create powerful imagery. Yes, you will not be able to fit everything in the image, but that’s the point. By focusing on a specific focal point and isolating the subject, you simplify the image and make it more interesting and powerful.
Another way to use the zoom lens is by compressing the image to create even more drastic layers.
Here is what I mean. In this image, instead of focusing on the entire cityscape, I chose to focus all attention on the Dubai Frame by using my zoom lens at its maximum range of 200mm.
In the image, you can also see how the zoom lens is compressing the buildings in the background allowing them to fill the Dubai Frame more than a regular lens would.
6. Use the Right Shutter Speed When You Don’t Have a Tripod
A good rule of thumb is to use a shutter speed that is equal to or faster than the focal length you are using. So, if you’re using a zoom lens and shooting without a tripod at 160mm, your shutter speed should be at least 1/160 or faster to offset little camera shakes.
Obviously, this is just a rule of thumb, and sometimes you will have to shoot at a slower shutter speed depending on the aperture you’re using and how much light there is, but this will help you decide what shutter speed is best.
7. Use a Polarizing Filter

Using a polarizing filter is one of the best ways to make your landscape photos pop. The polarizing filter will help reduce reflections in your image and will bring out the blues in the sky.
If you do use a polarizing filter, just remember that they are not good in all situations. When you shoot sunrise and sunset or want to capture a reflection, it’s best to take the filter off your lens.
8. Capture Movement

A great way to add energy to your image is to use slower shutter speeds to capture movement in the scene. Moving water or clouds are two of the most common elements in landscapes that you can try this with.
You might need to use a neutral density filter depending on the lighting situation and how slow the element is moving. In this image, I used a shutter speed of 1/25 with a neutral density filter.
A fixed ND filter is your best bet for photography, but if you also shoot a lot of videos, a variable ND filter might be a good choice.
9. Capture the Reflection with Water

There is nothing more beautiful than capturing a perfect reflection in a landscape scene and showing the natural symmetry in the world. To give yourself the best chance of capturing a perfect reflection over a larger body of water like a lake, go there during sunrise or sunset. I have had the best luck at sunrise, but bodies of water can also be calmer during sunset.
10. Use People to Show Scale

One of my favorite ways to show a sense of scale in a landscape photo is by placing a person in the image. By doing this, you’re much better able to show how vast and epic the landscape is in a two-dimensional image.
11. Use the Rule of Thirds

The rule of thirds is one of the classic rules of photography and is always a good one to keep in mind. Either use the gridlines in your camera or imagine breaking your image down into vertical and horizontal thirds to make 9 total sections.
By placing your subject on one of the lines that intersect, your image will be more balanced, making for a more interesting and visually pleasing photo.
12. Use Leading Lines


Another one of the classic photography techniques and a good one too. By using obvious or not so obvious leading lines in your landscape composition is a great way to lead your viewer’s eyes naturally through the image.
Take these two examples. In the first photo, I used the obvious leading line of the road to focus the viewer’s attention. In the second image, I used the water line created on the beach by the ocean waves as a subtler leading line.
13. Don’t Forget About the Rule of Triangles

Similar to tip #10 and #11, this is another great photography technique to keep in mind. I’m not talking about actual, physical triangles, but implied triangles in the image.
By finding these implied triangles in the environment and using them in your composition, you will be able to create a sense of the relationship between the different elements in your image making it flow more naturally.
14. Learn to Use the Horizon Line to your Advantage

Where you place the horizon line in your composition can make a huge difference to the overall look and feel of your image. If you place the horizon line lower in the image, you will place more emphasis on what is located above the horizon such as the sky.
On the other hand, if you place the horizon line higher in the image, you’re giving more importance to the foreground in the image and less so on what is above the horizon.
15. Break the Photography Rules

Although the rules of composition like the rule of thirds, leading lines, triangles, and placing your horizon line that we just covered are good principles to remember, they are just that, guidelines to help with your composition.
Like any rules, they are meant to be broken and by breaking them you will better be able to find your own style and how you like to compose your images.
16. Scout Out the Location, Show Up Early and Stay Late

It isn’t always possible, but if you can, try to show up to the location at least 1 hour before you plan to shoot to scout out the location, especially if you’re shooting golden hour.
I can’t tell you how many times I had shot a location only to find a better spot later on. By showing up early and scouting out the area, you will give yourself the best chance to find the best composition possible AND catch the best light.
If you can’t get out to the location in person, try to do some scouting digitally either through Instagram or Google maps.
At the same time, make sure you stay late too if you’re shooting the sunset. Sometimes, the best images are created during blue hour after the sun has gone down.
17. Put in the Work

Along the same lines of tip #15, put in the work. Landscape photography is definitely not a lazy person’s game.
You will be rewarded for waking up at crazy hours when everyone else is sleeping to catch a sunrise or hiking up that mountain for those couple of shots. If it was easy, then everyone would have breathtaking landscape shots in their portfolio of work.
18. Shoot at Golden Hour

There is a reason why it’s called Golden Hour and why it makes for such beautiful landscape photos. The light is softer, more colorful, and more magical than any time of the day.
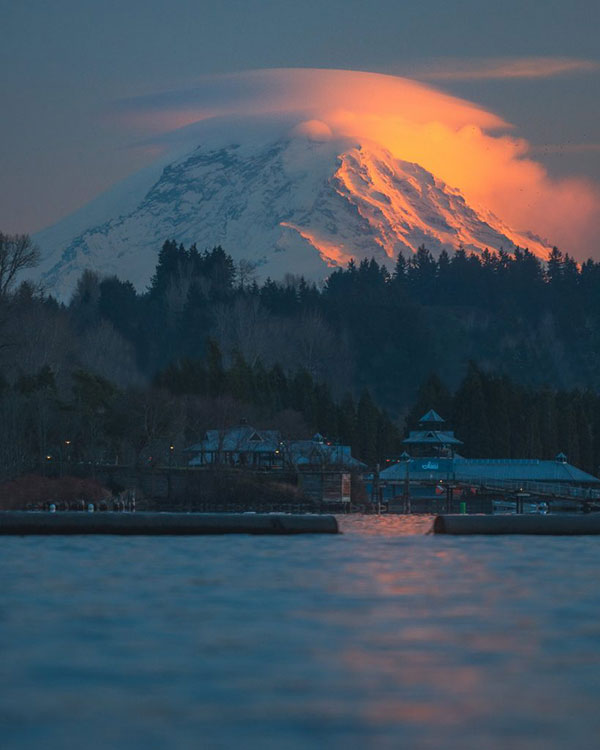
19. Shoot in Bad Conditions Too

Everyone is down to go out and shoot the golden hour when the weather is nice, but most people won’t go out when the weather is bad.
Don’t be like most people.
By going out in bad conditions, you can get incredibly moody landscape photos with a ton of atmosphere and character. Just make sure it’s safe out there before you go, though.
20. Don’t Limit Yourself to Only Golden Hour

Going off of #18, it’s important to not just limit yourself to golden hours even if it’s tempting to do sp. Just remember that good light can also appear at other times of the time. Sometimes on a cloudy day, the light will shine through the clouds creating a unique image.
Other times, you might find yourself walking through a forest flooded with streams of light in the middle of the day.
Read the rest of this story with all 51 landscape photography tips on Wit and Folly's website.


![]()
Get the Latest Photo Tips, News & Reviews from Shutterbug!
| Camera Reviews Other Reviews | Mobile Reviews Photography Reviews Columns | News | Features | How-To | Resources |
 © 2026 Shutterbug
AVTech Media Americas Inc., USA
All rights reserved