- REVIEWS
Camera Reviews 
More Reviews Mobile Reviews Photography Reviews - GALLERIES
- VIDEOS
- BUYER'S GUIDES
Want Cleaner Selections? Add a Mask, Subtract it & Invert it (VIDEO)
Understanding how Lightroom's Masking tools work is an essential component of making selective enhancements to various parts of a scene to achieve a final image with perfectly balanced tones. If you're having difficultly creating clean results, this straightforward tutorial is just what you need.
Instructor Mark A. Hunter is a post-processing expert, and in this episode he reveals a powerful technique that may appear counterintuitive at first—until you see how well it works. The idea is to add a Mask, Subtract the same Mask, and then Invert it to achieve an absolutely precise selection.
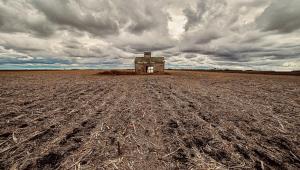
Hunter pulls up a trio of images to demonstrate the effectiveness of this method for different types of photos. All three involve cleaning up sky selections, "because Lightroom doesn't always get it right." His first example is a seaside shot that already has an imperfect sky selection created with the conventional technique.

If you zoom in on the photo you'll see how the selection has bled into the buildings on the horizon, a common problem that's definitely not what you want. The tugboat and the surrounding area in the image are seriously underexposed so he makes a few basic corrections before revealing his alternative masking technique.
With that out of the way Hunter returns to his AI selection to "tidy it up." He first Subtracts the Mask and illustrates how that's done. Now the sky itself is unselected but the purple bleed over is readily apparent. But here's where the magic occurs: Once you Invert the shot you're back to the original mask, but all the offensive bleed on the shoreline buildings has disappeared.
Now "you can go on your merry way" and edit the image with any adjustments necessary. Here Hunter drops Highlights, adds a bit of Clarity, opens up the shadows, and makes a few other adjustments for a final image that's far superior to the original. And this entire transformation took barely four minutes to accomplish.

Hunter's point is this: There's no reason to be alarmed by a somewhat sloppy initial selection, because this effective approach will clean everything up in a hurry. He does the same for two more images, just so there's no question about how all this works for just about any photographs you capture in the great outdoors.
The technique works so well that we're sure you'll employ it often when making selective enhancements to your photos. After the video concludes pay a visit to Hunter's instructional YouTube channel where there are more unique processing tips to be found.
You may also want to check out the earlier tutorial we featured, demonstrating another pro's post-processing technique for creating dramatic depth in landscape photographs by enhancing light and shadow in Lightroom.
- Log in or register to post comments


![]()
Get the Latest Photo Tips, News & Reviews from Shutterbug!
| Camera Reviews Other Reviews | Mobile Reviews Photography Reviews Columns | News | Features | How-To | Resources |
 © 2024 Shutterbug
AVTech Media Americas Inc., USA
All rights reserved