- REVIEWS
Camera Reviews 
More Reviews Mobile Reviews Photography Reviews - GALLERIES
- VIDEOS
- BUYER'S GUIDES
The Digital Darkroom
Making Digital Mattes In Photoshop; Adding Borders And Accents To Enhance Your Image Page 2
 |
|
|
5. Having filled the top matte area with the dark blue color, it was then time to make the dark blue-colored area look like a piece of matte board by giving it some texture. I went to Filter to Texture to Texturizer. In the 100 percent preview window, place the cursor and drag the image to an area where you can see the effects of the Texture filter. Next, select Canvas in the window labeled Texturizer. Remember that the selection of the dark blue area is still in place, so whatever you do with the Texture filter will only occur in the dark blue area. In my case, I set the Texturizer tool to Scaling 169 percent; Relief 6. The exact settings of this tool depend on just how much texture you want in your matte.
 |
|
|
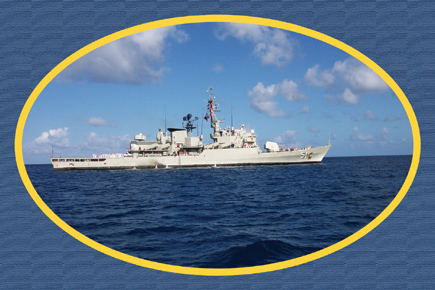
6. At this point the picture is finished, so I went to View to Show to Grid and unchecked it to remove the grid. Then, I went to Select to Deselect to remove the last selection. And, there was my masterpiece, ready for printing and framing!
 |
|
|
For more information on digital imaging, visit my website at: www.colorbat.com.
|
| |||||||||
- Log in or register to post comments


![]()
Get the Latest Photo Tips, News & Reviews from Shutterbug!
| Camera Reviews Other Reviews | Mobile Reviews Photography Reviews Columns | News | Features | How-To | Resources |
 © 2024 Shutterbug
AVTech Media Americas Inc., USA
All rights reserved