- REVIEWS
Camera Reviews 
More Reviews Mobile Reviews Photography Reviews - GALLERIES
- VIDEOS
- BUYER'S GUIDES
Create Landscape Photos With More Depth by Adding Light & Shadow (VIDEO)
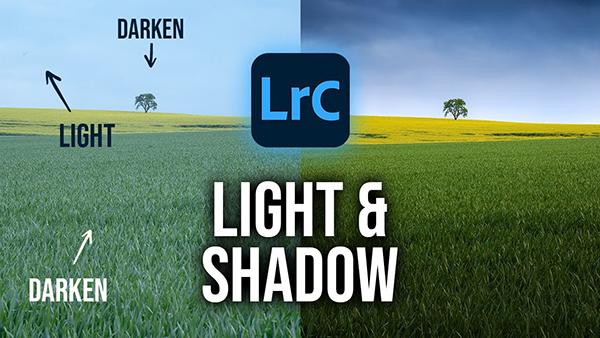
We're all looking for a creative edge that makes our landscape photos stand out from the crowd, and today's tutorial from the PHLOG Photography YouTube channel demonstrates a straightforward Lightroom method that really delivers the goods. The technique involves selectively introducing light and shadow during post processing.
Christian Mohrle is a German landscape photographer, very adept instructor, and a favorite among Shutterbug readers looking to elevate their skills. In this 12-minute episode he demonstrates how to enhance outdoor images by employing targeted adjustments to strategically darken and brighten different areas within the frame.
Feel free to download Mohrle's sample Raw file with the link beneath the video so you can follow along and make changes yourself as the various steps are explained. If you've watched his lessons in the past you know that Mohrle always makes a few global adjustments to prepare the shot for the fun stuff that follows.

Preliminary adjustments begin with cropping because the key element in the scene is slightly off center. Mohrle then turns to basic enhancements to improve the flat and uninspiring shot. These include changing the profile from Adobe Color to Adobe Landscape to boost base saturation, modifying While Balance to neutralize an unwanted color cast, and playing around with exposure. He also boosts contrast while paying close attention to the histogram.
Now it's time to employ simple masking to achieve the selective adjustments that transform the bland image into a money shot. He creates a simple sky selection to address that portion of the frame, using a quick Subtract method for the Radial Gradient he employs to enhance both Texture and Exposure.
Mohrle also adds a stack of Linear Gradient over the foreground to make enhancements that increase depth and interest with adjustments to exposure and other key variables. The idea is to create a subtle range of complementary tones in the green field closest to the camera—rather than having the entire foreground appear the same.

All that's left to complete the impressive transformation is a final bit of color grading and sharpening, and Mohrle demonstrates exactly how this is done. You'll be duly impressed when you compare his before/after images.
Once you're done watching. head over to Mohrle's instructional YouTube channel here you'll find a wealth of helpful methods that are guaranteed to improve every landscape photograph you shoot.
And don't miss the earlier tutorial we featured with another pro's five favorite Lightroom keyboard shortcuts for streamlining your post-processing workflow.
- Log in or register to post comments


![]()
Get the Latest Photo Tips, News & Reviews from Shutterbug!
| Camera Reviews Other Reviews | Mobile Reviews Photography Reviews Columns | News | Features | How-To | Resources |
 © 2024 Shutterbug
AVTech Media Americas Inc., USA
All rights reserved