- REVIEWS
Camera Reviews 
More Reviews Mobile Reviews Photography Reviews - GALLERIES
- VIDEOS
- BUYER'S GUIDES
Using Flat-Bed Scanners For Film; Can They Replace Dedicated Film Scanners?
All Photos © 2004, Paul Mozell, All Rights Reserved
Film is not dead especially for photographers who began shooting before the
sun rose on the digital age. Unlike my nostalgic collection of worn, long-playing
record albums that I seldom play, the thousands of transparencies and negatives
in my files still have value as commercial, fine art, or personal images. Until
recently, I have relied on dedicated desktop film scanners to digitize my photographs,
while making occasional use of pre-press drum scanners and high-end flat-beds.
Today, a new crop of low-cost flat-bed scanners with great specifications carry
out the analog to digital conversion very smoothly and make publication-quality
files. But how do they really measure up to the dedicated film scanners that
have been so popular in recent years?
For me, film scanning is a tedious but necessary process. But the quality of
files I send to clients, or print to ink jet or digital photo printers, is largely
determined by the quality of the scan. I evaluate a scanner primarily by the
characteristics of the files it makes, followed closely by the ease-of-use of
the scanning software, and finally by handling and usability of the scanner
itself. Many scanners with great hardware specifications end up costing you
time and money because the software is awkward to use, or because it has too
many utilities, or even too few.
Over the past half-dozen or so years, film scanners from Nikon and Polaroid
sold for $1000-$2000 and were considered a good value. Somewhat less costly
models from Canon and Minolta were also popular. With a very small desktop footprint
and glassless film holders, they could handle one to six images at a time or
batch scan larger quantities with optional adapters. Transparency scans invariably
were superior to scans of negative film due to the difficulty in creating color
look-up tables or ICC profiles that corrected for the usual orange base color
of negative film.
Two new scanners with approximate street prices of $599 caught my eye: the Epson
Perfection 4870 Photo and the Microtek ScanMaker i900 and I thought it fair
to compare them to each other, and then to my reliable Polaroid SprintScan 4000
dedicated film scanner. For this article I used an Apple PowerMac G4 with a
profiled Hitachi monitor, and Adobe Photoshop CS for testing. My goal was to
compare: a) apparent color accuracy as viewed in Adobe Photoshop CS, b) apparent
dynamic range--with particular attention to shadow, highlight detail and
digital noise, and c) the ease-of-use of the scanners and their software suites.
Microtek ScanMaker i900
The ScanMaker i900 stands out from the crowd with its glassless film-holder
tray that slides out from the front of the scanner. Separate removable tray
inserts accommodate 12 35mm slides, 4 medium format frames, 2 35mm strips of
print-film, or 2 4x5s. With glassless film holders you'll scan far less
dust than a standard flat-bed, and you won't be plagued with
Newton-rings--concentric rings of distortion that sometimes appear when
film is placed directly on or near glass. The i900 specifications include 3200dpi
optical resolution, 48-bit color depth, 4.2 dynamic range, FireWire and USB
connectivity, and 8.5x14" reflective scan bed. The scanner has built-in
Digital Ice for cleaning up reflective scans (surprisingly no film capability
is installed), and it ships with a Kodak IT8 4x5 transparency target for making
ICC profiles with the supplied profiling software--a very nice bonus. For
scanning software you can choose between the factory product--ScanMaker
Pro or the popular third-party application, Lasersoft Imaging Silverfast Ai
6.0. The other in-box products include: Color Matching system, ABBYY FineReader
OCR, Ulead Photo Explorer, Adobe Reader, and Photoshop Album (Windows only).
Another nice bonus is the inclusion of a printed manual--increasingly rare
these days.
 |
|
|
ScanMaker Pro is fully packed with professional features that should give most photographers all the controls they will ever need. My only criticism is that while some of its controls mirror similar windows in Photoshop, other controls are different; such as a color level control that lacks a gamma or midpoint slider. Then again, every product takes some getting used to. Those wanting a more familiar interface and more complex color correction features can use Silverfast.
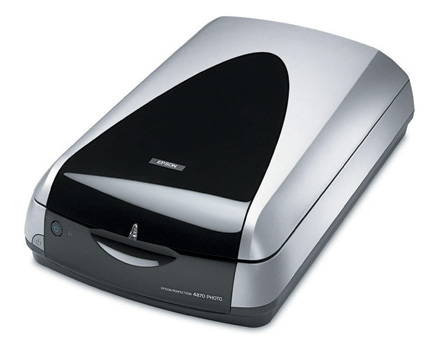
Epson 4870
Although this scanner is part of Epson's lower cost Perfection series,
the scans it generates are very high quality. Its key performance specs are
very high, with 4800dpi max optical resolution, and a dynamic range of 3.8.
Its biggest physical difference from the Microtek i900 is that the 35mm slide,
filmstrip, medium format, and 4x5 holders are placed directly on the scanner's
glass scan bed. To scan reflective art you need to remove the film holders and
install a letter-sized white panel in the top, hinged portion of the scanner.
The Pro version that I tested ships with a generous software package including
Epson Scan, Lasersoft Imaging Silverfast Ai 6.0, ABBYY FineReader Sprint OCR,
Photoshop Elements, and Monaco EZcolor 2.5 for making profiles, ArcSoft PhotoBase,
ArcSoft PhotoStudio, and ArcSoft PanoramaMaker.
 |
|
|
Epson's approach with its software is to make it clean, simple, and
fairly foolproof--definitely not high-end. You get a choice of three scanning
modes. Full Auto mode is exactly what it says and I didn't bother to test
it out. Home mode has only two brightness and contrast sliders for image correction,
leaving Professional mode as the only one worth evaluating. Epson's interface
is clean and simple and its configuration options are minimal.
When you scan film, the Epson 4870 knows which plastic film holder you have
selected--35mm slide, 35mm negative strip, medium format, or 4x5. A preview
scan automatically finds the borders of each image in the film holder and designates
each as a separate file. The price you pay for this convenience is losing a
good percentage of your film image because Epson Scan finds the edge of your
plastic or cardboard slide mount and then crops in. Alternatively, you have
the option to define your own scanning area rectangle, using a slower, but more
accurate workflow.
Its Unsharp Mask functions are limited to High, Medium, and Low settings, with
none of the usual Radius, Intensity, or Threshold settings familiar to Photoshop
users. The Digital ICE works on both film and reflective scans to clean up surface
imperfections, dust, and flaws. Unlike the Microtek ScanMaker software, which
appears to have professional scanning products as its ancestors, Epson Scan
appears to have risen from an amateur lineage. Plan on using Silverfast with
your Epson if an automated, workflow does not meet your needs.
Scan Comparison
I scanned two Fujifilm Provia 100 slides on the flat-bed scanners using the
default settings in the factory scanning software and made no corrections in
Photoshop. I scanned the same slides on the Polaroid using Lasersoft Imaging
Silverfast 6.0 rather than Polaroid's in-house software, because Polaroid
has not updated its in-house software with support for Mac OSX. I used the canoes
photograph because it had bright, saturated colors. Girls and horse was picked
for the bright whites and dark shadows in the image.
 |
|
|
|
| |||||||||
- Log in or register to post comments


![]()
Get the Latest Photo Tips, News & Reviews from Shutterbug!
| Camera Reviews Other Reviews | Mobile Reviews Photography Reviews Columns | News | Features | How-To | Resources |
 © 2024 Shutterbug
AVTech Media Americas Inc., USA
All rights reserved