Spot Meter Roundup
Metering For Those Who Seek Total Exposure Control

Spot Meter Roundup

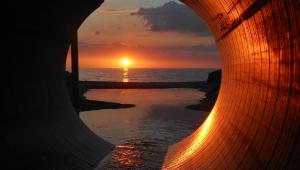
Victoria Harbor, Vancouver Island, just after sunset. A situation that precluded a close-up meter reading. Again, my 1Þ meter made a difficult situation a simple one. I read a medium tone, in this case on a building just outside the image area, and exposed as indicated. I bracketed liberally as I was concerned with reciprocity failure due to the several second exposure. However, the first shot was the best of the series.
Photos © 2002, Joseph A. Dickerson, All Rights Reserved

For the record, I use TTL (Through The Lens) metering and automatic modes quite often. Many of my subjects, birds on the wing for instance, are just too flighty to allow for thoughtful metering. But, give me a rustic barn, an historical California Mission or, my favorite, a Victorian lighthouse isolated on a windswept bluff looking out on a storm-tossed sea and I'll immediately reach for my trusty spot meter. This is when I really want control, and a spot meter gives me the control I need. I can compare highlights and shadows to assure detail in both. Or, with a multifunction meter, I can take several readings, compare or even average them. In short, it's all about precise exposure control.

A Definition Or Two And A Few Parameters
First, there are two basic meter types. Incident meters read the light that falls on, or is incident to, your subject. Incident meters are distinguished by the white dome that looks like half a Ping-Pong ball that covers the light sensor. To make a reading the dome is usually pointed at the camera from the subject's position. This method averages the highlights and shadows and the indicated exposure setting will allow all the tones in the scene to be recorded as they appear in the scene. This method works well in the studio or where the Subject Brightness Range (SBR) is limited. However, when the SBR is greater than our film can record we lose detail causing blown-out highlights or shadows without any substance.

Lime Kiln lighthouse on San Juan Island, Washington. Blue sky is a medium tone so it was easy to meter it with a 1Þ spot meter and set the camera at the suggested reading. Even with a light meter I trust I'll still bracket the exposure if time, and the subject, will allow.

Second, as the name implies, a reflected meter evaluates the light reflected by the subject. At first, this would seem to make more sense but here, too, there are some caveats. The meter is an ignorant tool. It doesn't know, or care, whether you are photographing the proverbial black cat in a coal bin or a snowy plover in a snow drift. It will indicate the correct exposure to make whatever it is pointed at a medium tone. That is how they are designed, and that's what they do, period.

Most reflected light meters have a fairly broad angle of view, usually somewhere around 30Þ. This is adequate for many subjects but occasionally it presents a problem. That moose in the meadow probably won't tolerate you holding your meter 2 ft from its nose to make sure you're getting the right reading. So, we also have narrow angle meters. These generally read an angle of view of around 10Þ while true spot meters will read as low as 1-5Þ.

A Lesson In Photographic Mythology
In college we were taught that light meters are calibrated to a standard of 18 percent reflectance or middle gray. Well, they lied to us! It ain't so: 18 percent gray is like Santa, the Easter Bunny, and the Great Pumpkin. Suffice it to say that light meters are calibrated to a reflectance of around 12-18 percent and that you need to do a little testing to be sure that your meter will produce the exact tones you expect. For more on this diabolical plot to mess up the minds of young photographers I'll refer you to two excellent sources. Post Exposure, Advanced Techniques for the Photographic Printer, Ctein and/or The Hand Exposure Meter Book, Martin Silverman, Jim Zuckerman, and our own Bob Shell.


The Old Veteran, Point Lobos, California. This scene would be easy for almost any meter to read. With my 1Þ spot meter I simply read the gray bark of the gnarled cypress, said a short prayer to Ansel and Edward, and exposed as indicated. Instant gray card.

Less Is More
Many photographers prefer spot meters that do one thing and one thing only. They want to read a small area of the scene, selectively and accurately, and that's it. These basic spot meters will indicate the brightness by providing an EV (Exposure Value) number. This value is then transferred to a dial that in turn indicates the f/stop and shutter speed values--it's simple, quick, and reliable. The Pentax Digital Spot Meter has long been considered the benchmark of this KISS (Keep It Simple, Stupid) approach. It is remarkably compact, has
solid-state ruggedness, a reputation for exposure accuracy, and has seemingly been in production forever. By the way, for those of you in the market for a new meter I've included a chart on page 162 that compares spot meters, their specifications and who to contact for more information. But as useful as these basic spot meters are, some photographers need, or want, more.

OK, Maybe More Is More Several manufacturers offer spot meters that are capable of reading both ambient
light and flash. These are generally digital meters and as such they indicate f/stops and shutter speeds and/or EV using an LCD read-out. Many photographers like the easily read numerical read-outs while some may be intimidated by all the numbers--you pay your money and you take your choice. Some displays include an analog scale and memory, which allows several readings to be recorded and then compared.

The Sekonic Dual Spot F (L-778), for example, will even indicate the exposure required to make the current reading a highlight or a shadow value. The user decides how far above or below the middle tone this highlight or shadow should be and the meter shows the exposure needed to achieve that tonality. This is a very useful feature for practitioners of the Zone System. Studio photographers frequently utilize multiple "pops" of their flash to properly expose at a desired f/stop. Many of these meters provide a degree of automation for even this tricky task. However, I do have one word of caution. While most experienced photographers can intuitively figure out how to use basic spot meters, you'll probably want to spend some quality time with the Owners Manual of one of these ambient/flash units. I know if I don't use mine for a while I have to spend a little time
re-acquainting myself with its operation.


Old barns, Los Olivos, California. I metered the dark wood on the nearest barn and stopped down 1 stop. I usually carry a gray card with me and here I made some comparison readings with tones in the scene to check my exposure plan.

More Than One Meter
It has long been known that most pros wind up with a plethora of meters. They'll have a spot meter for Zone System work, a flash meter for studio shots, and an incident meter for quick and dirty outdoor shooting. So, what's the logical next step? Yep, nothing gets by you guys. I think Sekonic was the first with an all-in-one, but everybody is in the game now. The latest entry, the Minolta Flash Meter VI, was introduced at the PMA Show this year and is very impressive. I'll be working with one for a while and will have more to say about it in the upcoming 2003 Shutterbug's Photography Buyer's Guide, due on newsstands this September.

Do these all-in-ones mean that it is now possible to carry one meter and handle any metering task imaginable? Are there any drawbacks to the all-in-one wunderkind? Well, one is cost. They ain't cheap. But, considering they replace two, or perhaps even three, separate meters they could be a real bargain over the long haul. For reasons best left to the engineers, they aren't quite as sensitive as their less versatile cousins either. My Sekonic L-608, an incredible tool, pops out a couple of EV before my Dual Spot F L-778 does. For me, this has not been a serious problem, but if you do a lot of available darkness photography it's something you should consider.

How I Use Spot Meters
My spot meter methodology varies a bit depending on whether I'm shooting black and white film or color slide film. With black and white the most important thing is to assure adequate shadow detail so that's the area I meter first. I identify the darkest area where I want that texture and meter it. As pointed out earlier, the meter will give an exposure value that results in a medium tone, but this area should be darker. This means I must stop down, or reduce the exposure to achieve that tone. I usually reduce the exposure by 2 steps, either f/stops or shutter speeds, which makes it dark but retains the texture.

An example would be dark gray bark on the shady side of a tree. Having determined this exposure value I compare it to readings taken from the lightest area of the scene where I also wish to preserve detail. As long as the textured highlight is no more than 5 stops brighter than the textured shadow all is well. Both areas will have detail and texture. This is one of the tenets of the Zone System, which I have obviously simplified for purposes of our discussion. There are many useful books devoted to this one subject alone. While the study of the Zone System can be daunting, knowledge of its principles and applications can't help but make you a better photographer.

When I'm shooting color slide film I'm more concerned about the highlights blowing out so I read the important highlight first. Then I increase the exposure to make the highlight area lighter than the indicated medium tone exposure. Usually 11/2-2 stops will do it. If I desire, I can then check the darker tones to see where the image will retain shadow detail. Anything more than 4 stops less than my highlight exposure is going to be pretty much black.

With color negative film you still need to base your exposure on the important textured shadow, just as with black and white, but the highlights shouldn't be more than 4 stops brighter, as the color negative film has less latitude than black and white.

Will owning a spot meter make you a better photographer? Probably not. But owning one, taking the time to understand what it does and then mastering its use will. Besides, spot meters are such cool things, you know you just got to have one!

Editor's Note: A Comparison guide of spot meters appears on page 162 of the July 2003 issue.

X