
Substantially improved. Easy to use even for beginners. - Casa Sandoval
- REVIEWS
Camera Reviews 
More Reviews Mobile Reviews Photography Reviews - GALLERIES
- VIDEOS
- BUYER'S GUIDES
Sony’s Alpha A850; 24MP In A Full-Frame D-SLR Page 2
I would suggest that there be a blinkie-only display, as that’s how I and other folks I know handle their exposure in the field, relying on the blinkies to notify of dangerous overexposure. The way it is set up now has the blinkie image way too small.
One of the most impressive items in this camera is the twin-BIONZ processing engines, which are necessary to handle not only the large image files delivered by the CMOS sensor but the intense amount of image processing involved in 3 frame-per-second shooting at full res and the DRO bracketing, discussed below.
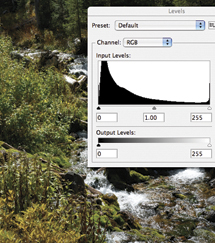
There is no Live View (or video) in this camera but there is something Sony dubs “intelligent preview,” which to me is a viable alternative to Live View for those who use it for making sure the right exposure and white balance, etc., are set correctly. Here’s how it works: you frame the picture and then press the DOF preview button on the lower right of the camera. The sensor then grabs the frame and shows you the image with a histogram and the exposure (both aperture and shutter speed), any exposure compensation, DRO setting, and even white balance. You can then change any of those parameters (this is a Raw grab) and the processor changes the Raw instructions and actually previews the image with the changes made on the screen. You then have to make the image over again though the settings are made for you by the way you correct the image on the screen.
 |
|
|
This is a very fascinating way to check exposures, etc., in the field. It will not change, for example, how motion is depicted if you change shutter speed, but it will help you get the very best exposure and white balance of the shot. This is certainly a nice alternative to Live View and we’ll see which one gets the buyer’s vote. I found it very useful for setting white balance. The only thing I suggest is that once you make the changes, why do you have to then shoot the image again with the new settings? Why not let the user simply make the processing changes on screen and then just keep the image as changed? And keep it as a Raw file?
Right now there is another brand with Retouch options for après-shooting fix and change, but they do not save it as a Raw, only as a JPEG. In any case, this bit of technology bears watching, and further development. (And by the way, if you want to use the DOF button to check depth of field, you do so by changing the Preview Function to “Optical Preview” in the Custom setting menu. Now there’s another thing—it would be nice to have an easier way to do this or a simple toggle on the “quick” navigation screen to go from one to the other. You could, I suppose, use one of the “memory banks” to set up this alternative use of the DOF preview button.)
Another piece of tech that bears watching, and using, is Sony’s DRO (Dynamic Range Optimizer), which I think will shake up the HDR crowd and may change the way we relate to that old albatross, excessive scene contrast, and how we handle it. I previously mentioned the Drive button on the camera, and in addition to the usual single, continuous, and self-timer options, it is the access point to what I consider some of the most interesting tech items the camera affords.
The Drive button actually has numerous levels and in a way hides the bracketing function until you activate it. There is single-shot and continuous (three shots with one release pressure) exposure bracketing, and what Sony dubs high and low values (20 or 10 mired, respectively) of white balance bracketing afforded. Then there’s the “BRK D-R+” notation that corresponds to DRO bracketing, Sony’s built-in tonal curve adjustment.
I have worked with DRO in the past and have found it a fascinating if not entirely predictable way to open up shadows in a contrasty scene. My technique had been to bias for the highlights in my exposure readings and then set DRO to various levels and watch, with some amazement, as the shadow areas opened up without the harsh and noisy shadow details seen if you, for example, over-adjust Shadow/Highlight in Photoshop. This camera takes it to the limit by offering five levels of DRO adjustment, which, in my experience, seems to do an excellent job of handling scene contrast in a unique way, as long as you continue to bias exposure toward the highlights. You can select DRO from the menu and make the settings as you see fit.
What the Alpha A850 does is mechanize the process by offering a DRO bracket (low or high power) that does not require you to take three shots in sequence, but actually makes one exposure and then rather quickly processes, in camera, the remaining two of the bracket. You get three shots for one shutter release, all with the same exposure but each with a different tonal curve. This is a very unique take on bracketing. In some cases it solved harsh exposure problems that would require post-processing later. In others it gave an almost “Illuminist” look to fairly high-contrast images. It was quite impressive.
 |
 |
|
 |
 |
|
|
||
Taking it a step further, I was curious how this might be applied to HDR imaging. After all, if we can blend exposure brackets why not tonal curve brackets, especially when they are handed to us on a silver platter using DRO bracket sets? However, when I tried to open three shots in a Hi sequence of DRO brackets, Photoshop’s Merge to HDR became a bit confused and wondered if I had shot the scene with three different cameras. That’s because the exposure does not change—the tonal curve changes.
The same went for Photomatix Pro, which wanted me to change the EV differential, which I did at the minimum of 0.3 EV. Processing both (you do need to indicate some mechanical EV change in each, and then Photoshop will also do its thing) showed once again that Adobe has lots of work to do on their Merge to HDR function. The Photomatix Pro using Tonemapping actually enhanced the shadow detail in the three combined images and produced a superior shot to any of the three individual DRO bracketed shots. In all, I would say that DRO bracketing and Photomatix Pro combined opens up a whole new era of HDR imaging, one that I am eager to explore further. The fact that you get three shots with different tonal curves with one shutter release is a really handy way to work. This does not obviate the advantages of using exposure bracketing and then HDR, but it is another viable and interesting route. I will leave the reader to take this another step—to combine tonal curve and exposure bracketed shots into one.
What about noise at higher ISO settings? I found the noise was no problem up to ISO 400, slightly greater at ISO 800, as expected, and at ISO 1600 it crept in, but only if you really dug into the file. In well-exposed areas it is barely noticeable at that speed, but when magnified you could see specks in the shadows. Overall very impressive, and what we have come to expect from full-frame sensor performance. Noise Reduction (NR) filtration helps and in the shots I made I kept the NR filter on Normal, with the idea that some noise reduction is happening anyway all the time and more so when you set a higher ISO.
The speed of processing was quite impressive, especially when I started shooting lots and lots of bracketed DRO shots. This did, it seemed to me, tax the battery more than usual, so my advice is that you should carry a spare if that’s the shooting course for the day and you are going full steam ahead. I also tried out some of the preset image “Styles” as Sony calls them. Perhaps it was the camera I worked with (a prerelease model I am given to understand) but I could only access a few of the many more touted in the instruction booklet, although I did have access to them for Raw image processing in the supplied Sony software. I tried out a few and it only convinced me that tweaking characteristics is best left to post-processing where more nuanced control is afforded. The only other bug I noticed was that once in a while the AF would not respond if I switched to vertical from horizontal framing, though if I played with it a bit it would. I am sure this is a prerelease matter as well.
Speaking of the instruction booklet, it is at times poetic (for example, describing the “Clear” Style as one that captures an image “in a clear tone with limpid colors in the highlight area, suitable for capturing radiant light”) and other times too brief in describing some fairly complex items. I suppose one could do a very lengthy instruction booklet on the rather amazing features in this camera, so my best advice is to work with the information provided and give yourself time to work it through before going out on an official shoot.
I relied on the Sony software for Raw file processing as Adobe Camera Raw did not seem to reveal, for example, changes in the DRO brackets. This might be changed when you read this. The supplied Sony software suite is easy to use and recommended, and I am impressed by the ease with which it works and the quality it delivers. The Sony software even offers to hand off the processed Raw files to Photoshop or other programs if desired. So, my suggestion is to do just that—process your Raw images in the Sony software and then hand them off for anything else you might like to do to your image editor and processor of choice. Sony knows its Raw file better than anyone and you might not even need another program to get the global corrections right, though burning and dodging and selective tonal control is best left to others.
Now, about those image file sizes. At 16-bit Raw, opened, the file size is 139MB. That’s correct. At 8-bit Raw it’s 69.8MB. At 300dpi that gets you a 14x20” print, straight up, no resampling. At 240dpi, where I print, that’s 16x25”. Do you need this large a file size? Do you print that size more than a few times a year, or ever? This is even beyond what we use here in the magazine for full-page repro. You could argue that it’s nice to know it’s there if you need it, and that if you crop then you have so much more leeway. You could also say that having that large a file size from a full-frame sensor is a combination that’s hard to beat. And I’d have no argument with you there. But getting and using backups and exterior drives is hardily recommended, as is maxing out the RAM in your image processor.
Conclusion
The Sony Alpha A850 is a pro-oriented camera that delivers all the tools for the art and craft of photography with some new, impressive tech thrown in. It brings a new way of thinking about exposure and image processing and a new way of creating instantaneous bracketed shots to the fore, thus maybe signaling a real change in how we make images. It could be a foreshadowing of even more such dynamic range and in camera processing fixes to come that will at long last allow photographers to deal effectively with the challenges of contrast and difficult lighting conditions. But being a progenitor is not always justification for running out and buying something; the camera itself has to deliver the goods, here and now. In all respects I have to say the Alpha A850 does the job, delivering startling image quality, more than sufficient image file size, a full-frame sensor that delivers quite good results in low light, and a format that lets a wide-angle lens behave like one. I do have to say that I am very curious about what’s next in the three shots for one shutter release scenario and other image enhancement tricks Sony engineers might have up their sleeves.
For more information, contact Sony Electronics Inc. at: www.sonystyle.com.
|
| |||||||||
- Log in or register to post comments


PHOTO OF THE DAY

Today’s photo is Gleam in the Mountain Desert by Hans B. Epp
eNEWSLETTER SIGNUP
![]()
Get the Latest Photo Tips, News & Reviews from Shutterbug!
| Camera Reviews Other Reviews | Mobile Reviews Photography Reviews Columns | News | Features | How-To | Resources |
 © 2024 Shutterbug
AVTech Media Americas Inc., USA
All rights reserved