- REVIEWS
Camera Reviews 
More Reviews Mobile Reviews Photography Reviews - GALLERIES
- VIDEOS
- BUYER'S GUIDES
Playing With Pixels
Make A Digital Montage
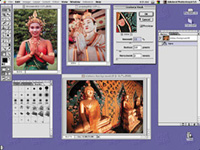
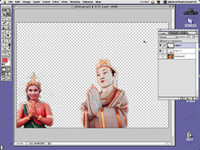
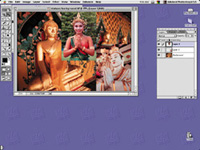
| The photo montage--a picture or several pictures within a picture--has been around for decades. In the 1930s, for example, famed Harlem photographer James Van Der Zee created montages in camera and in the darkroom. His most famous is perhaps the picture of a dead child looking at himself as he is laid out in his own casket. (Many of Van Der Zee's pictures were published in a book entitled, The Harlem Book of the Dead.) Well, Van Der Zee would probably turn over in his grave and jump with joy at how easy it is to produce montages today--in the digital darkroom. You can create a montage with any digital imaging program that offers a feature called "layers." Basically, layers allows you to add pictures (layers) on top of each other. More sophisticated programs let you add more layers than basic programs. In addition, professional imaging programs make it easier to work on the entire montage without going back and forth from image to image (layer to layer). That is a very beneficial feature when you want to resize and edit pictures within pictures. Here's a quick look at how I made a quickie montage with three pictures--one taken in Singapore (white statue) and two in Bangkok. One closing thought on making a montage. Imagine what my Bangkok/Singapore montage would look like with my headshot in the frame€or a zebra€or a picture of the Statue of Liberty! My point: when creating a montage, use pictures that complement each other--pictures that have a similar theme. Of course you can go wild, too. It's up to you. |
|
|
|
|

- Log in or register to post comments


![]()
Get the Latest Photo Tips, News & Reviews from Shutterbug!
| Camera Reviews Other Reviews | Mobile Reviews Photography Reviews Columns | News | Features | How-To | Resources |
 © 2024 Shutterbug
AVTech Media Americas Inc., USA
All rights reserved