- REVIEWS
Camera Reviews 
More Reviews Mobile Reviews Photography Reviews - GALLERIES
- VIDEOS
- BUYER'S GUIDES
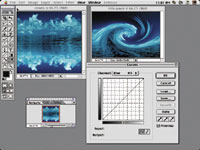
Playing With Pixels
Experimenting Opens Up A New World Of Creativity
Someday, when you are sitting
at your computer and have nothing to do, open a picture in your photo
imaging program and try this: go to Filters and apply each and every
filter to that picture. You may find that some filters make your picture
look worse than the original; some may border on the ridiculous. However,
while you are experimenting, you may find a filter that creates an unexpected
and very pleasing effect. An effect that makes you say, "Wow!" |
|||
Here are the techniques I used--the
same ones you can use to create interesting and original pictures. |
|||
1. Scan your picture and create
a new file. |
|||
Naturally (for me), seeing
the parting waves brought to mind the Biblical image of Charlton Heston
as Moses parting the water in the Red Sea. So, I needed a man to walk
through the parted waves. |


- Log in or register to post comments


![]()
Get the Latest Photo Tips, News & Reviews from Shutterbug!
| Camera Reviews Other Reviews | Mobile Reviews Photography Reviews Columns | News | Features | How-To | Resources |
 © 2024 Shutterbug
AVTech Media Americas Inc., USA
All rights reserved