onOne Software’s PhotoFrame 4.5; A Finishing Touch For Your Images
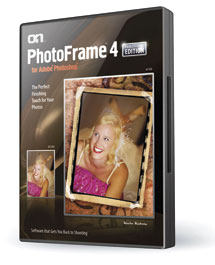 Whether you’re starting with a portrait, a landscape, a wedding photo, or a still life, it’s easy to use the hundreds of effects in onOne Software’s new PhotoFrame 4.5 (PF 4.5) to enliven your images and give them a distinctive look and unique appeal. Whether you want to enhance the borders of your picture with traditional photographic film and darkroom edges like film sprockets or the borders from Polaroid pull-apart film, or you lean toward artistic edges like brush strokes and torn paper, PF 4.5 has a wide selection from which to choose. The more than 1100 options include full-page layouts with various backgrounds, textures, and design elements created by graphic artists, suitable for use for individual prints or in albums for portrait and wedding professionals, or for scrapbook crafters. You can use PF 4.5 with Adobe’s Photoshop CS2 and above. Many features also work with Elements 6, 7, and 8. With Photoshop, you can incorporate these frames in Adobe’s Lightroom and Apple’s Aperture.
Could you do a lot of this yourself with Photoshop or Elements? Yes, but it can be quite time consuming and can require a deep knowledge of layers, brushes, masks, and blending modes. The beauty and speed advantage of this framing in this fashion is that you simply choose an effect you like from the visual library and then click to apply it to your photo. If you want to go further, you can add more effects in layers, change the color of a border and/or background, add a texture or graphic, change the blend mode of each layer, and add a glow or a shadow, all from within PhotoFrame. When you have the look you want, apply it and the newly enhanced photo opens in Photoshop with the effect(s) applied as individual layers so you can still tweak them later if you like.
Version 4.5 adds scores of new frames, including content from graphic artists, renowned Photoshop gurus, and wedding photographers. Full-page layouts can be used for individual portraits or albums, and a clean interface fosters a streamlined workflow.
Most plug-ins are applied through Photoshop’s Filter menu. Not so with PhotoFrame. In Windows or on a Mac, you can access the plug-in by choosing File>Automate>PhotoFrame 4.5 (#1). When you install PF 4.5 on a Mac, onOne is also added as a menu item in the top menu bar. In my work I opened PhotoFrame by selecting this onOne menu item, then PhotoFrame 4.5 Professional. On both platforms, you also have the choice of opening a batch process version of the plug-in.
 |
||
|
||
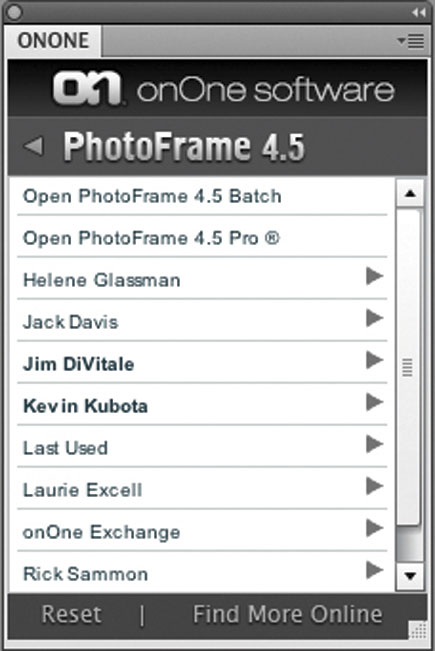
New in Version 4.5 is the onOne panel, available in Photoshop CS4 and later. This is a moveable panel that floats in the Photoshop window and lets you launch PhotoFrame (and other onOne products) directly. You can access presets and your most recent frame choice from within the panel (#2). To add it to your desktop, choose Window>Extensions>onOne.
 |
||
|
||
My portrait of Audrey opened full screen in the PF 4.5 window (#3). At the upper left is the Frame Stack—an equivalent of layers. Nested with it is a tab labeled Options. Click on Options (#4), and you can choose to apply each frame to a new layer (as I did here), to apply the frame as a layer mask, or apply it as a clipping mask, and more. At the top right, another nested group of palettes offers tabs for Instant Frame, Edge, and Bevel controls.
 |
||
|
||
 |
||
|
||
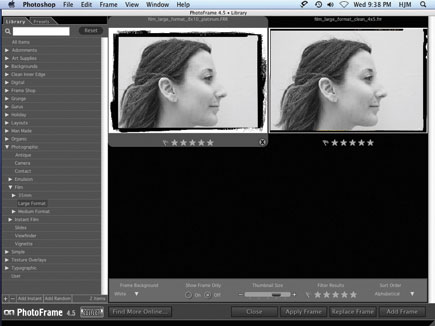
The first thing that I wanted to do was choose the style of frame or edge to add. So I clicked on the Open Library tab on the bottom menu bar, just below Audrey’s chin. This takes you to the Library window (#5) with a list of the names of frame choices on the left, and a visual library of them, applied to your photo, on the right. Below the right window is an arrow labeled Frame Background. Here you can choose to use a white or black background. I usually use white, but which works best depends on both the frame and your image. You can also choose to see just the frame or the frame applied to your photo via the Show Frame Only buttons. The central Thumbnail Size slider allows you to examine multiple previews at once by varying the size of your photo with the frame applied, from postage stamp dimensions to the full window.
 |
||
|
||
I suggest that you spend some time browsing through all the frames to get an overview. Perhaps you may want to jot down the names of a few favorites for future reference. The Library allows you to search and sort frames quickly. For my portrait profile, I chose the Photographic frames category, then Film, Large Format. Of the two frame options shown, I chose the one on the left, called 8x10 platinum. These edges reproduce the look of an 8x10 negative contact printed onto paper coated with platinum, a very time-consuming alternative process that I used to do with film. In the darkroom days, I brushed the platinum emulsion carefully on a watercolor or other artist paper with a brush, hence the brush stroke edges of this frame.
Next, I clicked the Add Frame button at the lower right. I didn’t click the Apply Frame button, because that adds the frame just as it is. Add Frame allows you to adjust the edges and position of the frame, to fine-tune it to fit your specific photograph.
- Log in or register to post comments


