
Good day! Thanks for posting this site. That HD TV was awesome for slideshows. wow
- REVIEWS
Camera Reviews 
More Reviews Mobile Reviews Photography Reviews - GALLERIES
- VIDEOS
- BUYER'S GUIDES
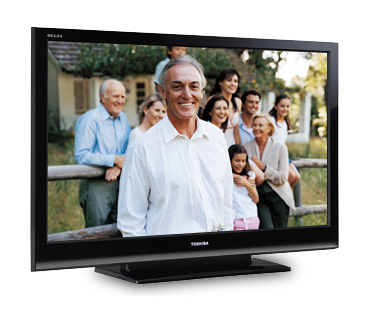
LCD HD TV FOR SLIDESHOWS
In the July issue of Shutterbug my answer in Digital Help to Rich Zahren’s question about HD format slide show authoring elicited a good number of suggestions from readers. One involved maybe the easiest, cheapest to implement and best ways to present a slideshow using a large LCD HD TV that are now so popular. Set up your LCD HD TV as a display for your computer:
“It's very easy to use your personal computer to present digital photo "slide shows" on HDTVs. Connect a 15-pin VGA cable from the computer's "monitor" connector to the HDTV's "PC Input". Make sure you've set the computer's Display Properties settings to match your TV's resolution (1920 x 1080 for full-HD 1080p sets; 1280 x 720 for 720p TVs). Most computers made in the last 10 years can be set to these resolution values, including some laptops. (If your TV lacks a "PC Input", buy a cheap computer video card with a DVI output connector, and use a DVI-to-HDMI cable to connect the computer to one of the TV's HDMI inputs.) Then run one of the many free photo-viewing programs on the computer (they're packaged free with most cameras, or can be downloaded on the Internet). The full-HD results can be spectacular--much better than trying to view the photos via a DVD player or a card reader connected directly to the TV.”—Vincent Andrunas, San Diego, California
My immediate response to Vincent’s suggestion was: Hey, I have a spare Mac Mini and a fairly new Toshiba Regza LCD HD TV, let me try this with an Apple Mac and see how it goes. First I ordered a DVI > HDMI cable from the Apple Store ($19.95 6 foot, $29.95 12 foot). While I was waiting for the delivery of the cable I made a selection of images for a slideshow from my digital photo archive files, opened each and resized the images (all landscape format orientation) to 1080 pixels in height, and left the width proportional, which was always less than the 1920 pixel width of the HD format resolution, and Saved As to a new “slideshow” folder.
When the DVI > HDMI cable arrived, it took just minutes to connect the HDMI end to my LCD TV and the DVI to the Mac Mini’s display output DVI socket. Then I have to admit referring to the TV user guide to find out how to set it up to display a digital computer input. With my Toshiba the Picture Size setting should be on “Native”, and I was encouraged to select the Standard Picture Mode, and of course to set the Input selector to the HDMI channel I had plugged into. So with the TV turned on and set as described, I turned the Mac on and eureka, I had a computer screen display image that looked entirely normal, but very much bigger than usual for me. The Apple Mini on booting up recognized the display and set itself in System Preferences to a display resolution of 1080x1920 pixels.
Before playing the slideshow I had created, I wanted to equalize the playing field further between the display performance I am used to with my computers and LCD displays and using my LCD HD TV as a computer display, so I used a ColorVision Spyder2 Pro to calibrate and profile the LCD HD TV. This process to calibrate and profile was done in the same manner as a computer LCD display and with the same basic aim points of 6500K color temperature and 2.2 gamma I use with my computers, but at the TV’s standard brightness (for the time being).

Now ready to try displaying the slide show image files I had saved to a folder,and transferred to the Mac Mini now running my TV, how would I show them? Some time ago I found in Apple System Preference/ScreenSaver you can select a folder of images and they will be displayed by Screen Saver at full screen, and the image will, if there are several files in the folder, change every few minutes from one file to another. This is an easy way to do a slide show without any programming whatsoever. And once turned on the Screen Saver slide show will run continuously, at least until you move your mouse and the screen saver turns off. The images fill the screen top to bottom and if not as wide as the full screen, the edges are left black. But the important thing is that the image quality in color, and contrast was comparable to viewing the images on any of my computer LCD displays. Although, if you view the slides from a vantage point closer to the screen than you would normally watch TV, they are not quite as sharp as they are displayed full-screen on a computer display because at 1080 by 1920 pixel resolution for a 40 inch LCD TV display compared to 1200x1600 pixels of a 20 inch computer display, the pixel size of the LCD TV is much larger. Bt of course at a normal TV viewing distance image sharpness looks comparable.
As I indicated when I calibrated and profiled the LCD TV I left it at its standard default brightness, which measured almost twice the white luminance CD/m2 value my computer displays are adjusted to. So why didn’t the images then look too light? At the greater normal TV viewing distance the light of the image shown has to travel further, and incident indoor illumination falls off in intensity at an inverse square of the distance from the source. In other words because as artificial light travels from its source its brightness is diminished by of the distance from source to where it is viewed, you need more light at the source (the LCD screen backlight), to obtain the same perceptual brightness/darkness at a greater viewing distance.
I don’t really know if Windows offers anything similar to the Screen Saver option the Apple OS does, so not to come off as an Mac snob, there is another option most digital photographers probably have whether PC Windows or a Mac that supports slide show presentation. It is an Adobe Acrobat utility that is in all the recent versions of Photoshop Elements, and is also in several Photoshop CS versions as PDF Presentations. With Photoshop running just go to File/ Automated Tools/PDF Slideshow in Elements 6.0. Then with a folder of image files (on your HD), whether resized for screen display as I did, or not, use the PDF window dialog to select the files, choose the kind of transition you prefer, as well as the number of seconds each image should be on-screen, click OK and select the filename and location where this new PDF slideshow should be stored, and in a short time its done. Then if you have Adobe Acrobat Reader installed on your computer, and most do, just double click on the PDF slideshow file you created and it will run full screen or in a window if desired. The screen image quality is as good as it gets.
If you have a comment, they are welcome, so please post it. If you have a question you want me to answer please address an e-mail to David B. Brooks at: goofotografx@gmail.com
- Log in or register to post comments


PHOTO OF THE DAY

Today’s photo is Tuscan sunset by Jeff Van Scoyk
eNEWSLETTER SIGNUP
![]()
Get the Latest Photo Tips, News & Reviews from Shutterbug!
| Camera Reviews Other Reviews | Mobile Reviews Photography Reviews Columns | News | Features | How-To | Resources |
 © 2024 Shutterbug
AVTech Media Americas Inc., USA
All rights reserved