| |
|
If you're using the Windows operating system, click
on the Start button, and then Settings, followed by Control
Panel. In the Control Panel window, from the Icons there,
double click on Display. The Display Properties window
will be on screen. Click on the Settings tab and then
near the bottom of the dialog, click on the Advanced button.
In the Plug-and-Play Monitor dialog that comes up next,
click on the Color Management Dialog. The information
in the dialog should indicate the Default monitor profile.
If a profile is named it should also appear below in the
Color Profiles currently associated with this device window
and be highlighted. If there is a profile named that is
the default and it does not seem to match the brand and
model of your monitor, click on the Add button, which
will open the Color folder with all of your .ICM monitor
profiles. If there is not a file name listed that includes
a description identification related to your monitor,
you can right mouse click on the file names and open the
Properties dialog and read the Profile description on
the second tab. If there is a Profile .ICM file which
matches your brand and model of monitor, click on it so
that it appears in Color profiles dialog, and with it
highlighted click on the Set As Default button. If there
is not a profile for your monitor, refer to your monitor's
documentation to determine what type it is (EBU, P22)
and then pick the generic monitor profile that best matches
it. If you do not have this information, and no profile
is selected at all, then select the Generic RGB Monitor
profile. |
|
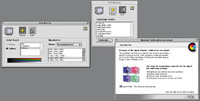
As I write this, it's
just after the holidays and I'm sure many are trying out their
first steps with a new computer, ink jet printer, scanner, or digital
camera. Thanks to Plug-N-Play, most will have these devices working
easily and be happy to get results. Many, sooner or later, will find
themselves not entirely satisfied, like so many who have written me
or posted messages in various photo forums, because the prints they
make do not match what they see on the screen. And many more would also
complain if they realized that the "out of the box experience" is not
producing the full potential available with their hardware and software.
Many of you just coming into
digital photography might assume that computer monitors, scanners, digital
cameras, and ink jet printers all communicate with each other in the
same color language. To a limited extent that is true, as all of these
devices respond to RGB data. However, like Americans, devices like monitors
and printers reproduce somewhat different dialects of color from the
same data, something we in the computer graphics world refer to as "device
independent" color.
How do we get all of the
devices--monitor, scanner, ink jet printer--to communicate exactly the
same colors? How do we get them to understand each other's device independent
dialect? The answers and solutions to this problem are called "Color
Management" or CMS for short. Most of the tools to manage color already
exist in your computer's operating system, in the image-editing software
(Photoshop) installed in your computer, and in the software drivers
also on your computer's hard drive. In addition there are calibration
and profiling hardware/software solutions you can add to your computer's
tools (utilities) that will increase the precision and control you have
to fine-tune your system.
To begin with, the PC's Microsoft
Windows Operating System (OS) contains ICM 2.0, and the Mac's OS has
Apple Colorsync. These (ICM 2.0 and Colorsync) are color management
facilities that include an engine (translator) and a folder of Profiles
(*.ICM files in Windows, and *.ICC files on the Mac), with each file
containing a data description of how specific devices read or produce
RGB color in comparison to an International color reference (IT-8) standard.
The first steps in tuning
your system to reproduce "What You See Is What You Get," or WYSIWYG,
are to locate the control for each device and then confirm that it is
using the correct profile for that device. In the case of your monitor
there is an additional and essential task. Because the monitor is the
central cornerstone of perceptual color adjustment and control using
an image-editing application, and it is the least stable device, it
is essential that the monitor's adjustments conform to a standard through
a process called calibration. It is important that a custom Profile
file be produced reflecting exactly how the monitor performs so your
computer and color management knows precisely what you are seeing.
|
| |
|
With the current Apple Mac OS, the monitor control is found
under the Apple menu by selecting Control Panel, and then
Monitors. The main VGA Display dialog provides the indication
of the Color Depth setting, which also includes the resolution
setting of the monitor. Then if you click on the Color Icon
button another window opens with a list of the Colorsync
Profiles available that may be selected. At the bottom of
this windows is a Calibrate button. This button opens the
Monitor Calibration Assistant. This is a step by step wizard
that supports calibrating your monitor by making selections
on the basis of perceptual comparison following the text
instructions on screen. By following the procedure as directed
you can adjust your monitor to a prescribed state, which
in turn calibrates your monitor and results in a custom
monitor profile. If, however, you are using Adobe Photoshop
full Version 5.0 or higher as your primary photographic
input and output application, it is recommended that you
calibrate and set up Color Management from within Photoshop.
|
|
Step 1: Monitor Calibration
& Profiling
Very often a computer system put together to be a digital darkroom may
have a monitor installed that is not of the same brand as the computer
or, if it is, the computer may come with a choice of several different
monitor models. Begin by going to your operating system control and check
if there is a profile associated with your monitor and that it is the
correct profile for the brand and model of your monitor.
Previous to Adobe's release
of Photoshop 5.0, most computer applications a photographer would use
as their working space would be the monitor space of the individual computer.
This had two disadvantages. The first was that the application could limit
the gamma of an image output to that of the monitor, which is usually
smaller than the gamut of an Ektachrome film scanner input, for example.
But more significant, because each monitor had a unique calibration, an
image file saved with one computer system might not open on another computer
with the same monitor appearance.
In addition, the output from
a printer would also vary. By using standard profiles as the working space
to which an opened RGB image is adjusted and referencing the system's
monitor profile, this problem is eliminated. You also have the option
to embed this working space profile. The image could then be opened with
any computer running Adobe Photoshop 5.0 or higher and it would appear
the same as it did on the machine that saved it, within that monitor's
capabilities. If the receiving system's Photoshop uses a different working
space, then on opening the image there is the option of converting to
the resident working space. In both instances, output to a printer could
provide an expected colormatch, if the printers are comparable.
|
| |
|
Adobe Photoshop full Version 5.0 and higher provides complete
support for both Windows and Mac OS color management, with
several additional capabilities. One of these is Adobe Gamma,
a monitor calibration utility. If you are doing digital
photo processing using Photoshop it should be employed.
In lieu of a hardware monitor calibration device and supporting
software, Adobe Gamma provides an easy to use Assistant,
a step by step visual comparison method of adjusting and
setting your monitor to a measured standard. It then generates
a custom profile providing an accurate reference for color
management. Adobe Gamma is also part of a full support system,
including the specification of the color temperature Kelvin
degree standard to which your monitor is set as well as
the Gamma. If you have a monitor that supports selection
of the color temperature from the monitor, it should be
set for photographic image processing to 6500 Kelvin. Then
click the "Same As Hardware" option from the White Point
selection dialog. The desired Gamma selection should be
2.2, which corresponds with the selection of the Adobe RGB
(1998) colorspace selection as Photoshop's working environment
for all output other than to the web. For the web choose
sRGB. |
|
With the Adobe release of the
free upgrade to Version 5.02, a Color Management Wizard was added in conjunction
with Adobe Gamma. This is accessible from the Help Menu by selecting Color
Management. With this Wizard, Photoshop can be set up by answering a few
simple questions, like which working space profile to use, and clicking
on the selection offered. Photoshop 5.5 has the same setup. In Version
6.0 Adobe has streamlined the process and done away with the Color Management
Wizard and made Adobe Gamma accessible from the operating system Control
Panel with both the Windows and Macintosh operating systems.
For PC Windows users, Adobe
Photoshop's full version, from 5.0 on, provides what many consider the
best image-editing tools and processes. It is still essential to implement
effective color management based on a calibrated and custom profiled monitor.
The other option, and the more preferable one in terms of accurate calibration,
is a hardware monitor sensor used with a calibration and profiling software
color management product. The only other popular image editor that has
an internal color management capability paralleling Photoshop is Corel's
recent versions of PHOTO-PAINT, which is also a component of CorelDRAW.
CorelDRAW 10, which was recently released for Windows, is also expected
to be available for the Macintosh platform in the spring of 2001.
Input Color Management (Scanners)
Scanners and digital cameras are the primary original sources of photographic
images for the individual computer user. Consumer and prosumer digital
cameras (at least those that I have worked with) do not have color management
profiles associated with them. Scanners, however, do. When the scanner
software is installed it provides a TWAIN or Photoshop plug-in driver
for the scanner. A manufacturer supplied profile for the scanner is filed
in the appropriate operating system folder.
On the Macintosh platform the
Apple menu Control Panel selection of the Colorsync dialog provides the
means for this. You click on Input to identify and select the profile
provided by the manufacturer. With more affordable, consumer scanner products,
the "canned" profile provided with the scanner is usually sufficient.
Many of the less expensive scanners' software do not permit the making
of a raw data scan, necessary to effective calibration and profiling.
Some higher-end scanner products include either built-in automatic calibration
or, in some instances, software support, as well as an IT-8 target so
a user can calibrate and profile the scanner.
|
| |
|
The Color Setting dialog for color management Profiles and
option selections are accessible from the File menu. One
straightforward dialog provides the user with the ability
to select the Working Space Profile(s) and options, the
selection of policies applied to opening image files, as
well as the choice of the CMM engine, the selection of intent
and whether to use Black Point Compensation and 8-bit dither.
|
|
Scanner drivers may also provide
access that allows you to define a color management setup. Less expensive
consumer scanners may not provide any support for color management, leaving
it entirely to the operating system to provide that function. Higher-end,
professionally oriented scanner product software drivers, however, may
support several different output options. These might include scanning
to file, on the fly CMYK conversion, high-bit raw scan output as well
as scanning to the workspace of the host image-editing application, like
Photoshop. Usually, such scanner drivers provide the ability to designate
an appropriate selection of profiles to associate with the choice of a
particular scanner output option. This can be found in their preference
settings. Generally I would assume most individual photographic users
would choose to scan to the workspace of the host application (Photoshop),
or scan high-bit raw data to file for archiving.
Color Management Control
For Printing
The use of an accurate scanner profile and calibrated monitor profile
ensure that the adjustments you make to a pre-scan will yield predictable
final scans in your image-editing application. If there are small variations
in color, however, nothing is lost other than a little time and effort
to "tweak" the image to perfection using your image-editing tools. However,
once the image has been adjusted to perceptual perfection in your image
editor, the accuracy of your monitor profile is in relation to the data
that is sent to your printer. A key element is interpreted by getting
a print that matches what you expect it to be. You will first of all want
to be assured that your printer's driver is referring to the correct profile
file(s) for your printer on the operating system level. On the Macintosh
platform this is accessed from the Apple menu and Control Panel. This
displays the Colorsync dialog window as shown.
|
| |
|
The Apple Macintosh OS 9 includes Colorsync Version 3.0,
which provides a Control Panel window accessible from the
Apple menu, has two window tabs. The first tab provides
an indication of what profiles are selected for Input, Display,
Output, and Proofer. When clicked on these allow the selection
of any of the profiles for functions available in the Colorsync
Profiles folder. The CMMs tab provides a similar function
indicating which CMM (engine) is in use and offers the option
of selecting Automatic or any CMM installed on the chosen
system. |
|
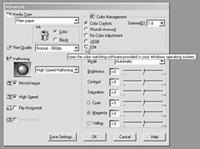
The final step in the process
is selecting Print from the file menu. This opens the printer driver control
dialog. What you will have in front of you varies considerably, depending
on the make and model of printer. It also varies somewhat depending on
the application from which you are printing. There are further differences
between the PC Windows version and the Apple Macintosh platform. For illustration
I obviously cannot cover all of these variables, so I will proceed with
the most popular consumer photo-realistic models, the Epson Stylus Photo
870/1270.
All of the instructions are
based on using both a PC and a Mac and setting up both systems from scratch
after an old CMS setup was removed. This was all done with the aid of
new hardware and software support from ColorVision. I used it to set up
custom profiles for four new fine art papers I recently received, including
Hahnemhule William Turner, Somerset Velvet, Crane Museo and ICI Olmec,
all supplied by www.digitalartsupplies.com. Three of the papers were custom
profiled for use with the Epson Stylus Photo 2000P quite successfully.
They produced beautiful test prints that closely match what I'd hope for
from the on-screen image displayed in Photoshop. The ICI Olmec luster
finish was profiled to print with the Epson Stylus Photo 1270 printer
with equally fine results.
The ColorVision Spyder And
RGB Profiler
ColorVision is a relatively new company formed out of the marriage of
several hardware and software companies established in the color management
field. Their newest product, the Monitor Spyder, offers an advanced and
sophisticated monitor color calibration tool with two different software
packages: PhotoCal, a moderate cost option for consumers, and the more
advanced OptiCal for professionals.
|
| |
 |
| Current
versions of Microsoft Windows provide a Scanners and Cameras
icon in the Control Panel. By double clicking on this icon
a Scanners and Cameras Properties dialog opens that lists
any scanners or cameras which have been installed in the
system. By highlighting any one of these devices and clicking
on the Properties button on the bottom right of the dialog,
a Properties window for the device opens. Click on the Color
Management tab and a dialog window appears with the profile
for your device highlighted. If the window is blank, click
on the Add button below, which opens the folder with your
.ICM profile files. Select the file which is associated
with your scanner, and click OK. |
|
I used the Monitor Spyder to
set up and configure color management as the basis for the accompanying
article using a PC Windows 2000 workstation and a Mac G4. The results,
based on the calibration and profiling of two high-end monitors, a Sony
GDM and a Mitsubishi Pro 900u, yielded the most effective color matching
I've experienced working with both Epson Stylus Photo 1270 and 2000P printers.
In addition to the Monitor
Spyder and the monitor calibration and profiling packages, ColorVision
also offers the product as part of an RGB Suite for photographic computer
users. This adds the Profiler RGB software, which provides the ability
to custom profile color printer output. In addition to gaining the advantage
of custom profiling both the monitor and output for the unique attributes
of an individual system, profiler RGB supports the critical use of media
other than what is offered by the printer manufacturer. Profiler RGB is
an easy-to-use Photoshop plug-in that quickly provides a finished printer/paper
custom profile for several fine art papers. It also has the capacity to
run a second or third profile from the same scanned image file of the
target image and to adjust image values like saturation, brightness, and
color balance to meet a specific user style. I found that I could also
produce an edited profile for a fine art paper that would allow printing
a gray scale image converted to RGB using all six ink colors, correcting
for any off-color shift in the tone that the blacks reproduced.
You can purchase the ColorVision
color management calibration and profiling solutions in a number of different
combinations. The Monitor Spyder with PhotoCal software starts with a
list of $224, and the Spyder with the OptiCal software is $399. The RGB
Suite prices begin with the Spyder, PhotoCal, and the RGB Profiler for
$365. The OptiCal monitor calibration and profiling software is $495.
ColorVision is now in the process of distributing their products through
local professional photography dealers, so you can look for it next time
you visit your pro camera store. Or, you can purchase direct through ColorVision's
web site at: www.colorcal.com.
|

LaserSoft SilverFast is a sophisticated independent
scanner driver that supports a large number of popular scanner
makes and models. SilverFast supports all of the output options,
including: scanning single images directly to the application
(Photoshop) workspace, scanning to file, high-bit raw data scans,
batch scanning, and on-the-fly CMYK conversion output. For each
of these output options an appropriate color management setup
scheme may be selected by clicking on the Option button at the
lower right of the main SilverFast control window. Then click
on the CMS tab. The selected Setup (shown here) is appropriate
to using a 35mm slide scanner to output scans directly to Photoshop's
workspace. At the top in the Color Management box the Scanner
€ Internal selection is Colorsync, based on the fact that the
scanner's profile has been selected as "Input" at the operating
system level. The Windows option would be ICM. Next, assuming
that the appropriate monitor profile is selected and that Adobe
Gamma uses and has the same monitor profile selected, the Internal
€ Monitor selection is Automatic. Then, because the final scan
will be immediately opened in Photoshop, the Internal € Output
selection is RGB. Consistent with the above, the Profiles for
Colorsync are: Scanner (the scanner profile is selected); Internal
(the profile for Photoshop's workspace); Output/Printer (grayed
and not functioning so, "none"); and the Rendering Intent is Perceptual
(because you are doing image editing by visual adjustment). Finally,
so Photoshop does not stop and ask on opening the file what the
source is, Embedded ICC Profile is clicked On, and the Internal
profile will appear as the Profile to embed. If you change your
output to batch scanning to file, you will need to alter the CMS
settings accordingly, and the SilverFast User Guide should be
referenced to learn the options to choose.

On the Macintosh platform the Epson print driver
window is accessed by clicking on the File menu item Print. Then,
in the Mode box, click on the Custom button, and then to the right
on the Advanced button. This opens a new window with the primary
paper, color and resolution settings on the left and Color Management
on the right. If you click on either Color Controls or PhotoEnhanced,
the print driver will refer to either the Photoshop workspace
profile or, if in another application, the monitor profile. It
will then adjust color output to what the Epson driver reads as
optimal from the data to produce the best print quality. These
options assume the file data being printed may or may not be optimized
for printing. If you have precisely color corrected your photographic
image and it appears on screen as you would like it to print,
then click on Colorsync and the driver will match the data from
the source profile to the printer profile. If you click on the
menu box to the right of Profile all of the print profile files
available in the Colorsync Profiles folder will be accessible.
You can then select from any of these, including Epson Standard,
plus any custom print profiles made for speciality fine arts papers.
|

With PC Windows OS, click on the Start button,
go to Settings and open Printers and click on the Icon for the
printer you are using. Then, use the right mouse button to open
the menu that allows you to select Properties. In the "printer"
dialog window there will be several tabs. Click on Color Management.
A profile file name should be highlighted in the box below "Color
Profile associated with this printer." If you are not sure this
is the correct profile based on the file name, click the Add€
button below, which opens the Color (*.ICM) file folder. From
the list of file names choose the one that clearly is associated
with your printer. Sometimes the file name provides little or
no clue, however. So you then need to click on each printer profile
.ICM file using your right mouse button to open the menu and select
Properties. This opens a three tab dialog window. Then look at
the Description tab page. The product associated with the profile
should be clearly named.

The procedure is quite similar with current
versions of MS Windows, although you have a few more screen windows
to go through to get to the Advanced window of the Epson driver
from within Photoshop 5.0 and 5.5. After you select Print from
the File menu, you get a Photoshop Print window. At the bottom
be sure the Printer Color Management is turned on. Then click
the third Setup button in the upper right corner. This opens a
second Photoshop window in which you select the print orientation:
Portrait or Landscape, and then click Properties. An Epson print
driver window opens with a Mode box with three radio buttons.
Click on the last, Custom, and then immediately below click on
Advanced. The Epson advanced window offers five Color Management
choices. Color Controls and PhotoEnhanced add Epson processing
to the translation of your image data from the workspace profile
(or monitor profile outside Photoshop) to an output profile that's
automatically selected on the basis of your paper and resolution
choices. The added sRGB selection is useful if you are using the
default sRGB workspace profile in Photoshop, or if you are printing
directly from a web browser. The selection of ICM provides an
unadjusted translation between the source profile of the image
to the printer profile. If you are using a custom profile you
have created to print on a fine art paper, for instance, then
before printing click on the Start button click on setting and
open the Printers dialog. Right click on your printer icon and
select Properties. That opens the Epson Printer Properties dialog;
select the Color Management tab. Then click on the Manual radio
button and click on the custom profile file name in the Color
profiles list. This assumes you have previously added it to the
list of associated profiles. Then when you print with the ICM
Mode clicked on, the profile you have selected will be the output
profile the print driver will use.
|
|