- REVIEWS
Camera Reviews 
More Reviews Mobile Reviews Photography Reviews - GALLERIES
- VIDEOS
- BUYER'S GUIDES
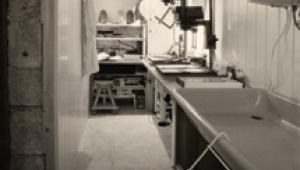
The Darkroom
Care And Feeding Of Enlargers Part I
Most enlargers look much the
same: a tall column, with the lamp and negative holder at the top, and
a baseboard at the bottom. But given that a cheap, used enlarger with
a good lens will, unless badly out of alignment, outperform a brand-new,
state of the art enlarger with a bad lens, why do some enlargers enjoy
near-legendary status, while others are scorned and despised? |
||||
Light Sources Getting Level |
||||
Even Light Try to make sure that the points you read are the same relative distance from the lens. There will be some falloff. The extreme corners may be 1/3 to 1/2 stop darker than the very center, directly under the lens. This is normal. But all corners should read the same. If they don't you will need to make some adjustments. |
||||
Check the simplest things
first. Make sure nothing is between the lens and the baseboard. With condenser
diffuser enlargers, make sure the bulb is centered and at the right height.
Make sure condensers are spotlessly clean. The mixing chamber in a diffuser
enlarger needs to be clean as well. When the illumination from my Meopta
Meograde head became uneven, a new mixing chamber solved the problem.
The Styrofoam material becomes gray and dirty after a few years, especially
if the enlarger sees heavy use. Get Sharp |
||||
nterchangeable Heads
Cold Cathode Mystique
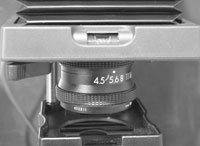
Use The Best Lens You
Can Afford |


- Log in or register to post comments


![]()
Get the Latest Photo Tips, News & Reviews from Shutterbug!
| Camera Reviews Other Reviews | Mobile Reviews Photography Reviews Columns | News | Features | How-To | Resources |
 © 2024 Shutterbug
AVTech Media Americas Inc., USA
All rights reserved