The specifications of the printers look very nice.It fulfills all the requirements that are essential and also provides new more improved features.
- REVIEWS
Camera Reviews 
More Reviews Mobile Reviews Photography Reviews - GALLERIES
- VIDEOS
- BUYER'S GUIDES
Canon PIXMA PRO-10: A 13x19” Pigment-Ink Printer
Canon’s 13x19”-sized printers, the PIXMA Pro9500 Mark II and PIXMA Pro9000 Mark II, have had a longer life than most, but have been replaced with two new models that are similar to the PIXMA PRO-1, introduced over a year ago. New features on both the pigment-ink PRO-10 and dye-ink PRO-100 include Wi-Fi and AirPrint compatibility, a new plug-in to make printing easier, and a refined inkset.

The PIXMA PRO-10 is a more compact version of the PRO-1. It’s still a large printer for the 13x19” output size, but thanks to Wi-Fi, you can set it up away from your normal work area if space is tight.
Courtesy of Canon U.S.A., Inc.
Courtesy of Canon U.S.A., Inc.
In this review, I’ll be looking at the PRO-10 pigment-ink printer.
Designed for the photo enthusiast, or those with less frequent printing needs than supplied by the more expensive and higher capacity PIXMA PRO-1 (reviewed in the March, 2012, issue; type PIXMA PRO-1 into the Search box on the Shutterbug homepage), the PIXMA PRO-10, at $699, uses the Lucia inkset found in the Pro9500 Mark II. There are some improvements, including the same Chroma Optimizer used in the PRO-1, and a reformulated yellow ink. Canon claims that the new inks have a wider gamut in the reds and yellows, and the Chroma Optimizer works to reduce the gloss differential (a.k.a. bronzing) seen with blacks when printed on glossy surfaces.
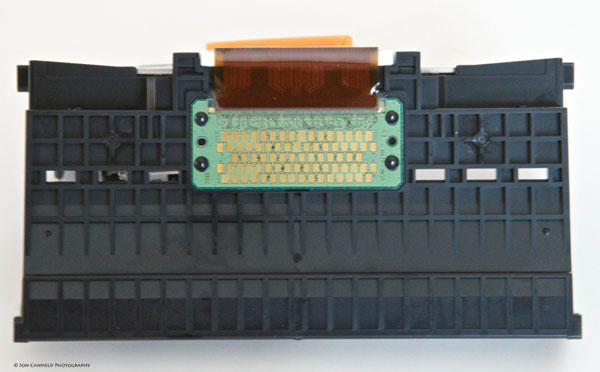
Canon uses a print head that can be replaced. One of the first steps to setting up is to install the head. It snaps into place, and the ink cartridges are installed into the head.
All Photos © Jon Canfield Photography
All Photos © Jon Canfield Photography
While the PRO-1 includes large 36ml cartridges designed for higher volumes of printing, the PRO-10 has the smaller sized cartridges (about 12ml) found in the older model printers. Inks run $15 per cartridge, and from my experience with the printer, plan on having extra ink on hand. About 1/4 of the ink included with the printer is used during the setup process, and if you do most of your printing on gloss or luster surfaces, you’ll go through the Chroma Optimizer fairly quickly.

The print cartridges are the smaller size used in the older model printers. At about $15 each, you’ll get good economy from them, but if you print on RC-type papers, have an extra Chroma Optimizer on hand.
Setting Up
Setup is straightforward, thankfully, as there isn’t really any in-depth documentation included with the printer. There is a quick start guide to help you set up via USB, Ethernet, or new to this model, Wi-Fi.
There’s a bit of assembly required—you’ll first install the print head, then install the 10 ink cartridges. They snap into place, and light up when properly installed. Powering up the printer begins the charging process, which takes about 10 minutes, and then printing an alignment sheet ends the process.
Size wise, the PRO-10 is smaller than the PRO-1, but still large for this type of printer—setting next to an Epson 3880, they are similar in physical size, although the Epson prints at 17x22”. At 43 lbs, you have a feeling of quality in the build. During use, the printer is very stable and extremely quiet—unless I was in the same room, I could not hear the printer at all during operation, and even in the same room the noise is barely heard.

The PRO-10 supports USB, Ethernet, and Wi-Fi connections. If you use an iOS device, like the iPad, AirPrint is also supported.

During setup you’ll choose the connection type. Be sure you’ve gone through the printer setup before installing the software.
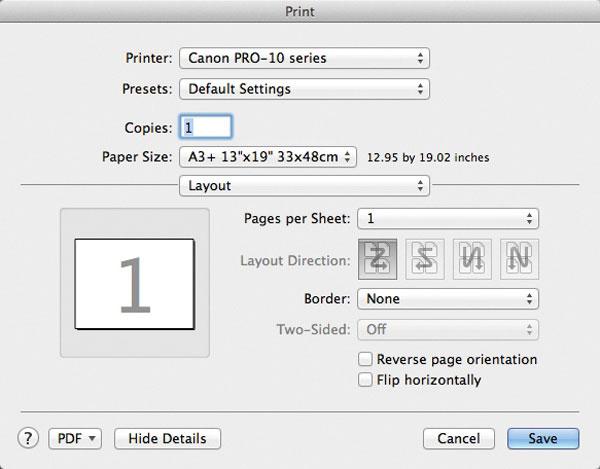
Paper sizes range from 4x6” to 13x19”. When using heavier fine art papers, you’ll want to be sure and select the manual feed option with Margin 35 settings. Borderless printing is supported for the rear feed path, and you can also print on CD/DVD media with the included tray.
The included CD has the drivers as well as Canon’s Print Studio Pro software, and plug-ins for Canon’s Digital Photo Pro (included with their EOS digital cameras), Photoshop, and Lightroom. While most people will never use the Print Studio Pro software, choosing instead to print from within Photoshop or Lightroom, the plug-in makes for a simple printing process. More on this in a bit.
I set the printer up using Wi-Fi.
My computer found the printer with no issues and added it to my list in minutes. I was also pleasantly surprised to see that the printer was immediately available to my iPad for printing from the Photos app.
Printing with the Pro-10
There are two paper feed paths to choose from—the rear path holds multiple sheets and is used for standard thickness media, and also supports borderless printing. The manual feed path is for heavyweight fine art papers. Borderless printing is not supported from this path, and in fact requires larger margins than typical for this type of printer. You can also print directly to CD/DVD with the included tray.
I’ve long had issues with the confusing profile names that Canon uses with their printers, and the PRO-10 is no exception. For example, the Pro Luster paper has two profiles—1/2 Photo Paper Pro Luster, and 3 Photo Paper Pro Luster. Nowhere could I find information on the differences between these two, and to be honest, I saw very little difference on test prints between them. Checking with Canon, I learned that the 1/2/3 designations relate to the print quality you have selected in the driver—1/2 would be for the high-quality setting, and 3 for standard quality.
If you decide to use the Print Studio Pro plug-in from Photoshop or Lightroom, you can ignore these issues completely—the software will select the correct profile based on your paper and quality settings. If you use third-party papers, like I do with Moab Lasal and Entrada, you’ll want to be sure to visit the vendors’ websites and download profiles for your paper selections. Pay close attention to the recommended paper types as well! While you’ll choose the profile for your paper, you still need to tell the printer what type of media is being used (fine art, gloss, matte, etc.) in order for it to lay down the correct amount of ink, and the proper blacks.
Print quality was uniformly very good. The PRO-10 includes the Optimum Image Generating System found in the PRO-1 to help calculate how much ink to apply and how to use the Chroma Optimizer. It’s a fancy term, and the technical details aren’t all that interesting, but the system works, and print quality on the same media and image is better with the PRO-10 than the previous Pro9500 Mark II.

The PIXMA PRO-10 supports a wide variety of media types, and has an option for black-and-white photo prints. The controls here aren’t as extensive as Epson’s Advanced Black and White mode, but they do allow you to fine-tune the tint and other settings.

With Black and White selected, the Color Options let you control toning, contrast, and intensity, or you can choose from a preset.

When printing color, you have the ability to adjust color balance in the driver. You’ll have better results using application-managed color and selecting the appropriate profile. When Photoshop or another program manages color, you won’t have access to these controls.

The Supply Levels panel lets you see at a glance what you have available in the printer. This screen shot was made with the initial set of inks after about 10 prints.
Speed is also improved over the Pro9500 Mark II. Canon claims a little over 5 minutes for an 11x14 print. The actual speed is going to depend on the quality settings used, but I found that high quality took about 10 minutes.
One of the great things about the Canon printers is the ability to print on matte or photo papers without having to do any ink switching.
Epson has improved here, no longer needing to swap cartridges, but you still have the wait time while it switches between photo and matte black inks. With the Canon, you can go from one to the other with no delay at all, making it easier to print as needed without planning for your print ordering.
I found that black-and-white prints were neutral in tone with none of the tinting I’ve experienced in earlier printers, and better depth in the blacks. While the Chroma Optimizer is a welcome addition for RC-type papers, I tend to print on fine art media more frequently, and the Canon did a very nice job here. As was seen with the PRO-1, a slight boost to contrast produced more pleasing results to get a true black. Color prints were vibrant and accurate on both the Canon Pro Luster and the Moab Lasal Exhibition Luster that I tested. I also had very good results with Harman Baryta, with deep clean blacks and virtually no bronzing to be seen.

Selecting application-managed color and choosing the correct paper profile will give you the most accurate results. Be sure to check third-party websites for profiles.

If you print from Photoshop or Lightroom, you can use the Print Studio Pro plug-in included with the PRO-10. This gives you a more streamlined printing interface and a number of advanced options not available in the standard driver.
Conclusion
Canon has obviously spent time evaluating the needs of the digital printmaker. The PRO-10 is a solid update to the Pro9500 Mark II it replaces, and surprisingly, they’ve managed to reduce the price at the same time. If you have lighter printing needs, the PRO-10 is an excellent option. Those with higher volume needs, and anyone who works mostly with black and white, will want to consider the PRO-1. However, that printer lacks Wi-Fi and AirPrint compatibility, so if those are important, the choice is clear.
For more information and specs, visit www.usa.canon.com.
- Log in or register to post comments

I wish buy one
Submitted by cusabio1 on June 20, 2013 - 7:11pm
While the PRO-1 includes large 36ml cartridges designed for higher volumes of printing, the PRO-10 has the smaller sized cartridges (about 12ml) found in the older model printers. Inks run $15 per cartridge, and from my experience igg elisa kitwith the printer, plan on having extra ink on hand. About 1/4 of the ink included with the printer is used during the setup process, and if you do most of your printing on gloss or luster surfaces, you’ll go through the Chroma Optimizer fairly quickly.

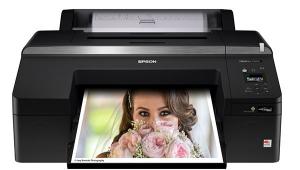


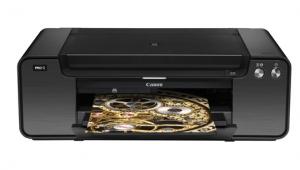
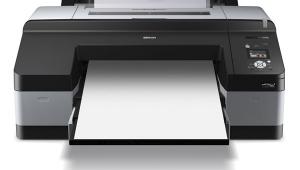


PHOTO OF THE DAY

Today’s photo is Tuscan sunset by Jeff Van Scoyk
eNEWSLETTER SIGNUP
![]()
Get the Latest Photo Tips, News & Reviews from Shutterbug!
| Camera Reviews Other Reviews | Mobile Reviews Photography Reviews Columns | News | Features | How-To | Resources |
 © 2024 Shutterbug
AVTech Media Americas Inc., USA
All rights reserved