- REVIEWS
Camera Reviews 
More Reviews Mobile Reviews Photography Reviews - GALLERIES
- VIDEOS
- BUYER'S GUIDES
Canon’s EOS Rebel XSi (EOS 450D); Lightweight And Easy 12.2Mp D-SLR Page 2
Format choices are JPEG in various sizes and compression ratios and raw. Mercifully the JPEG options have been reduced to six, including L, M, and S with two "stairstep" compression ratios for each. Canon's instruction book refers to these quality levels as "high," "medium," and "low," something lost in translation I assume as it would be odd for anyone to spend $800 for a low-quality image. Nevertheless, I still think that's too many choices for a camera aimed at this audience (or any audience for that matter) and could be greatly simplified by keeping it at three options and calling them web shots, small prints, and enlargements, reserving raw for those who want to engage in image processing themselves. And, while we're at it, I am unclear as to why Canon would make the raw+option a Large JPEG rather than Small, but that's my personal bias. Why waste space on a companion Large JPEG when I already have a raw file of the shot next to it? I just want a thumbnail for reference with the raw file, not another Large file.
The XSi kit comes with a very lightweight 18-55mm IS lens, a nice touch for the user and a fairly inexpensive way to get a pretty good lens. Of course the lens is max f/3.5 at shortest focal length and f/5.6 at the longest. It drops to f/4 max aperture at 24mm; f/4.5 at 35mm and then proceeds to f/5.6 at the longest. Keep in mind that this is an APS-C Canon sensor so the multiplication factor for those still referring to 35mm focal length lenses is 1.6x. If you do the math an equivalent focal length of 80mm at f/5.6 maximum aperture will need some help with a higher ISO or Image Stabilization in quite a few shooting scenarios. So IS in this class of lens has come to the rescue to keep lens prices down while adding quality value to the shooting experience, or at the least helping users get steadier pictures.
 |
 |
|
|
||
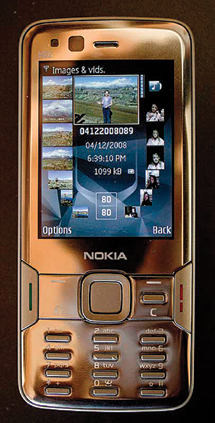
Live View, as regular readers might know, is not something I get too thrilled about, but I must admit it is an interesting and actually helpful way of working indoors when doing setups or still life images. I just don't see how it is helpful outdoors unless there is a revival of dark cloth usage or you mount a hood device over the LCD. While I was working with the XSi I was also doing a Nokia N82 camera phone review for our monthly newsletter (sign up at www.shutterbug.com) and found that Live View worked great for the indoor beauty shot of the device. It is very easy to set up; you go into the Menu and enable Live View, press the Set button on the camera back and Live View pops up on the LCD display. I worked with manual focus and played with WB and other settings for a preview of the effect. A note to black and white shooters: Set the camera to Monochrome and use Live View to preview the image in black and white as you shoot. Very cool for those who have trouble making the switch from seeing in color to previsualizing in black and white.
In the field the camera is one of the easiest to use, with the aforementioned control/display ergonomics (there, I used the "e" word). I played with Picture Styles; set up bracketing sequences for merging images; used exposure lock, exposure compensation, etc. all with ease. I worked mostly with the 18-55mm kit lens, though I also worked a bit with the other affordable IS lens that seems made for the Rebel buyer, the EF-S 55-250mm f/4-5.6 IS. This combo is made for the traveler who wants coverage for just about every subject and scene. I found the moderate wide to tele lens great to work with and coupled with the 12.2-megapixel sensor (about 35MB opened file) I got stunning 13x19" prints.
 |
 |
|
 |
||
|
||
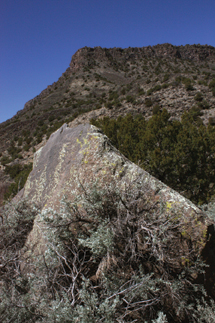
While I am not sure how much difference 2 megapixels make in the long run, I have no complaint with image quality from this camera at all. I did find that default settings did produce a slightly cold (blue) image, but do keep in mind that I was shooting the test at about 7400 ft in early spring, a UV playpen. But when played with in Photoshop (which, by the way, had this camera's raw file converter (ACR) ready as soon as I got the test camera out of the box) or when I used a Shady WB, the images came out fine. I was not totally enamored with the 55-250mm zoom when racked all the way out even with IS on, so if tempted keep it back a bit from max zoom when shooting at minimum aperture, but that's common sense with most such lenses anyway.
In all, I was very impressed with the Canon EOS Rebel XSi and would wholeheartedly recommend it to someone looking for a good camera and lens combo in that price range. I came to know its inner and outer workings very quickly, thanks to a very smart design and layout. Options for more creative shooting were there if desired, but for the most part working in Program and delving into the Picture Styles for fun (even though that's kind of moot when shooting raw) got me where I wanted to go. I even appreciated the depth of field preview and the ability to disengage focus and exposure lock from one another, a simple matter, you might think, but something that encourages the beginner, to whom this camera is aimed, to step into more creative realms. And while the Rebel has been a beginner brand for years, I know quite a few road warriors who swear by it as their favorite traveling companion. After working with it for a few weeks in New Mexico I can understand why.
For more information, contact Canon U.S.A., Inc., One Canon Plaza, Lake Success, NY 11042; (800) 652-2666; www.canonusa.com.
|
| |||||||||
- Log in or register to post comments


![]()
Get the Latest Photo Tips, News & Reviews from Shutterbug!
| Camera Reviews Other Reviews | Mobile Reviews Photography Reviews Columns | News | Features | How-To | Resources |
 © 2024 Shutterbug
AVTech Media Americas Inc., USA
All rights reserved