Alien Skin’s Blow Up 3: Resampling Made Easy
 There’s a considerable difference between resizing, which means maintaining the same pixel dimensions and adapting to different document sizes at the same print resolution, and resampling, which means building additional pixels from the original file to enable printing larger documents at the same resolution. Say you have a 24MB file, obtained from an 8 megapixel digicam, that will normally fill an 8.5x11” print at 300 dpi when printing. But you just got a 13x19” printer and want to try your luck at that size, still at 300dpi. Well, for that you would need a 62MB file.
That’s where a program like Alien Skin Software’s Blow Up 3 comes into play. ($199 or $99 if upgrading from previous Blow Up software, there is free trial on their website, www.alienskin.com.) Offering algorithms that allow you to construct enough “new” pixels (from approximately 2400x3600 to 3800x5700 in the above case) to make the grade while retaining the same resolution. The trick comes in making that upsample without causing “jaggies” on fine edges or introducing halos or artifacts along the way. If you have Photoshop you could use the Image Size dialog box to do this (using the Bicubic Smoother option suggested by the maker for enlargements). But if you don’t, or want to try another approach, Blow Up 3 works as a plug-in with Lightroom and Elements as well as Photoshop.
According to the lead developer, Terence Tay, Blow Up uses proprietary algorithm to resize images. First, it converts image pixels into vectors that follow the contours of the image. These vectors are enlarged and then converted back into pixels. The main benefit of this approach, he told us, is that it keeps edges crisp and clean. He recommended their introduction video (www.alienskin.com/blowup/video-intro.aspx) for a visual demonstration of how this is done.
Resampling and adding pixels is creating new image information out of what is already there, and not all assumptions the programs make or where they draw the information from to clone will be correct. There are inherent problems in the process—resampling may result in some degree of aliasing, jaggies at the edges—some blurring of fine detail and even edge halos, what you get when you over-sharpen or overdo HDR techniques.
Given the occasional compromise, and understanding that the physics of enlargement always entails enlargement of flaws as well such as poor lens quality, shaky shots. The need for resampling is a consistent one in digital imaging. It might be a bump in document size without dropping print resolution too low (although you’d be surprised how finer print heads these days can help you fudge a bit more on dpi settings than in the past). You might need to resample older images from smaller MP cameras, or you shot at the wrong JPEG image size setting on a newer camera, just to make a full-size print on your new 13x19 printer. (That’s why I chose to include “old” JPEGs from a 6MP camera in this test.) Or you may simply want to blow up an image way beyond the camera’s pay grade, like going up to a 24x36” from a 12MP camera.
Prior to the test results let’s go through Blow Up 3’s easy to use interface (#1). First off, this is a plug-in, which means that it relies on the processing engine of a main program, including Adobe Photoshop (CS4 or later), Lightroom (version 2 or later) or Elements (version 8 or later). When you load the program you make your choice and it immediately installs the program as a plug-in. When you want to work on an image you open it on the screen via one of those programs and then go to Filter>Blow Up 3 or Automate>Blow Up 3. This opens the image in the Blow Up workspace. I worked from TIFFs, JPEGs and 16-bit NEFs (Nikon Raw) and each opened quickly and easily.

All Photos © George Schaub
The workspace is fairly self-evident and there are easy-to-follow tutorials on the Alien Skin website. In essence, there are 3 “modes” you can work in: Crop and Resize, Resize and Stretch—yes, they use Resize as the term. In Crop and Resize you can fit an image onto a specific paper size and the program draws a crop frame corresponding to the aspect ratio of the paper, say an 8x10” crop that will necessarily cut into the image size. There are numerous choices including standard paper sizes up to 40x60”, square, panoramic etc. The crop is mandated in this mode but where it crops is not, as you can move the crop frame and even change from portrait to landscape orientation with ease.
Resize locks the aspect ratio of the original and allows you to output on larger paper sizes without cutting into the image, and that was my choice for most tests. Stretch actually does what it says and will distort the image to fit whatever paper size you choose. While it’s there to accommodate those who want it, it’s not really wise to use this option unless you have something odd in mind for your image, probably better done in another distort program.
There are also sliders for what the company calls “enlargement tuning”, which is mostly for sharpening and adding grain, the former being something to be used judiciously and only after you have tested with prints to see its practical limits and the latter a matter of taste. There’s also an interesting set of sharpening defaults for output on various paper surfaces. According to Tay, “The typical use of Blow Up is to resize a photo for print. Different types of paper (glossy, matte, luster) absorb ink differently and that causes a perfectly sharp photo to blur by different amounts when printed on paper. By telling Blow Up about the paper that you will be using, Blow Up will compensate for the print blur by sharpening the image. This may cause the image to look over-sharpened on the screen, but it will look good after you print it. The default setting is “low”. Users may increase it depend on what looks good with their images. Medium is about 2x as strong as low, and high is about 3x as strong.” You can also null these factors out as you see fit.
The bottom of the workspace allows for various viewing ratios (good when doing fairly large resampling ratios), has a hand Crop Tool to move around the crop area and offers a before/after view in various manifestations. And one more hidden tip before we get to work: next to the Help button (?) there’s an arrow that lets you set preferences for the program. The one I suggest that you always check is to dupe the image prior to resampling, thus keeping the edit non-destructive. Blow Up does not create a Layer when done but works on the original file. Yes, you can always do a Save As to get around this but not everyone remembers this in the heat of the action.
Test Results
Obviously we can’t show you a fully enlarged image in each case, trust that the detail shots will at least be an indication of what you can achieve.
6MP Camera: The first test was of a photo made with a “now-ancient” 6MP camera (2004 vintage) of a hat shop window in New York City (#2). I chose this old file because I feel that many folks with old image files from smaller MP cameras would be naturally attracted to a resampling option for printing. For this test I wanted to see how the image would look when resampled way up to 300dpi at 98MB (from 18MB) using Blow Up 3, making for a 250 percent leap and a potential 16x24” print. In each case I minimized the sharpening although it was not entirely turned off.

The original is bright and shows nice color richness, which has not been diminished by the resampling, (#3). When I viewed using Actual Pixels (#4) it is apparent that the larger sizing has its consequences and that some blurring and edge softness occurs. Looking at the original magnified shows that the lens used was not that good, but within its limitations the original image and its enlargement are not too bad. The main point is that the resampling did no further harm beyond what you would expect from magnifying a fairly poor image although it is certainly not a cure for it.


So, just how big can you make this type of image without totally losing quality? That will depend on the original file, and as usual it’s garbage in garbage out. But I must say that the Blow Up file when viewed and printed at the 98MB size was acceptable, given a respectable viewing distance, although for this file, and probably most from this camera and its ilk I’d limit it to a 150 percent upsample, to about 11x14” size. Can you go up to poster size? Sure, and there will be some fun uses for that, but as far as a quality image is concerned a 1.5 enlargement is my limit for this kind of shot.
Here’s another 6MP shot made in 2004 resampled up to 200 percent with Blow Up 3, showing that camera and the image itself calls the tune (#5). The detail shot from the upsample shows virtually no loss in sharpness from the original (#6). The lesson is to try out various enlargements and see, being critical of image quality as you do so, but don’t feel that any strictures apply to all the images in your files.

8MP D-SLR: This photo of an old building in New Mexico was made with a good but not pro 8MP D-SLR (circa 2008) using Adobe RGB and 16-bit Raw (#7). Just for fun I resampled it using Blow Up 3, Bicubic Interpolation in Photoshop and Perfect Resize. The original photo yielded approximately 10x15” 240ppi resolution. I resampled each to hit 300ppi at 172MB for an 18x28” print. I looked at both Print Size and Actual Pixel views, as well as printed out details from each. In my subjective assessment I would be happy with each one, although again this is often scene dependent and of course photographer dependent so its hard to generalize. I normally upsampled this image using Bicubic Interpolation (in Photoshop) to fit on 13x19” paper, but now would not hesitate to go to a larger size. In summary, all 3 did the job with this shot with very good sharpness, no jaggies and little if any blurring that affected the final print. Detail shots here show the Actual Pixel view from Photoshop (#8), Perfect Resize (#9) and Blow Up 3 (#10).


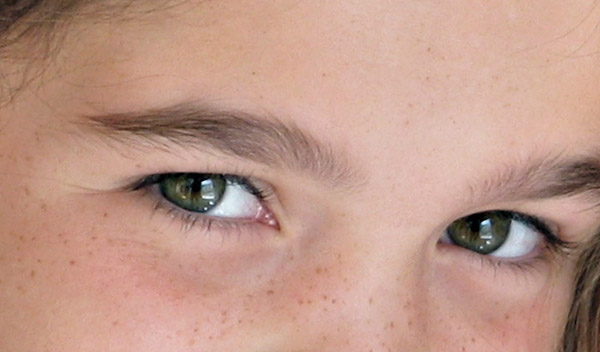
24MP D-SLR: My final test was on a 16-bit file shot with a pro camera and pro VR lens with a resultant 139MB out of the camera file (#11). The original is sharp as a tack and yields a 16x25” print at 240ppi. I decided to enlarge it 200 percent to yield a 33x50” print size using Blow Up 3. The results are great as seen in this detail of the large print (#12). When I looked at the Actual Print size image I was very impressed, as you can see from the crop here (#13). Even looking at Actual Pixels, which is a blemish revealer if ever there was one, there seems to be only a slight fuzzing at the edges, something you see in the original image when you super-magnify it. In other words, the Blow Up treatment did not harm and seemed to maintain, at that degree of enlargement, the characteristics of the original image.


This is as about as much as you can ask for in a resampling program, and it proves 2 things: that you get out what you put in, nothing more. With Blow Up 3 doing its work, not much is lost even at fairly substantial upsampled sizes. Second, if you want to play in the realm of the big, big print then you need to ensure that the image you work with is produced by a top lens and sensor on as steady a platform you can provide. Trying to make big prints from old images made with mediocre cameras and lenses won’t work, unless you are willing to only view the enlargements from way across the room. Another thing—in this test I did not upsample for huge images, like poster size from point and shoots, feeling that for most folks who read this practical sizes would be more apt.
The mantra of processing has always been non-destructive, meaning, do no harm in the process of what you do. From working with Blow Up 3, I feel like with the right gear and technique you could really stretch the limits in terms of image size to way beyond what we might have expected before. And while it can’t work miracles with noisy, fuzzy and shaky images, or those images made in digital’s distant past, you can create enlargements that exceed previous limitations. In all, it’s a useful tool to have in your plug-in folder.
Resampling Options
There are other software solutions for resampling. Genuine Fractals, now dubbed Perfect Resize by the maker (onOne Software, www.ononesoftware.com), is a patented scaling algorithm that “looks” for repeating patterns in an image, samples blocks of pixels of various sizes and patches them together to create a larger version of the original. Sampling and recreating blocks of pixels multiple times in this manner is said to preserve fine details like edges, smooth areas and textures. You can see our reviews of GF and notices about Perfect Resize by typing either name in our Search box at www.shutterbug.com.
Bicubic resampling, the Photoshop approach (www.adobe.com), considers the closest pixels as an area, generally in a 4x4 pattern, and interpolates or resamples from those to create more pixels and thus add pixels to the image. Photoshop’s offering has improved considerably in the last 2 manifestations of the program. And while Photoshop overall is a powerhouse, that doesn’t mean that every component is the best solution for every imaging task.
- Log in or register to post comments


